Dec 7
The web application ecosystem has improved leaps and bounds over the years, and its never been easier to make high performance static/hybrid sites quickly and using good development practices. And its just as easy to get these sites going using Cloud CMS as a datasource! Below you'll find a quick guide to get you started using Next.JS with Cloud CMS to setup a simple bookstore website, and some highlights from the code.
Getting Started
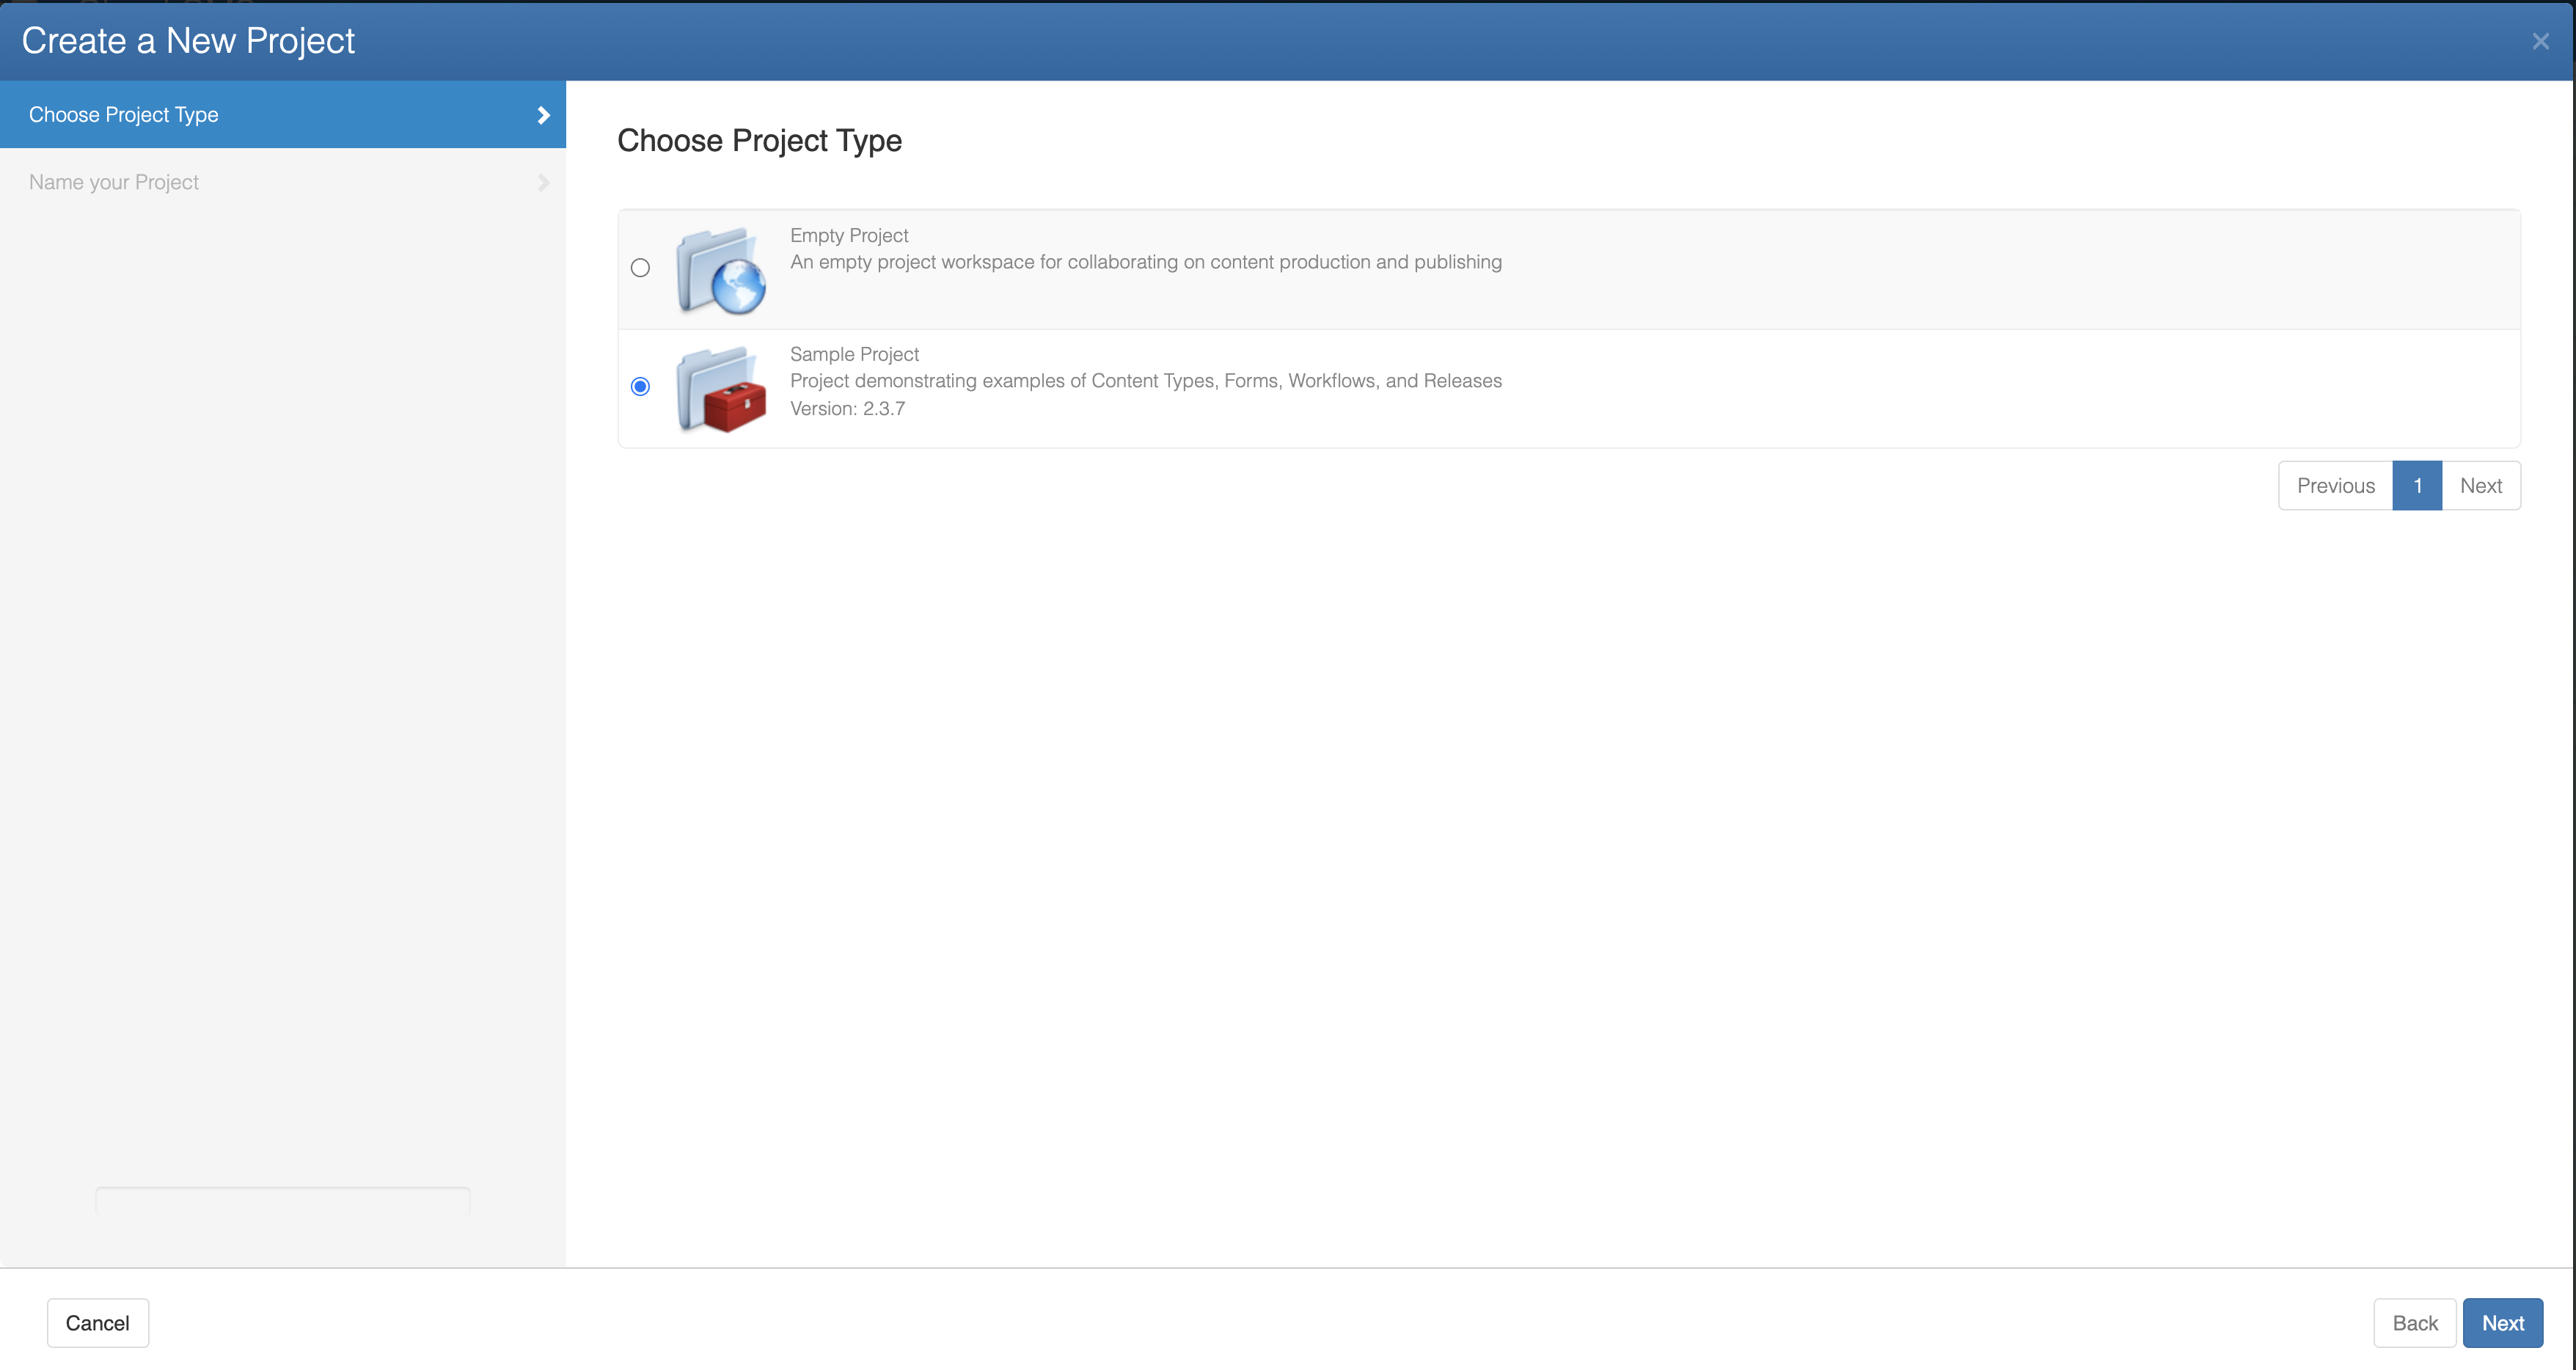
First, you'll need to have a Cloud CMS account and Sample project setup to use as your site's datasource. If you don't have an account, sign up for a trial! Then, navigate to your cloudcms platform by going to https://{subdomain}.cloudcms.net. When you get there, click create project, and in the popup menu select the sample project.
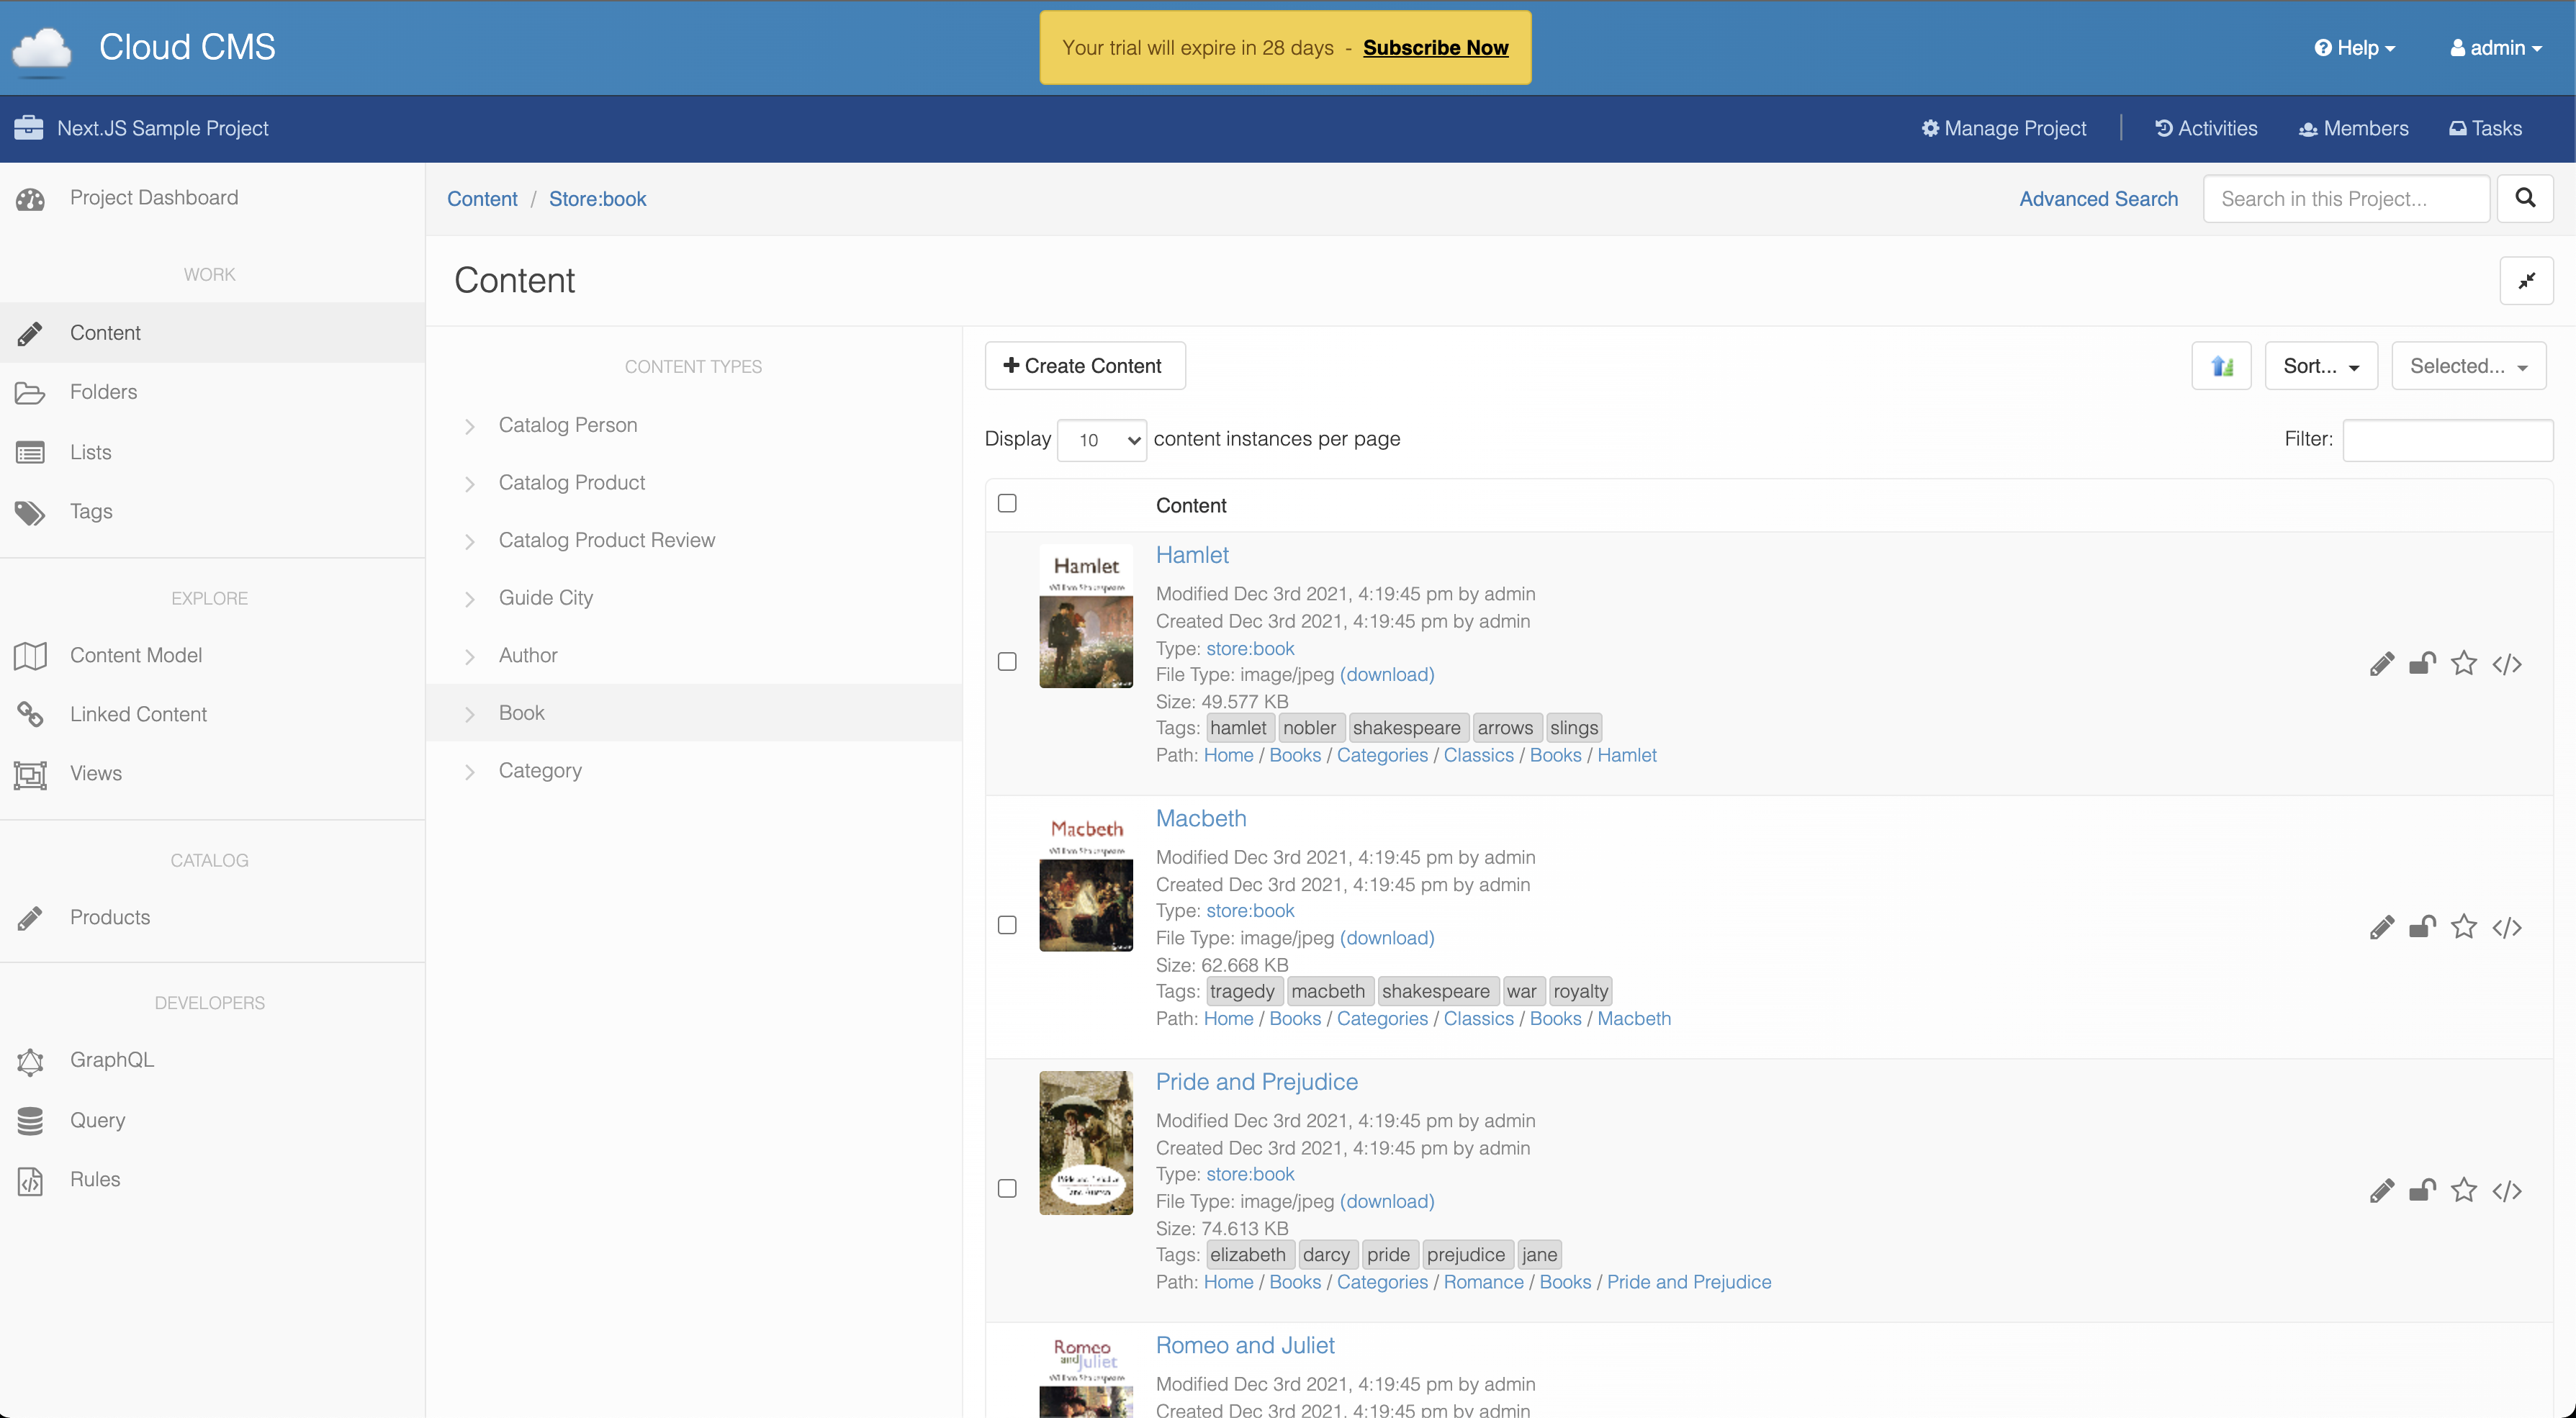
Once the project is created, feel free to click around to get a sense of the content model. The main types that we are interested in are store:book and store:author, which you can check out from the Content menu.
Credentials
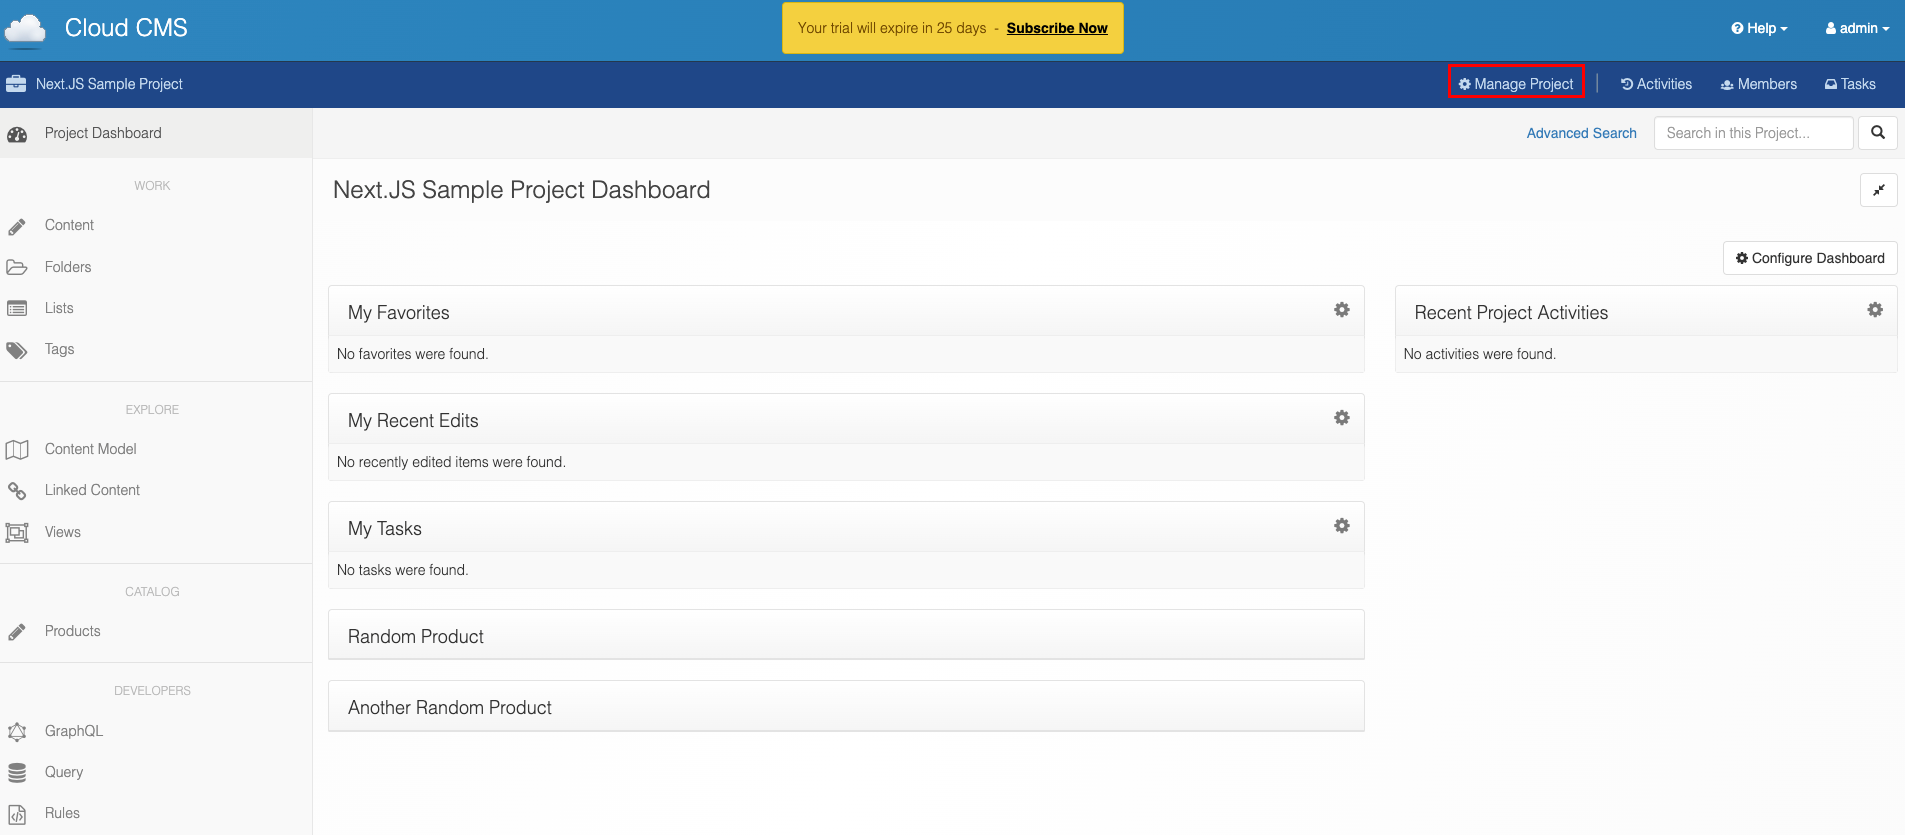
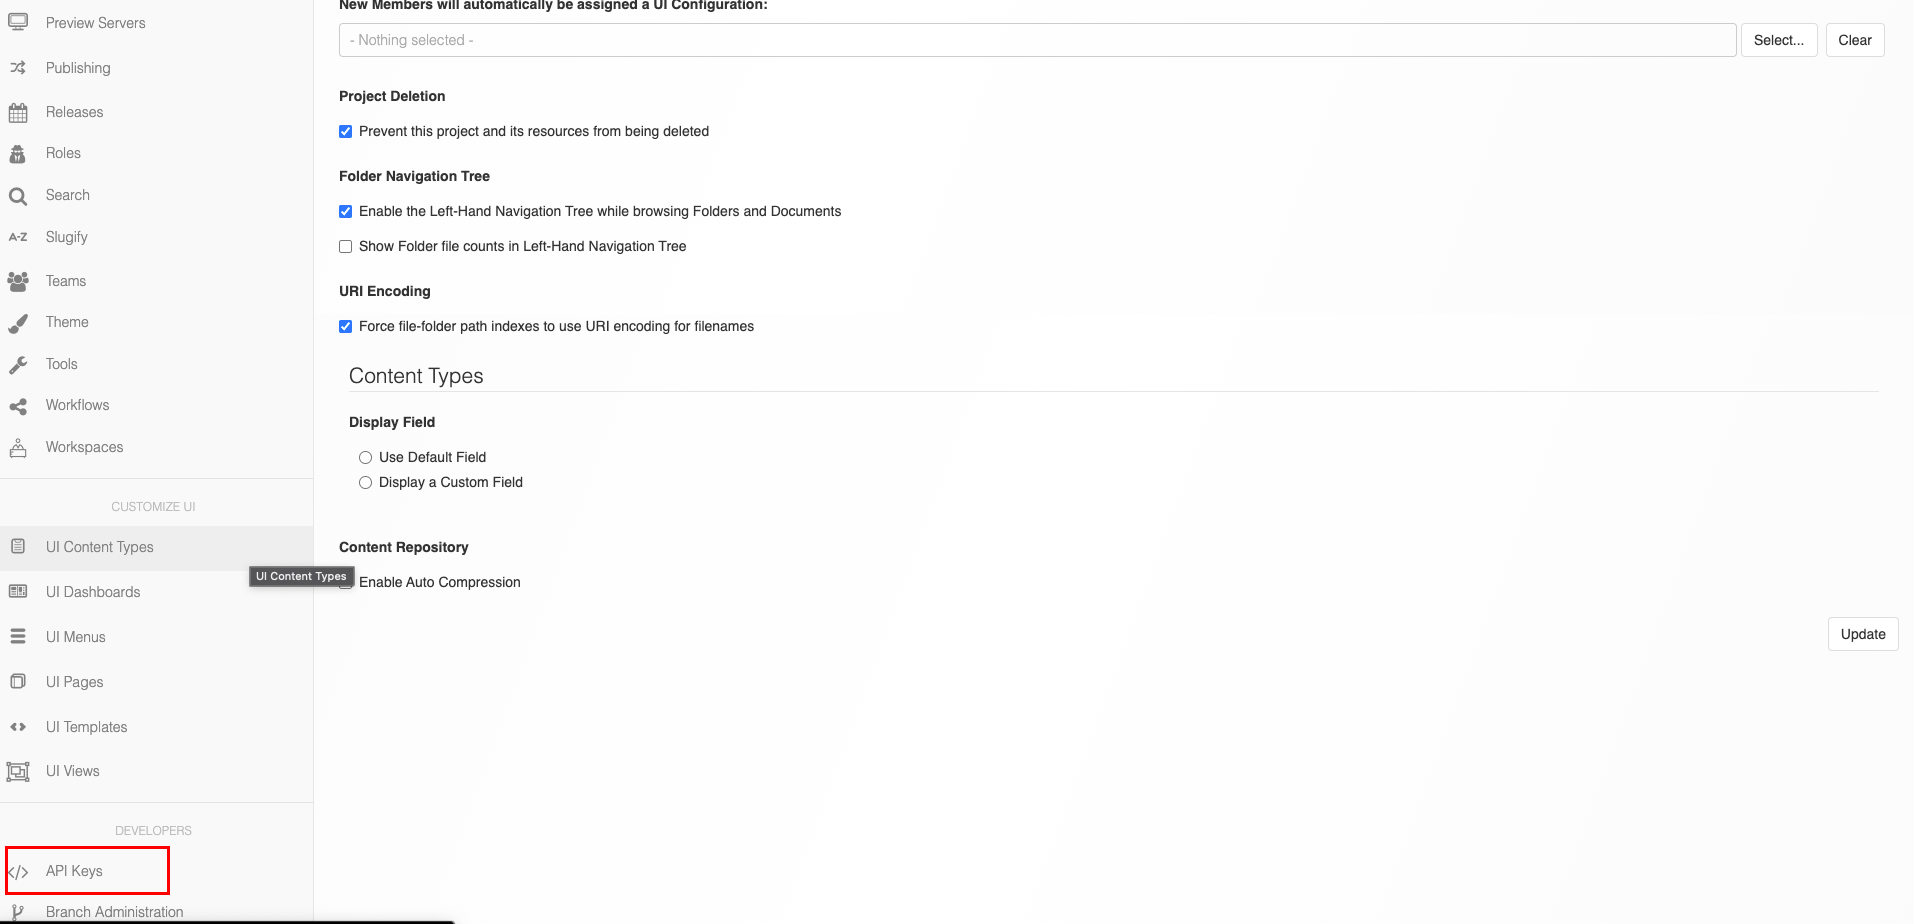
In order to connect Cloud CMS to an external application, we will need to get a set of API keys that this application can use to secure its communication. Click on Manage Project at the top of the screen, and then find API Keys from the left hand menu.
The sample project includes a default set of API keys that we can use here, click on gitana.json under Files on the right and copy the JSON that pops up.
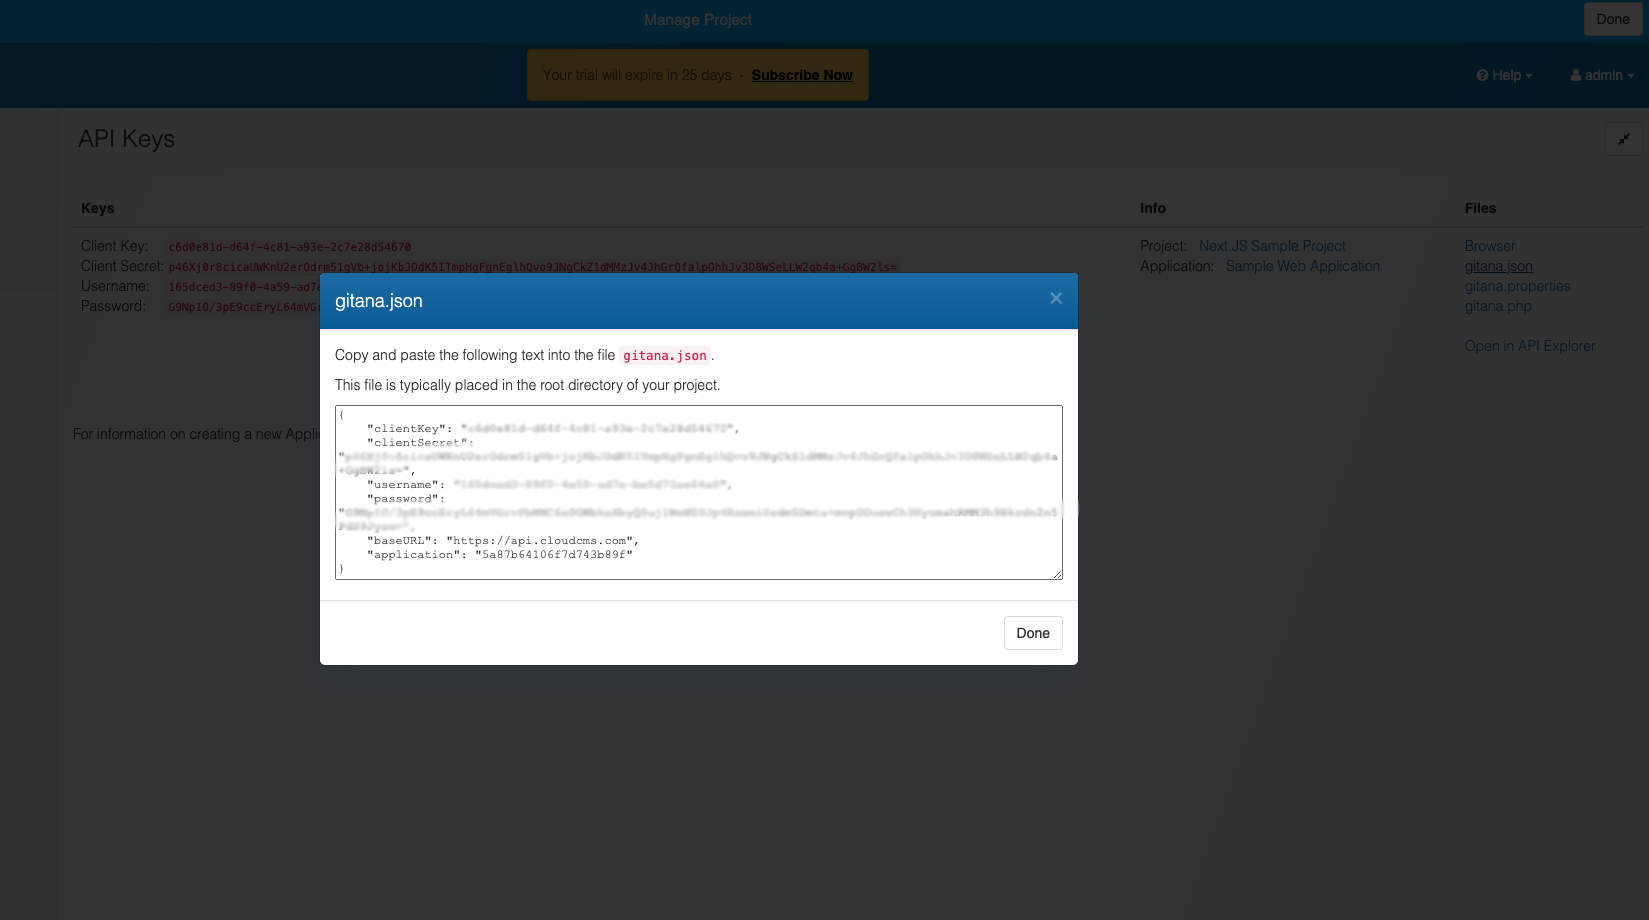
Copy this to your clipboard, we will need to paste this into a gitana.json file at the top level of our Next.js site's source code.
Pulling the SDK
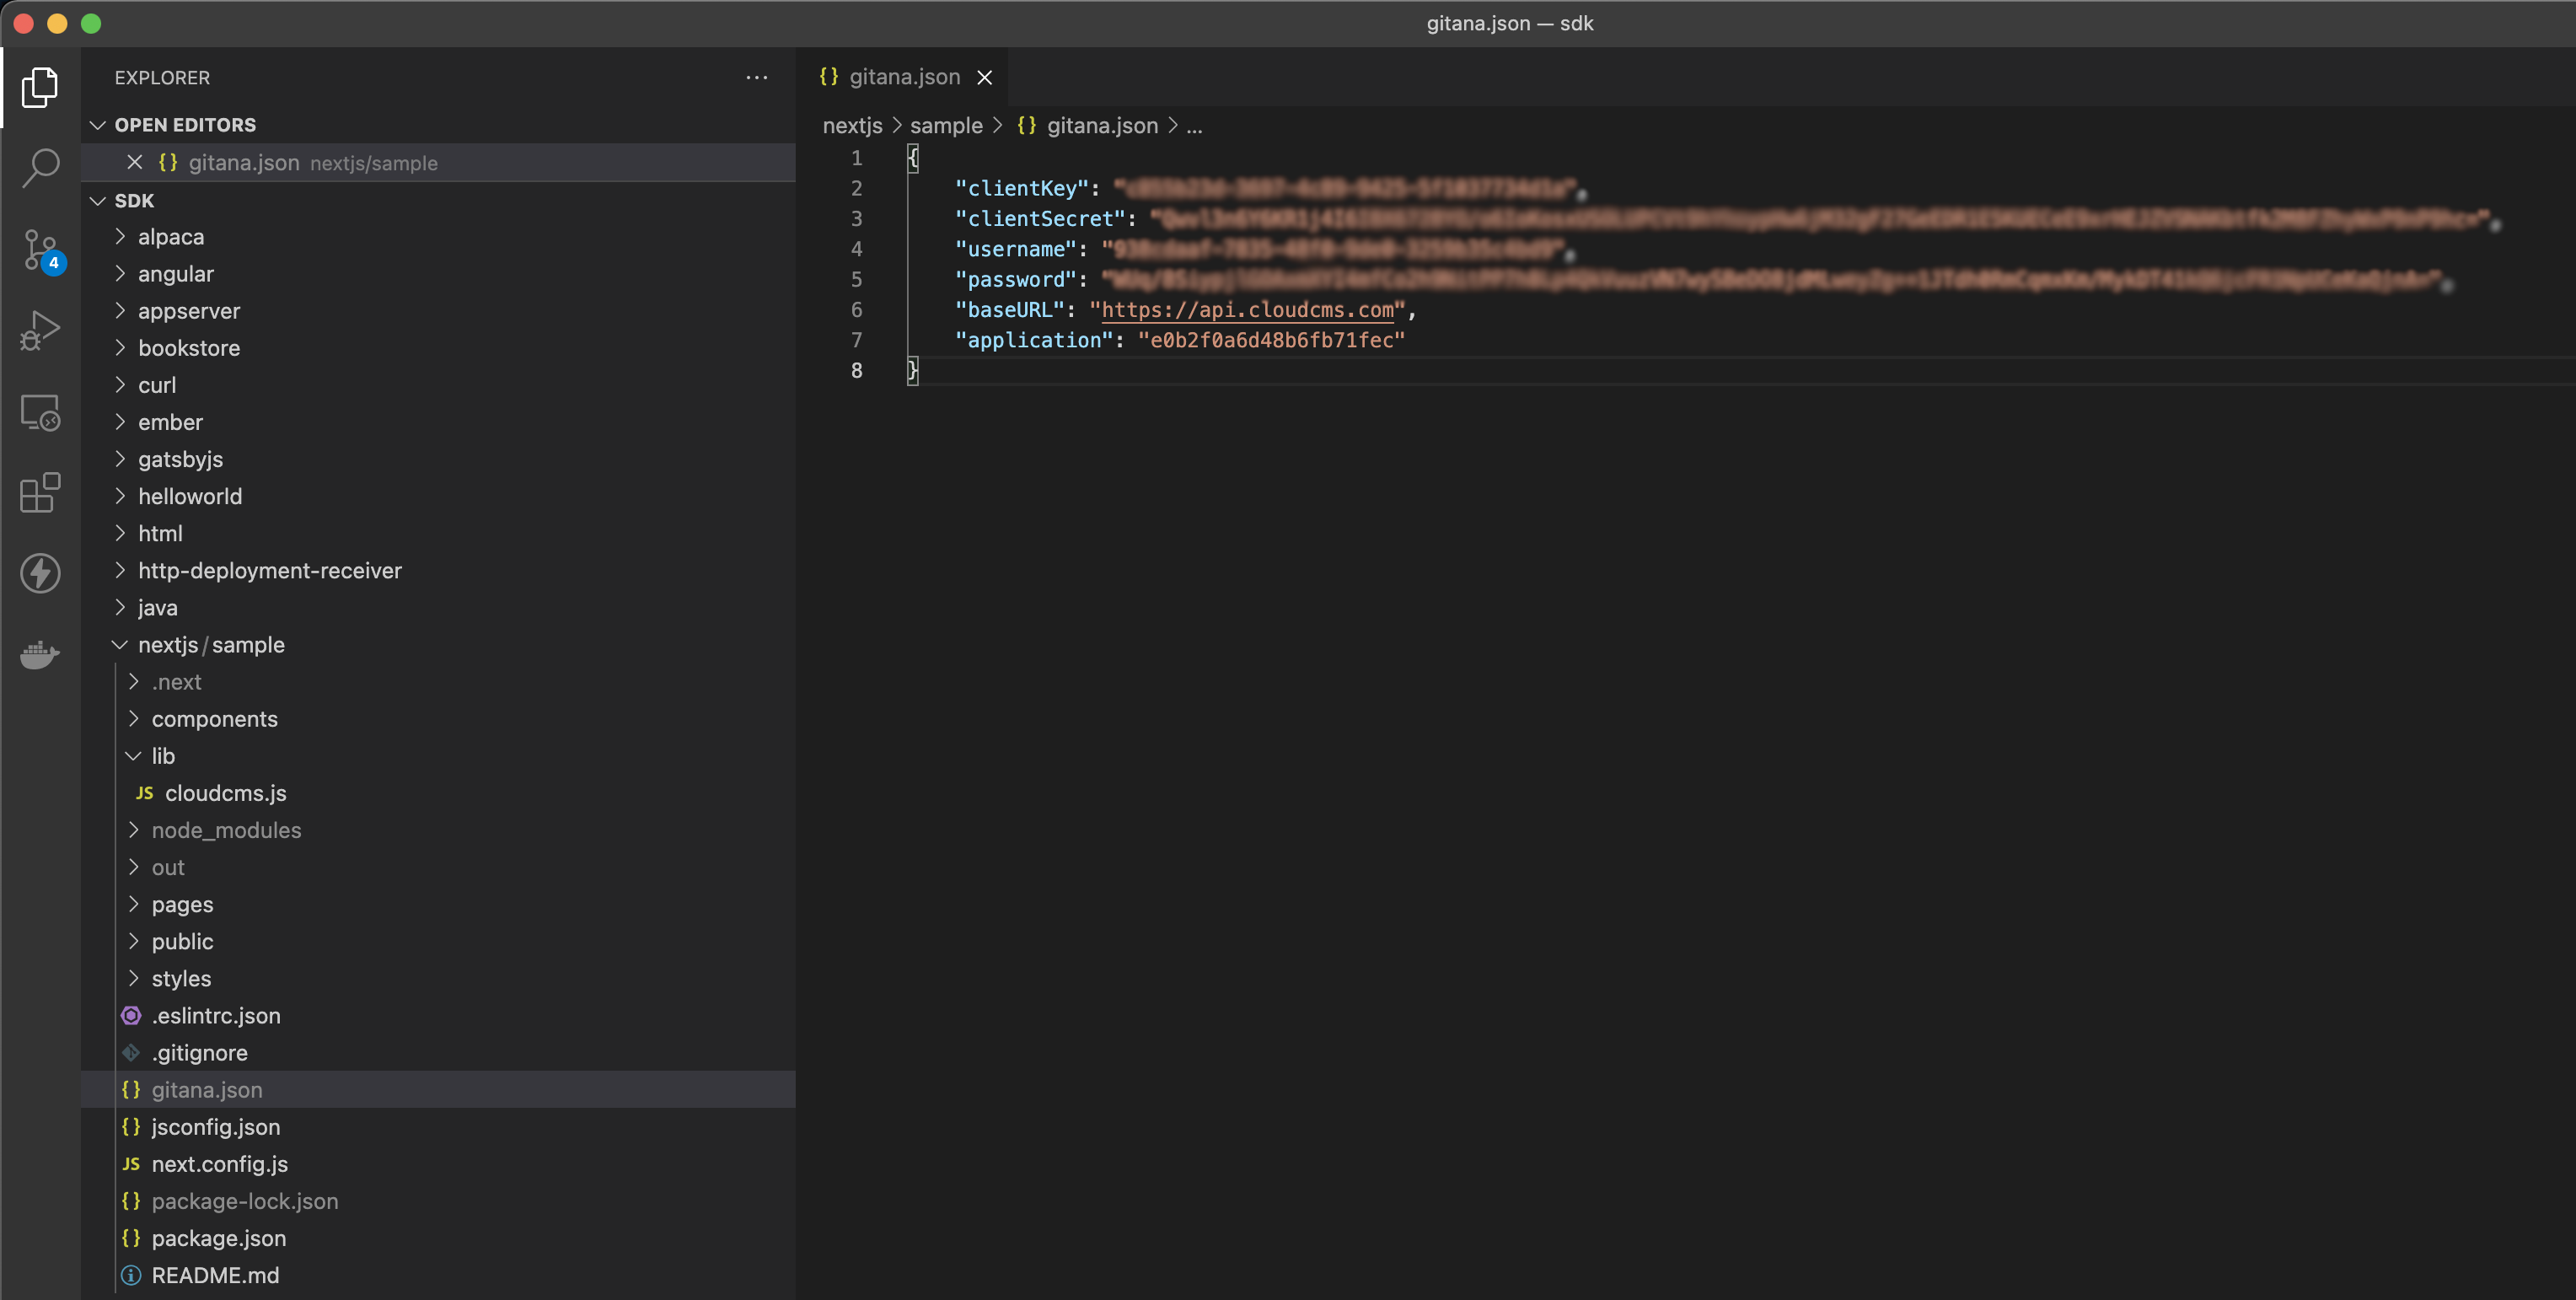
Now that we are setup with some content in Cloud CMS, we can start setting up the site where this content will live. We've already got this ready for you to check out as part of our SDK: clone this with your Git client of preference go to the nextjs/sample directory. Here, create a gitana.json file and paste in the credentials we copied from Cloud CMS
Ensure that you are using the latest Node.js LTS (at the time of writing, this is version 16.13.1). From here, install the dependencies by running npm install
Trying it Out
You are now ready to test the site! Run npm run dev to start the Next development server, and go to http://localhost:3000 to see the sample project on a page.
Since you are running this on a development server, any content changes you make in Cloud CMS will also change the content in your site, feel free to try it out!
You can also build an optimized static version of your site by running npm run build, which will download all content needed to a single directory. Note that this version will not update with any content changes until your next build.
Exploring the Code
The Next.JS sample project contains three main directories of interest:
lib - Contains cloudcms.js, which contains functions to connect and interface with cloudcms using some customizations to the Cloud CMS Javascript Driver. This file is a good starting point to copy into your own project when building out data queries.pages - Next.JS pages which contain React code as well as calls to getStaticProps which run queries to Cloud CMS serversidecomponents - React JS components used to display the content - these don't contain anything that interact with Cloud CMS directly and receive data from the pages they reside in
Custom Session
lib/cloudcms.js makes a number of modifications to the default Cloud CMS Javascript Driver functions by means of a custom session. It adds the following:
createAttachmentLink function which downloads or streams attachments from Cloud CMS into Next, and returns a URL which references it- Extensions to various node querying/read functions to allow default attachments to be available as
defaultAttachmentUrl
getCurrentBranch function which takes the Next JS context and returns the branch that is being viewed based on preconfigured defaults or a branch being previewed.
This session gets automatically used by the exported helper functions:
connect - returns a session object that can make any calls against your Cloud CMS tenant.getCurrentBranch returns a branch object, which binds functions from the session with information about the branch relevant to the current context.
Use these functions in your pages to quickly get connected to Cloud CMS and start requesting data.
Querying Data in Pages
Let's look at pages/index.js, the code for the home page of our site. In it we use getStaticProps to fetch the first four books and authors:
import { getCurrentBranch } from '../lib/cloudcms';
// ...

export async function getStaticProps(context)
{
    const branch = await getCurrentBranch(context);
    let books = (await branch.queryNodes({ _type: "store:book" }, { limit: 4 })).rows;
    let authors = (await branch.queryNodes({ _type: "store:author" }, { limit: 4 })).rows;

    return {
        props: {
            books: books,
            authors: authors
        }
    }
}
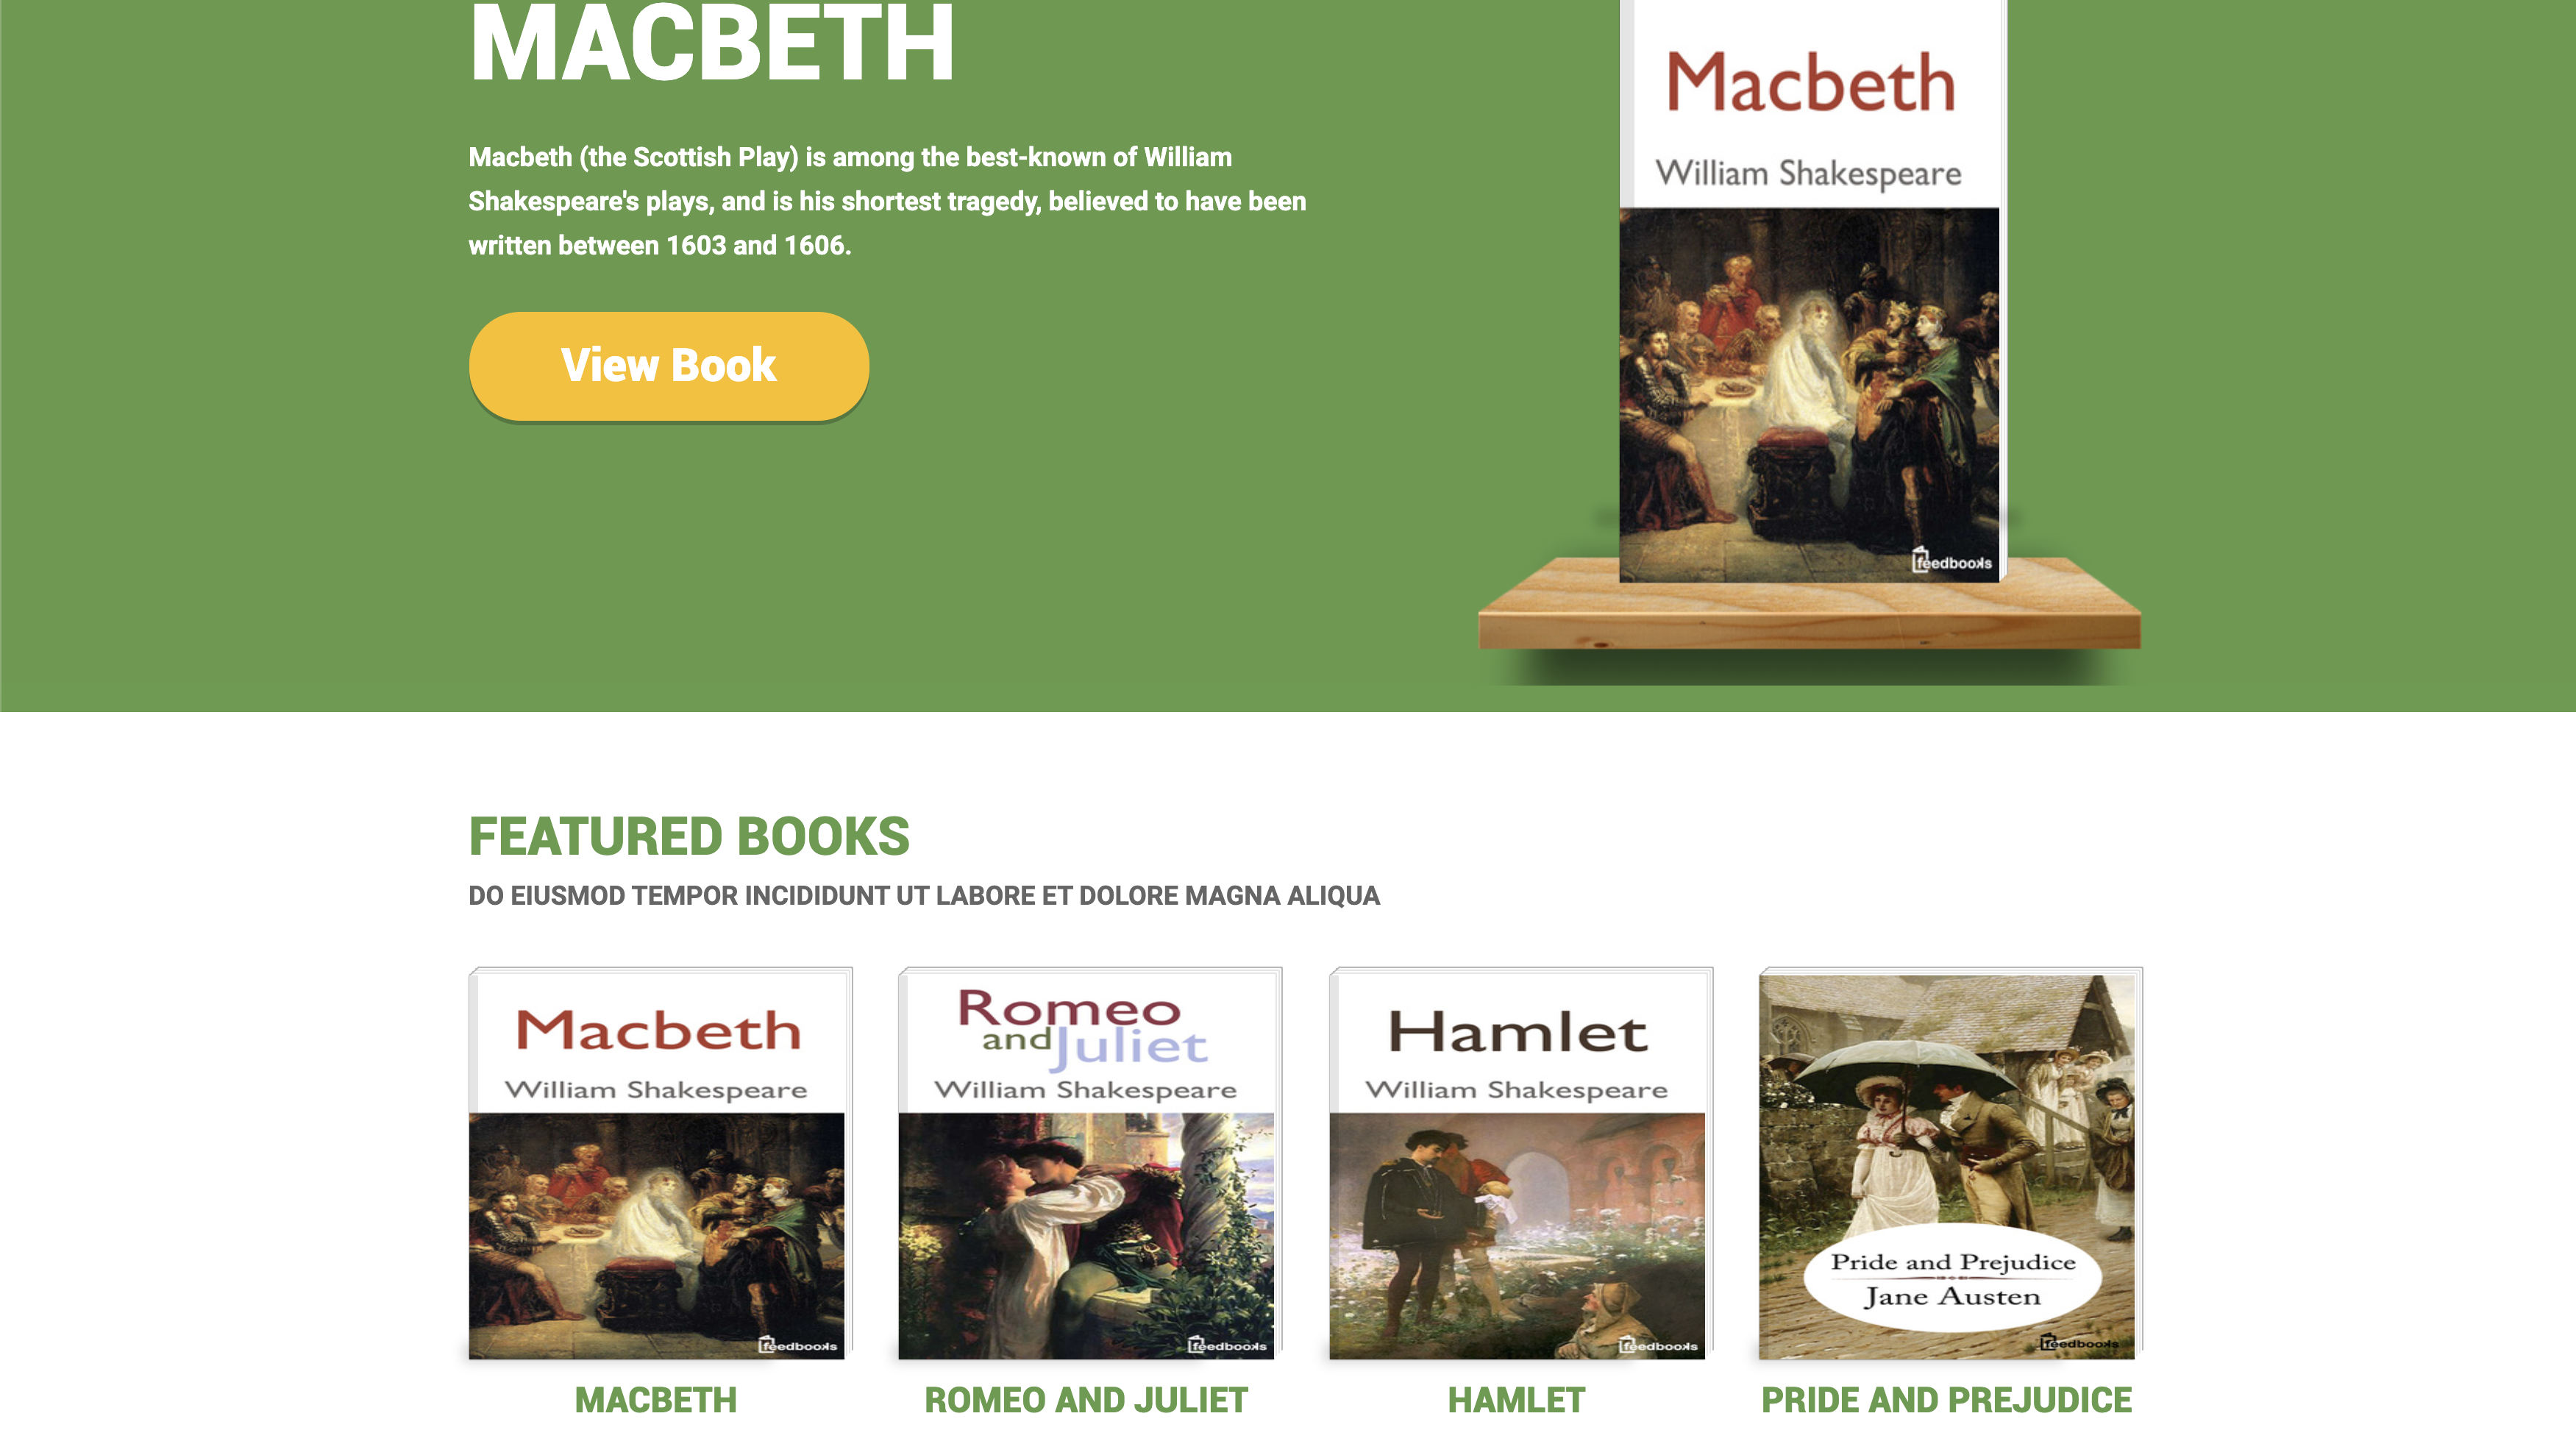
A resulting book, for example, will look like:
{
    _doc: '4e6ab409f6c50f2ef9f8',
    _features: {
      'f:audit': {},
      'f:titled': {},
      'f:filename': [Object],
      'f:geolocation': {},
      'f:indexable': {},
      'f:taggable': [Object],
      'f:deployment-config': [Object],
      'f:knowledge-recipient': [Object],
      'f:related': {}
    },
    _qname: 'o:4e6ab409f6c50f2ef9f8',
    _type: 'store:book',
    author: {
      id: '02369a026d5b5d69b36c',
      ref: 'node://92290c964a6ed8a0d29f/4ba62478c5658b735e0c/f5a325600af0468c021b/02369a026d5b5d69b36c',
      qname: 'o:02369a026d5b5d69b36c',
      typeQName: 'store:author',
      title: 'William Shakespeare'
    },
    description: "Macbeth (the Scottish Play) is among the best-known of William Shakespeare's plays, and is his shortest tragedy, believed to have been written between 1603 and 1606.",
    recommendations: [ [Object], [Object] ],
    slug: 'macbeth',
    summary: "Macbeth is among the best-known of William Shakespeare's plays, and is his shortest tragedy, believed to have been written between 1603 and 1606. It is frequently performed at both amateur and professional levels, and has been adapted for opera, film, books, stage and screen. Often regarded as archetypal, the play tells of the dangers of the lust for power and the betrayal of friends. For the plot Shakespeare drew loosely on the historical account of King Macbeth of Scotland by Raphael Holinshed and that by the Scottish philosopher Hector Boece. There are many superstitions centred on the belief the play is somehow 'cursed', and many actors will not mention the name of the play aloud, referring to it instead as 'The Scottish play'.",
    tags: [ 'tragedy', 'macbeth', 'shakespeare', 'war', 'royalty' ],
    title: 'Macbeth',
    _is_association: false,
    defaultAttachmentUrl: '/_next/static/cloudcms/4ba62478c5658b735e0c/f5a325600af0468c021b/4e6ab409f6c50f2ef9f8/default.jpeg'
}
This will be made available as a property in the page that can be passed to components.
The call to getCurrentBranch will give you the master branch of your project by default, and this will allow you to query, search, and read nodes, and even make updates to your content if needed. Feel free to take a look at some of the other pages to see other example reads and queries.
Previewing
One of the cool aspects of Cloud CMS is its branch based versioning system - which allows you to work on different versions of the same content, and the Next.JS sample allows you to preview different branch versions in context, without any deploying!
In pages/api/preview.js, the endpoint /api/preview is defined which takes query parameters url, branch, and repository. The endpoint redirects to url after setting branch and repository (both are optional) as preview variables and will turn on preview mode. When in preview mode, the preview variables for branch and repository will be used with priority over the defaults configured for your application.
For example, this link will preview the homepage (route /) for content on branch myBranchId:
http://localhost:3000/api/preview?branch=myBranchId&url=/
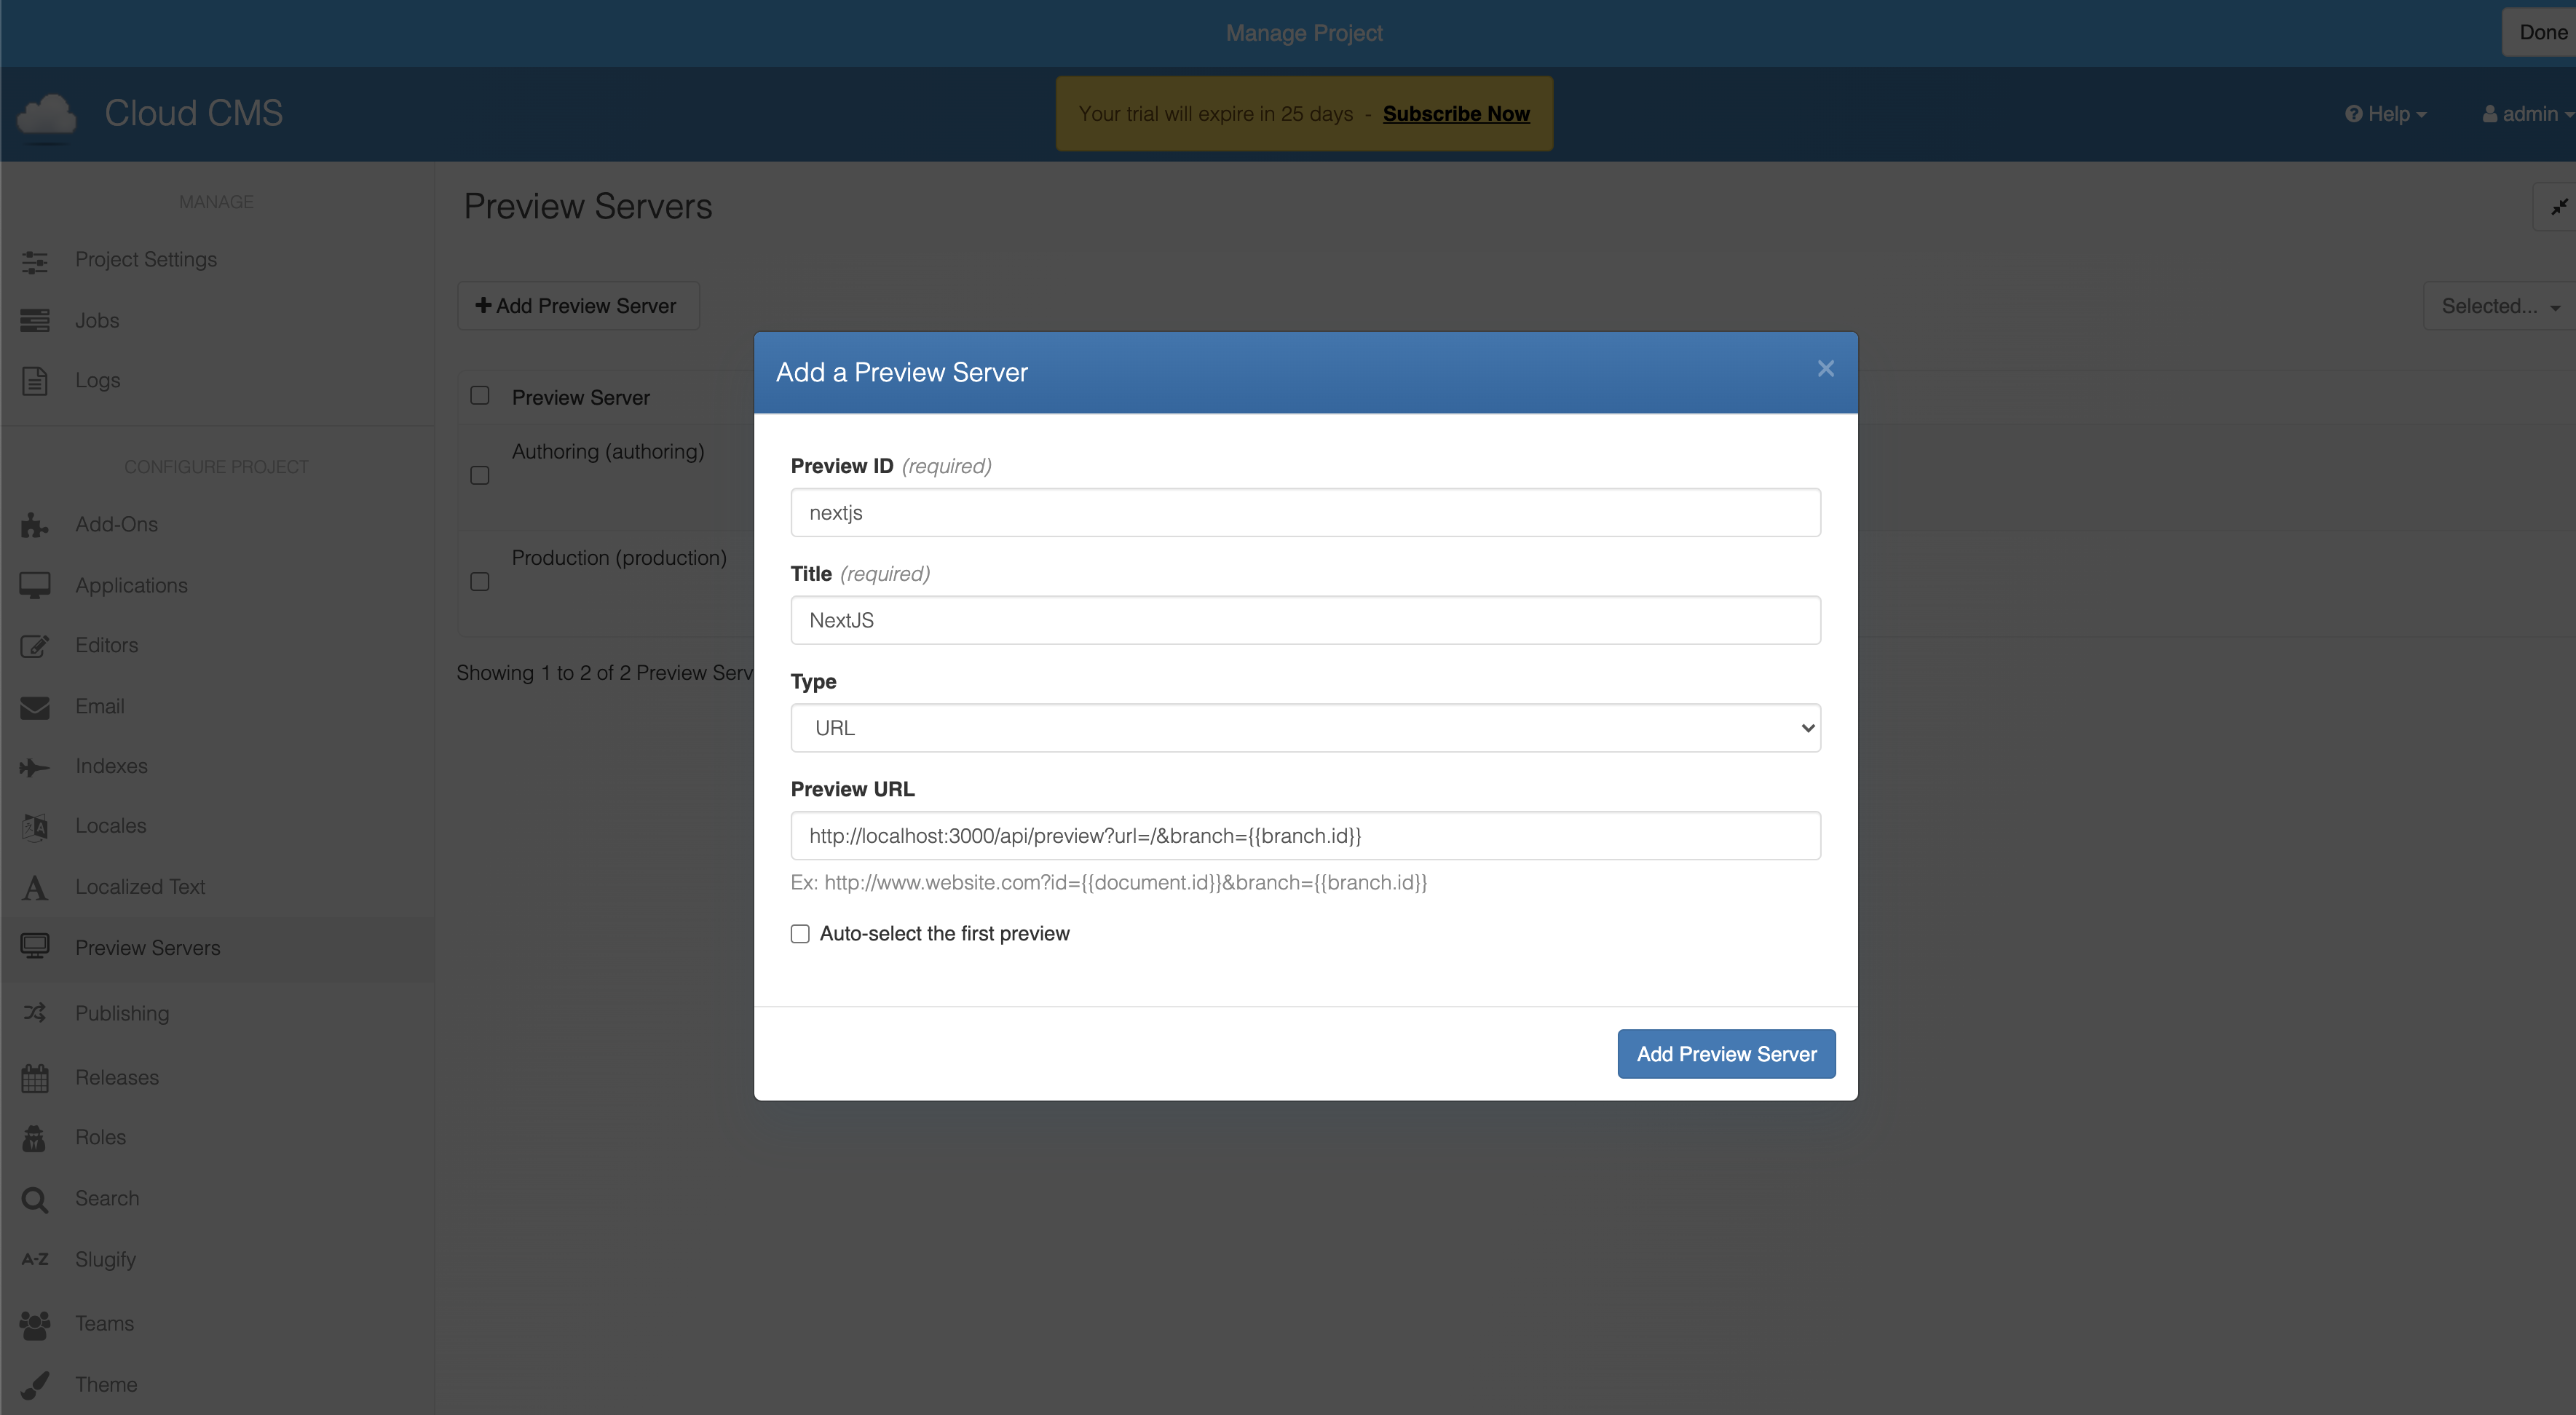
We can set Cloud CMS to provide preview links that automatically inject these variables into the paramters base on what branch a user is editing in. To do so, we need to configure a preview server. Go to Manage Project -> Preview Servers, and select Add Preview Server. From here, provide and ID and title, set the type to URL, and provide the following URL:
http://localhost:3000/api/preview?branch={{branch.id}}&url=/
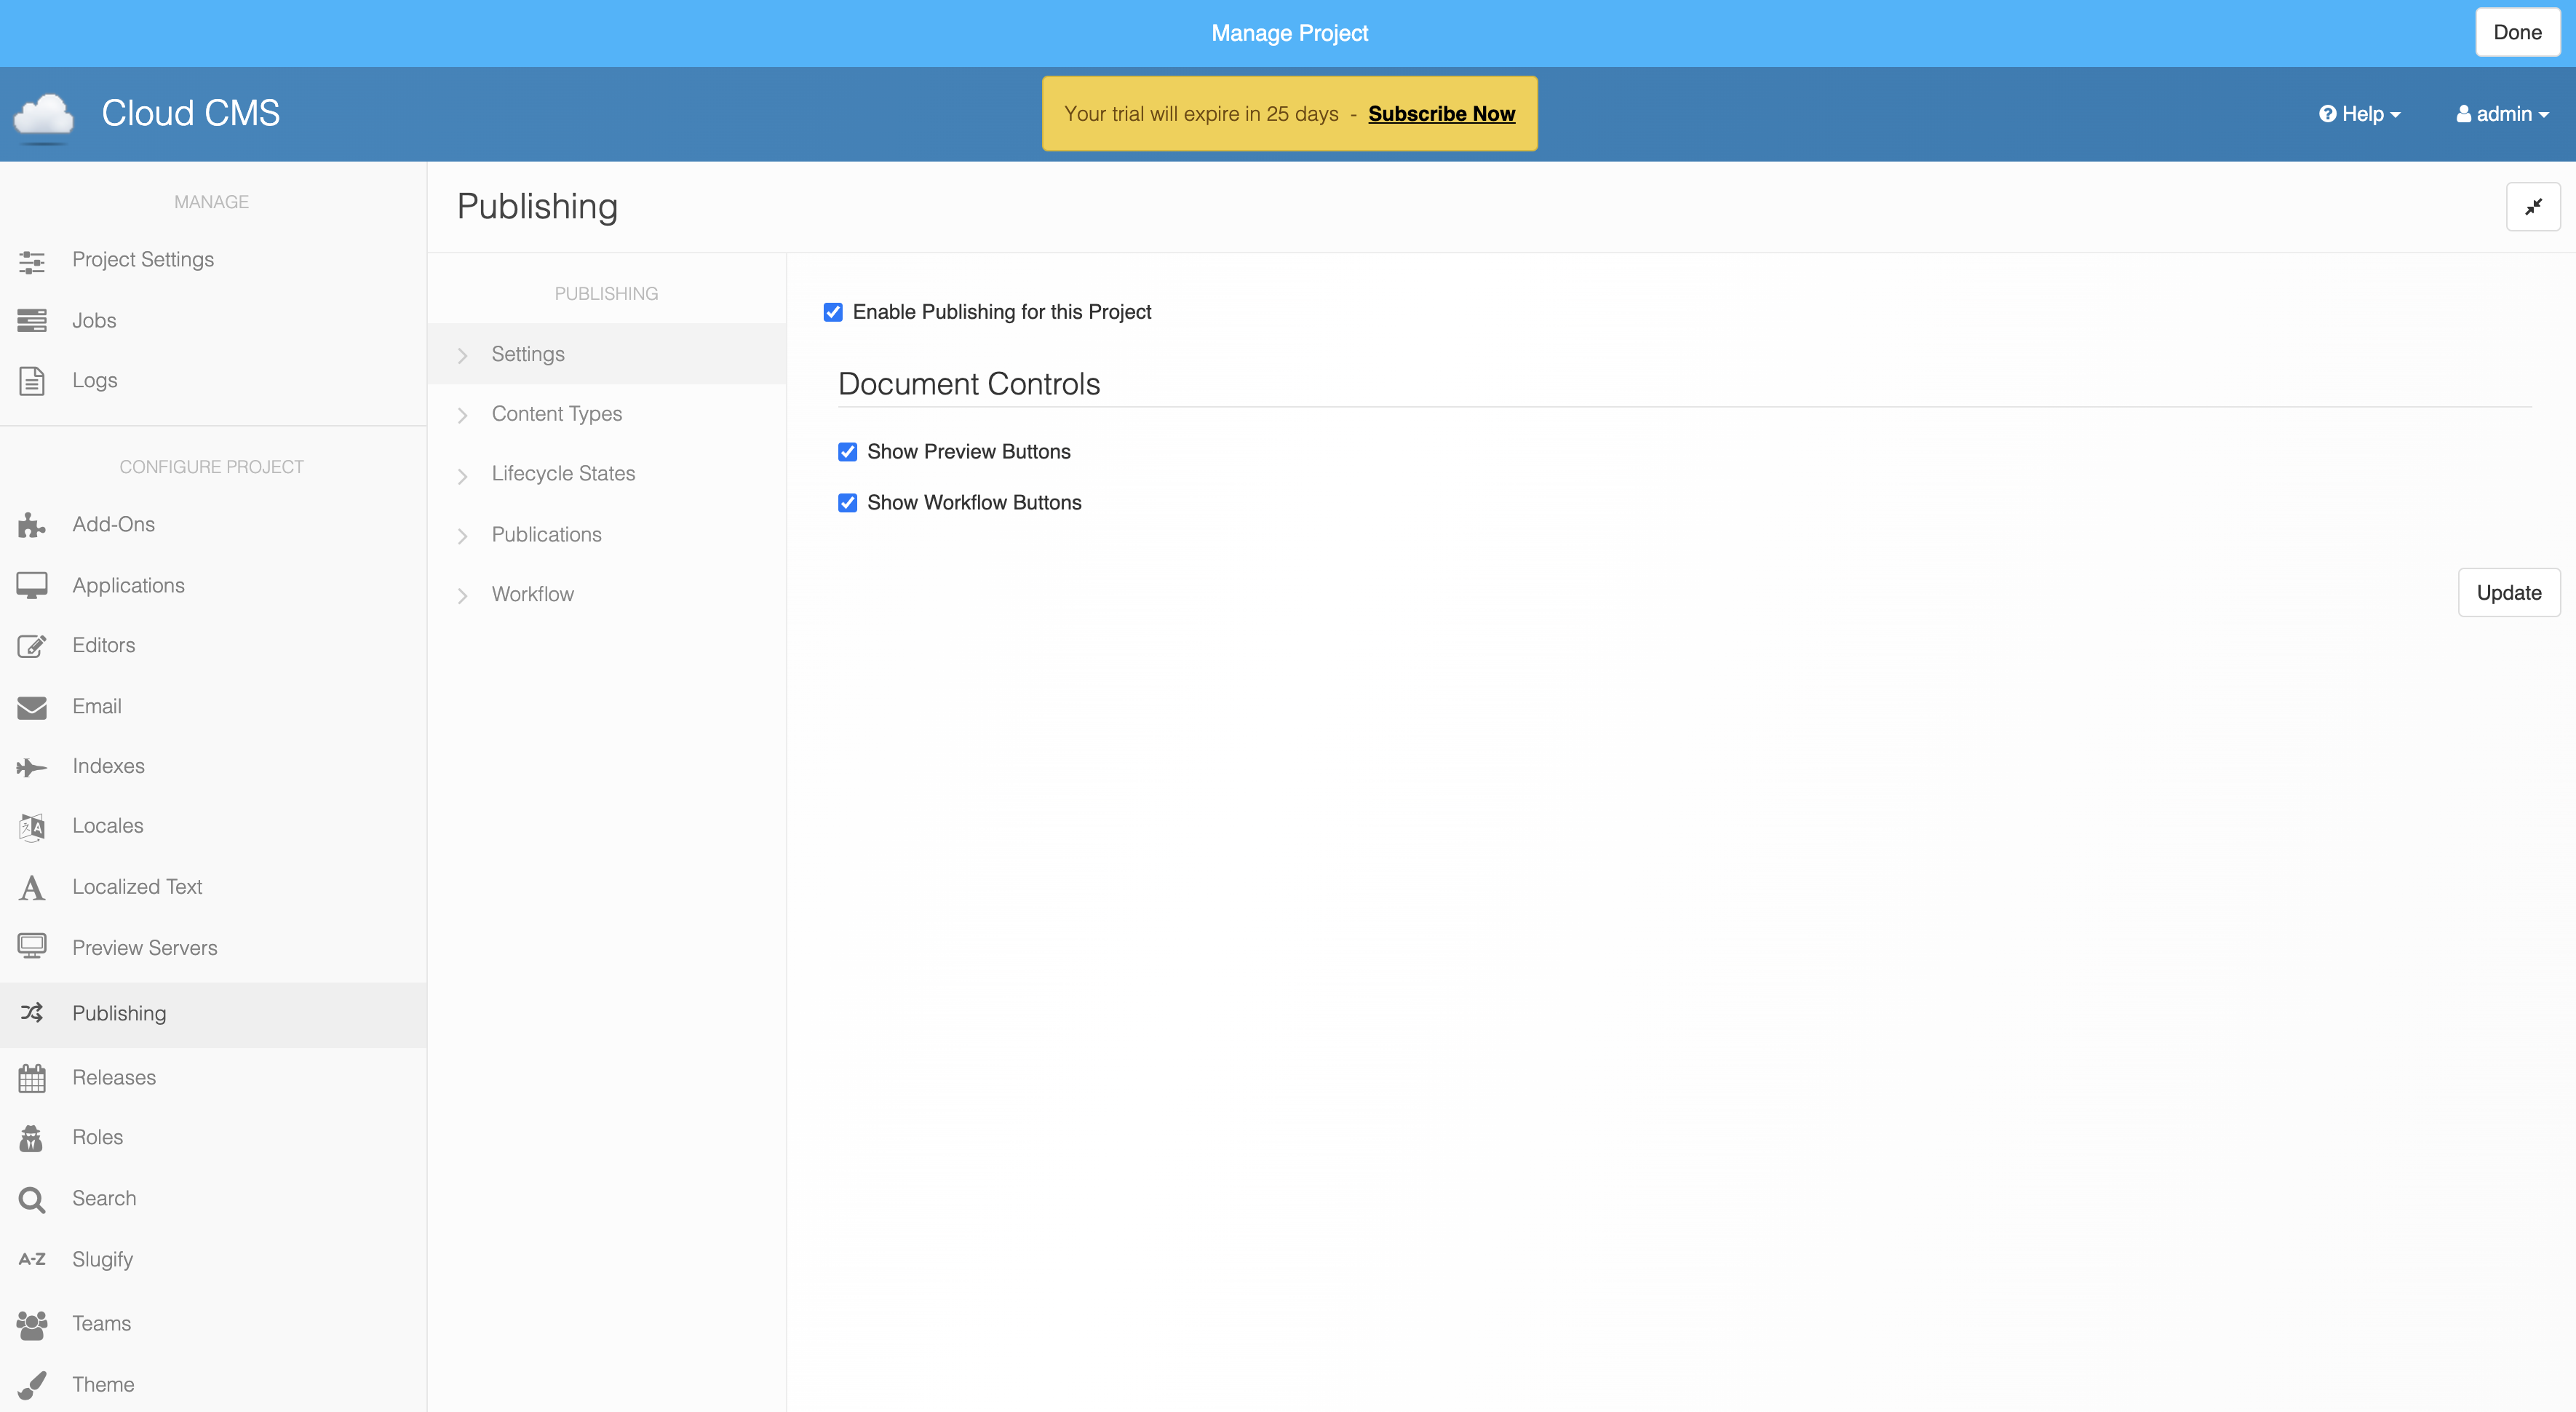
In order to see links in the editor, you will also have to ensure publishing is enabled. In Manage Project, go to Publishing, and ensure Enable Publishing for this Project and Show Preview Buttons are checked.
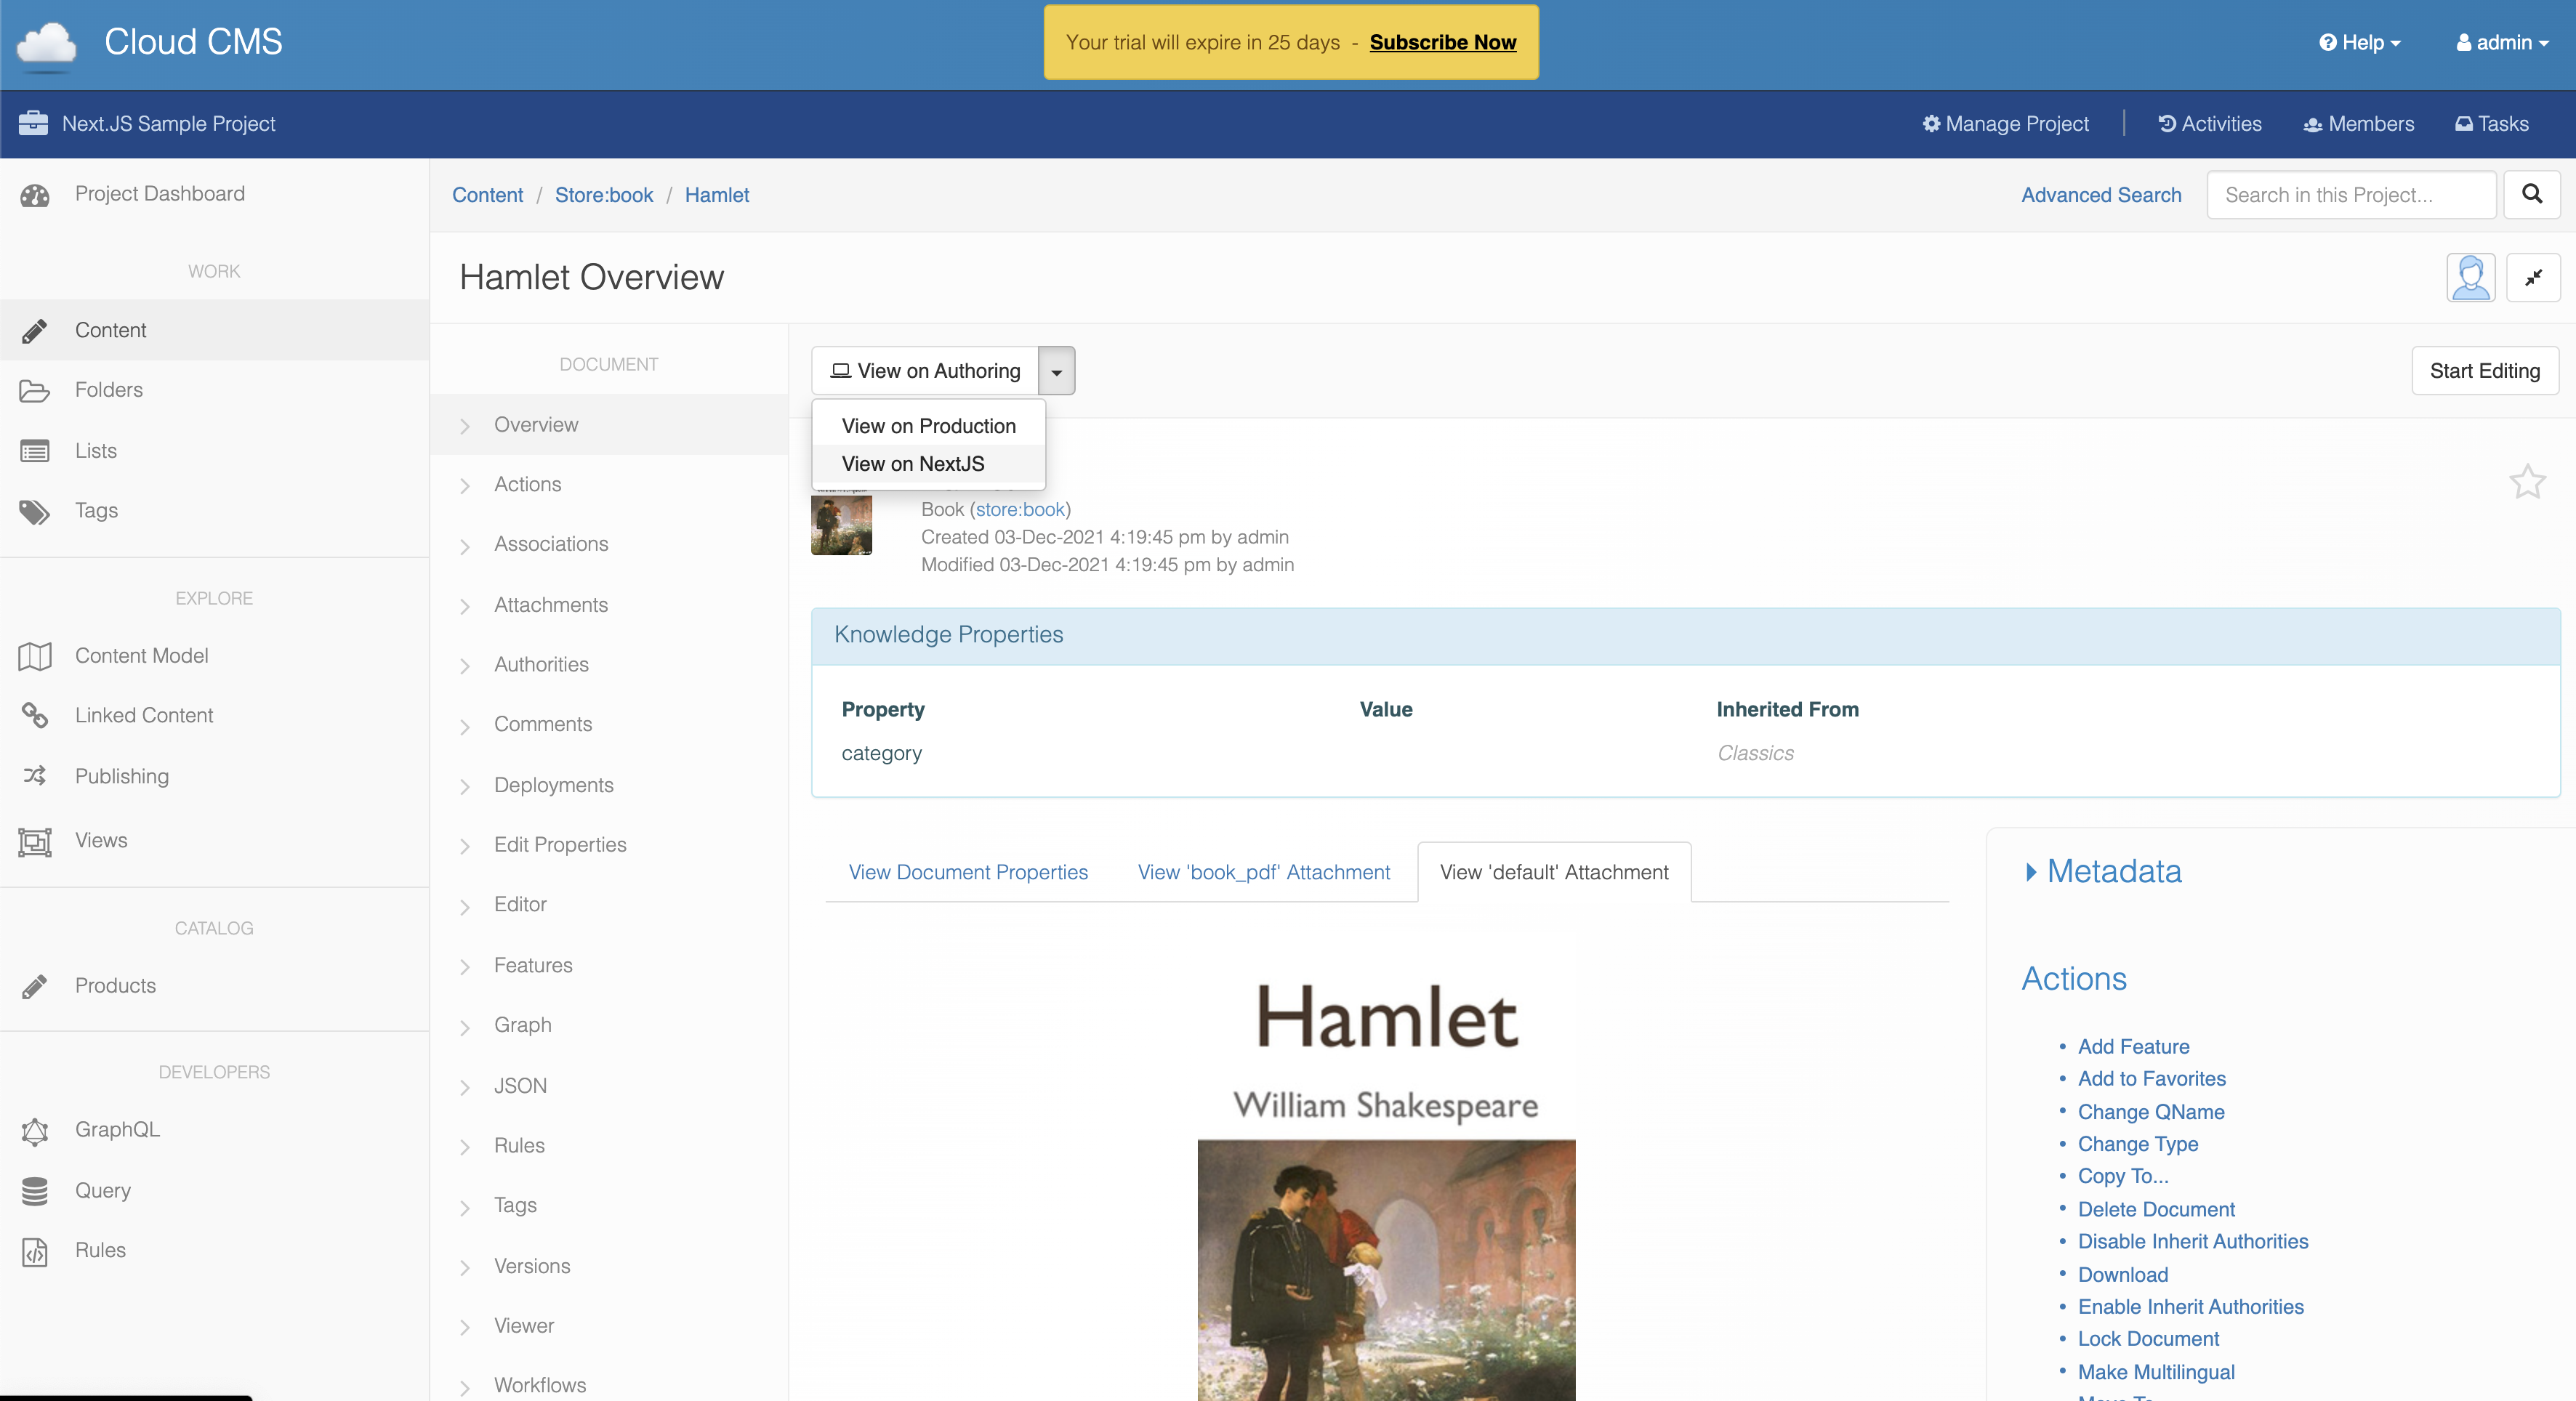
When you go to a content item, you will see the option to view that content in your preview environment. This will set a Next preview cookie in your browser, so all subsequent navigations in this preview browser will contain content from the branch you are previewing.
Deploying to Vercel
Next.JS provides a great deal of vertsatility with where and how it can be deployed in production. One of the great options for this is provided by Next's managing company, Vercel.
For this part, you will need a Vercel account and for it to be connected to a remote Git service like Github or Gitlab. You will also need to setup a new git repository for your Vercel project to link to. For this example, I will be pushing a version of the Next.js app to a github repository.
Go to Vercel and create a new project. If you do not see your new repository listed as an option for creating the project, you may need to adjust your Github permissions so that Vercel has access to your repository.
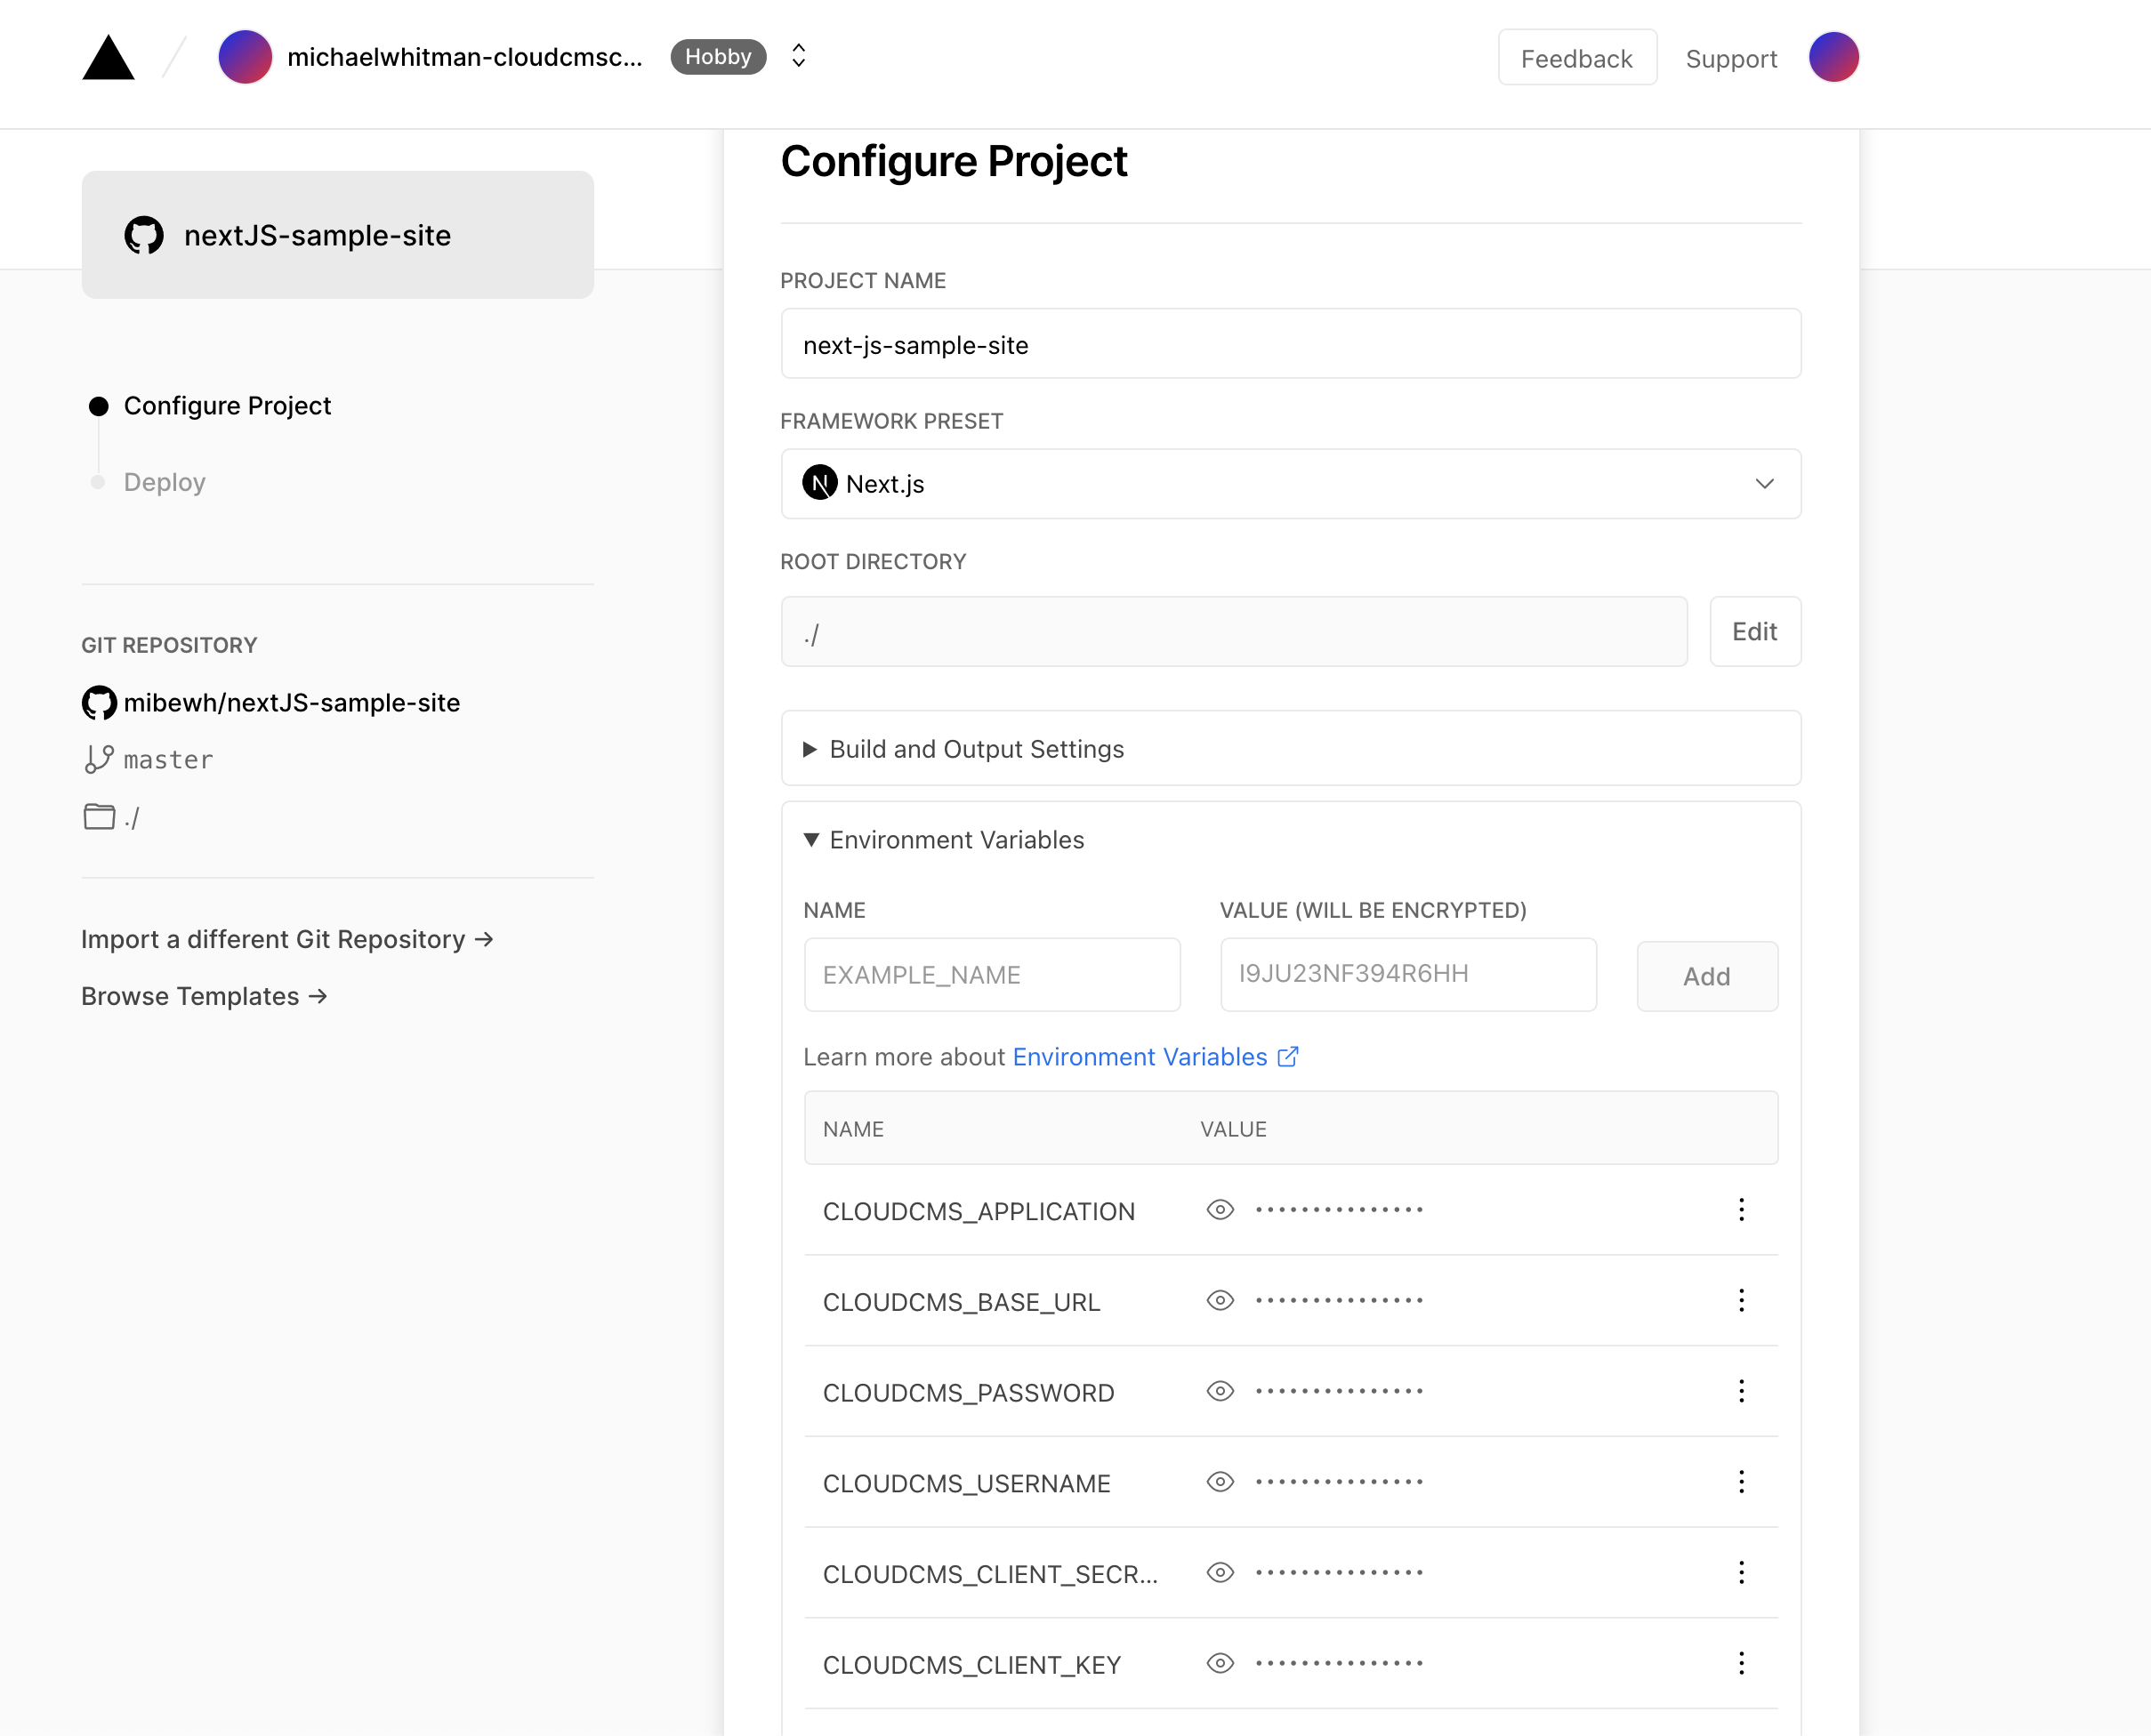
Now we are prompted to configure the project. If you uploaded the entire SDK rather than just the Next.js sample to github, be sure to set the root path to something like ./nextjs/sample. Instead of authenticating using keys from gitana.json, we will use environment variables to pass this information securely in the serverless environment. Be sure to provide values for CLOUDCMS_CLIENT_KEY, CLOUDCMS_CLIENT_SECRET, CLOUDCMS_USERNAME, CLOUDCMS_PASSWORD, CLOUDCMS_BASE_URL, and CLOUDCMS_APPLICATION.
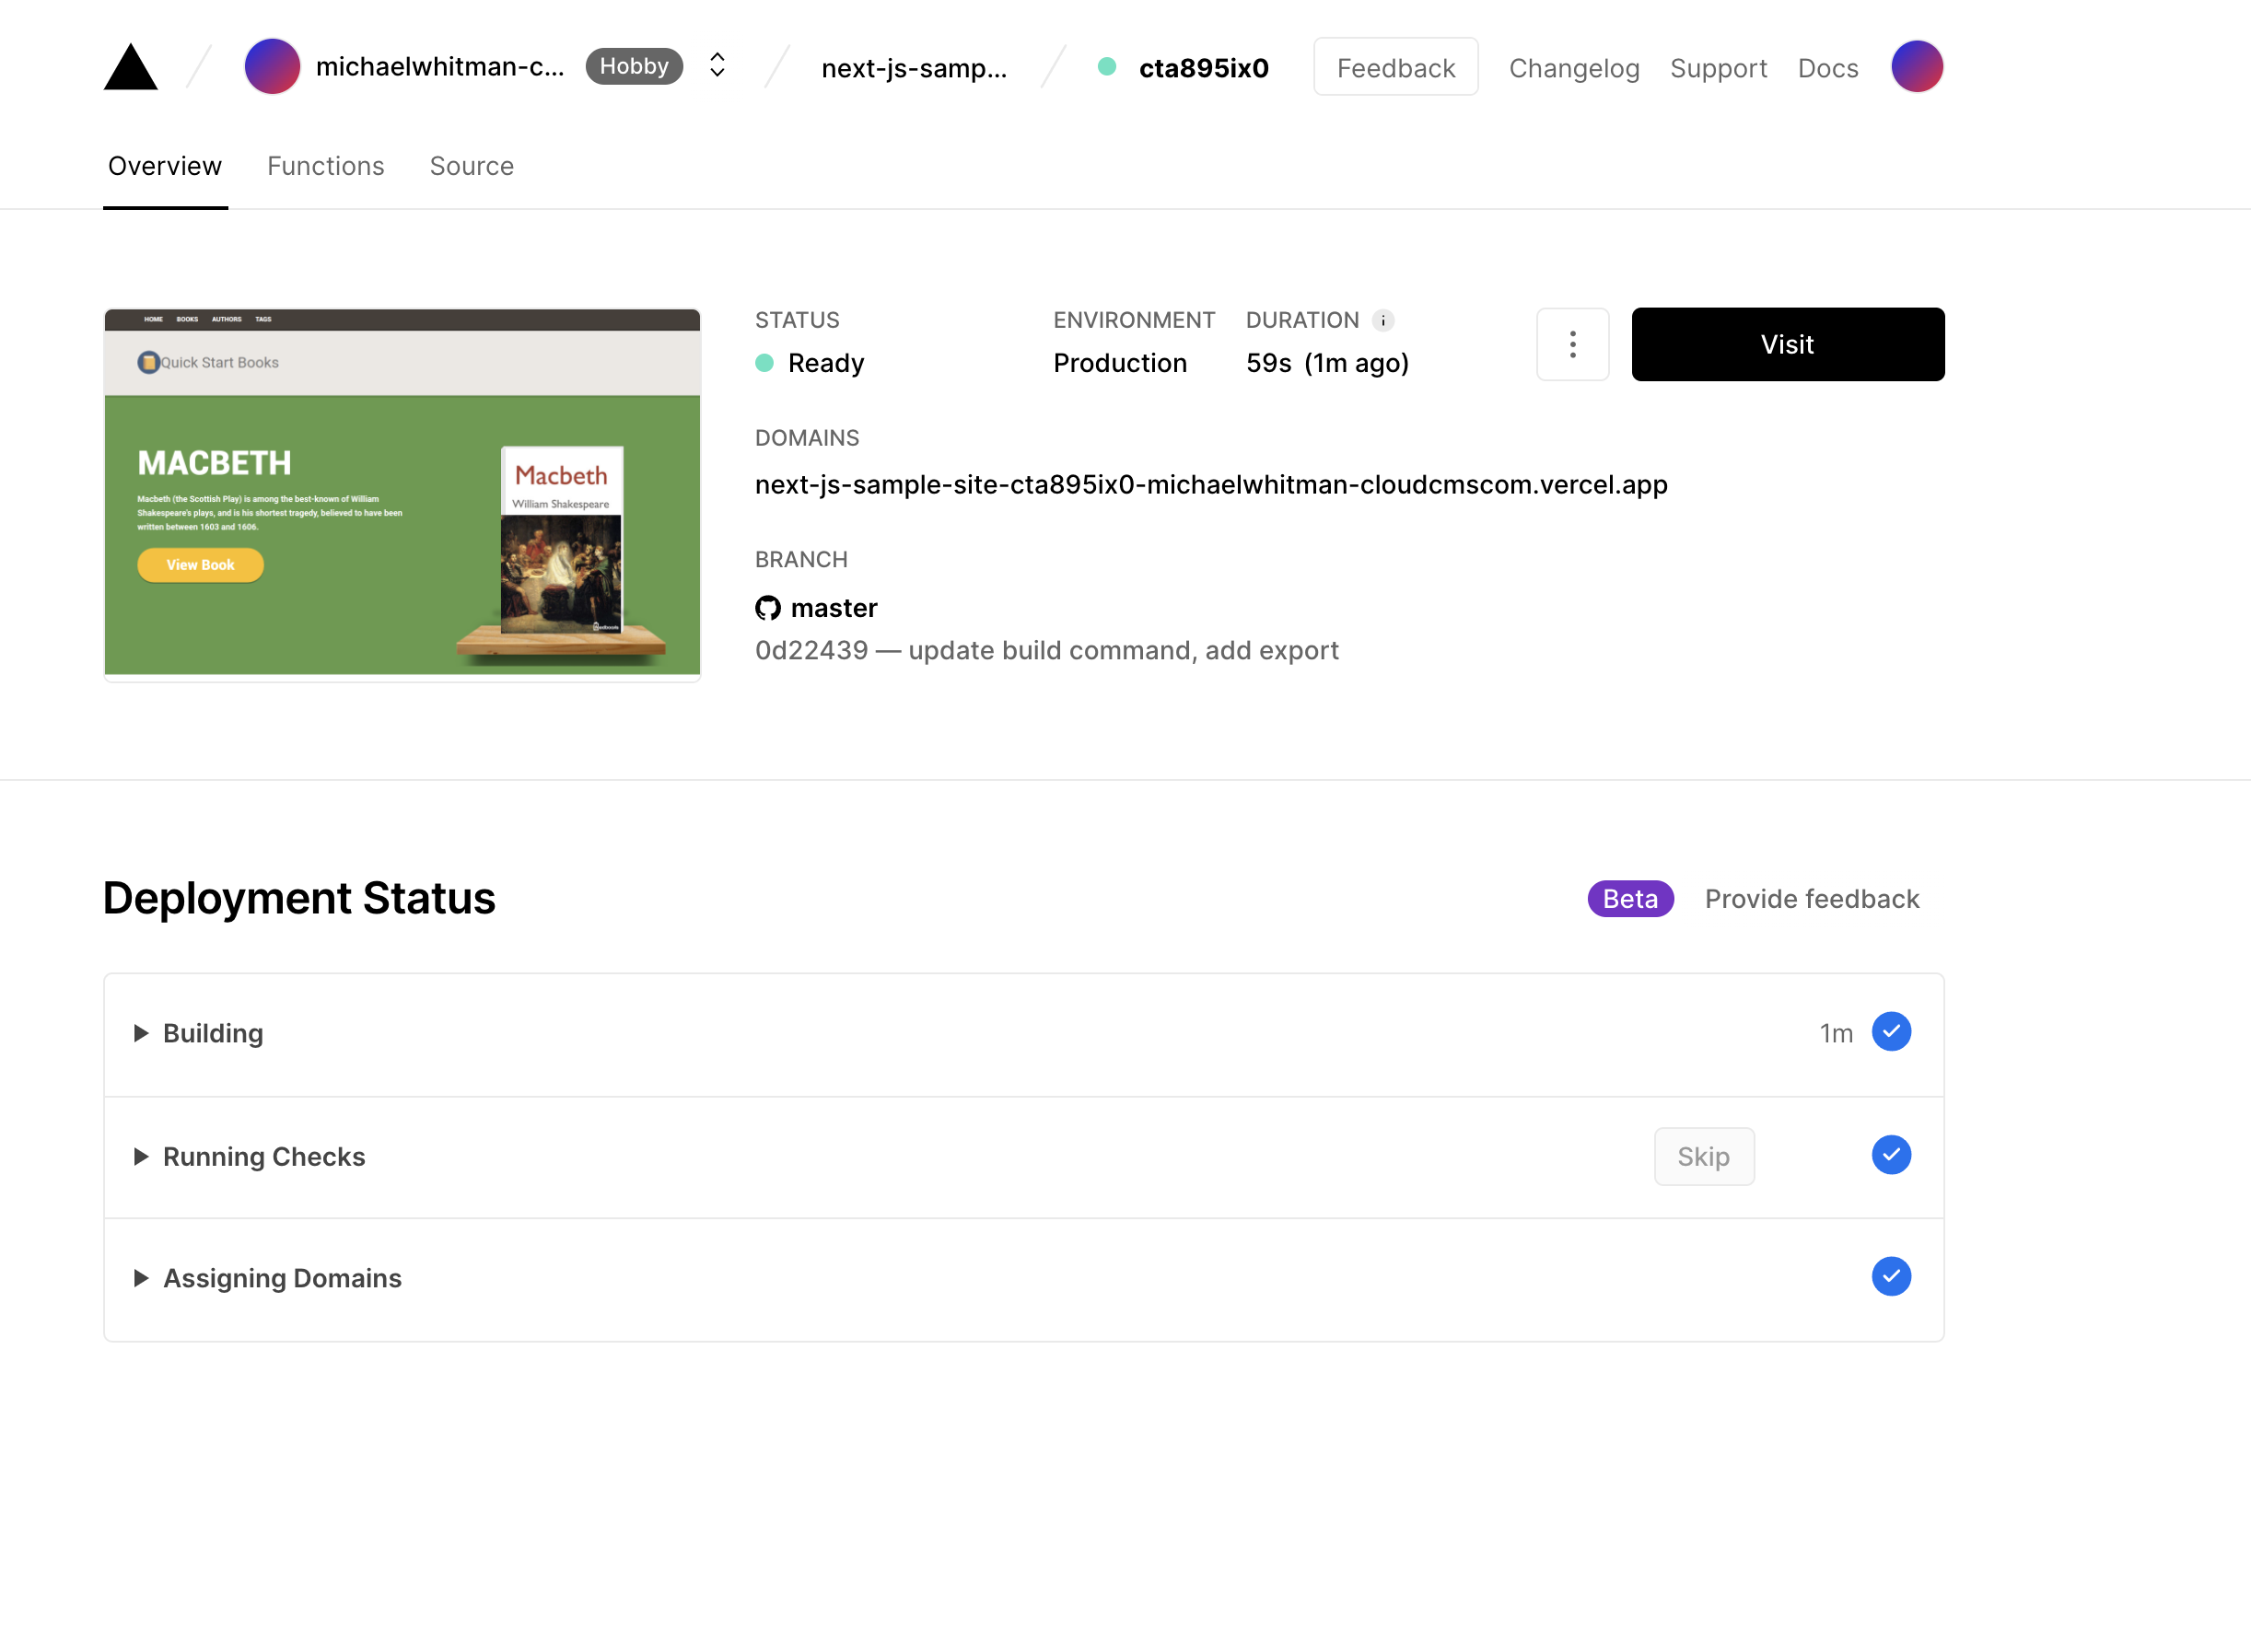
After setting these, you should be ready to click deploy, and within a few minutes your site will be ready to view.
Wrapping Up
By now you should have a good understanding of how can start with an editor being input into Cloud CMS, and end up as text and images in a modern web application, and how simple the process can be! From here you can continue to explore the sample project by adding/editing content, adding branches and seeing how they differ using the preview system, or even edit the content model to add fields to add more displayed information to the sample site. Then, take what you've learned and start building your own awesome Next.JS applications with Cloud CMS.