Quick Start
Prerequisites
To follow this quick start, you will need a Gitana account.
If you have one already, open it up in a browser so you can follow along side-by-side.
If you don't have one, you can easily create a free trial account.
-
Log in to Gitana
If you already have a Gitana account, you can access it using the subdomain that you registered when you signed up.
https://{subdomain}.cloudcms.net -
OR Sign up for a Gitana Account
You can sign up for a Free Trial Account at any time.
Trials last 14 days, but this can be extended as needed. No payment required.
Create a New Project
Projects store the content created by your editorial team.
We'll start by creating an empty Project. Later we will add content into this new project.
-
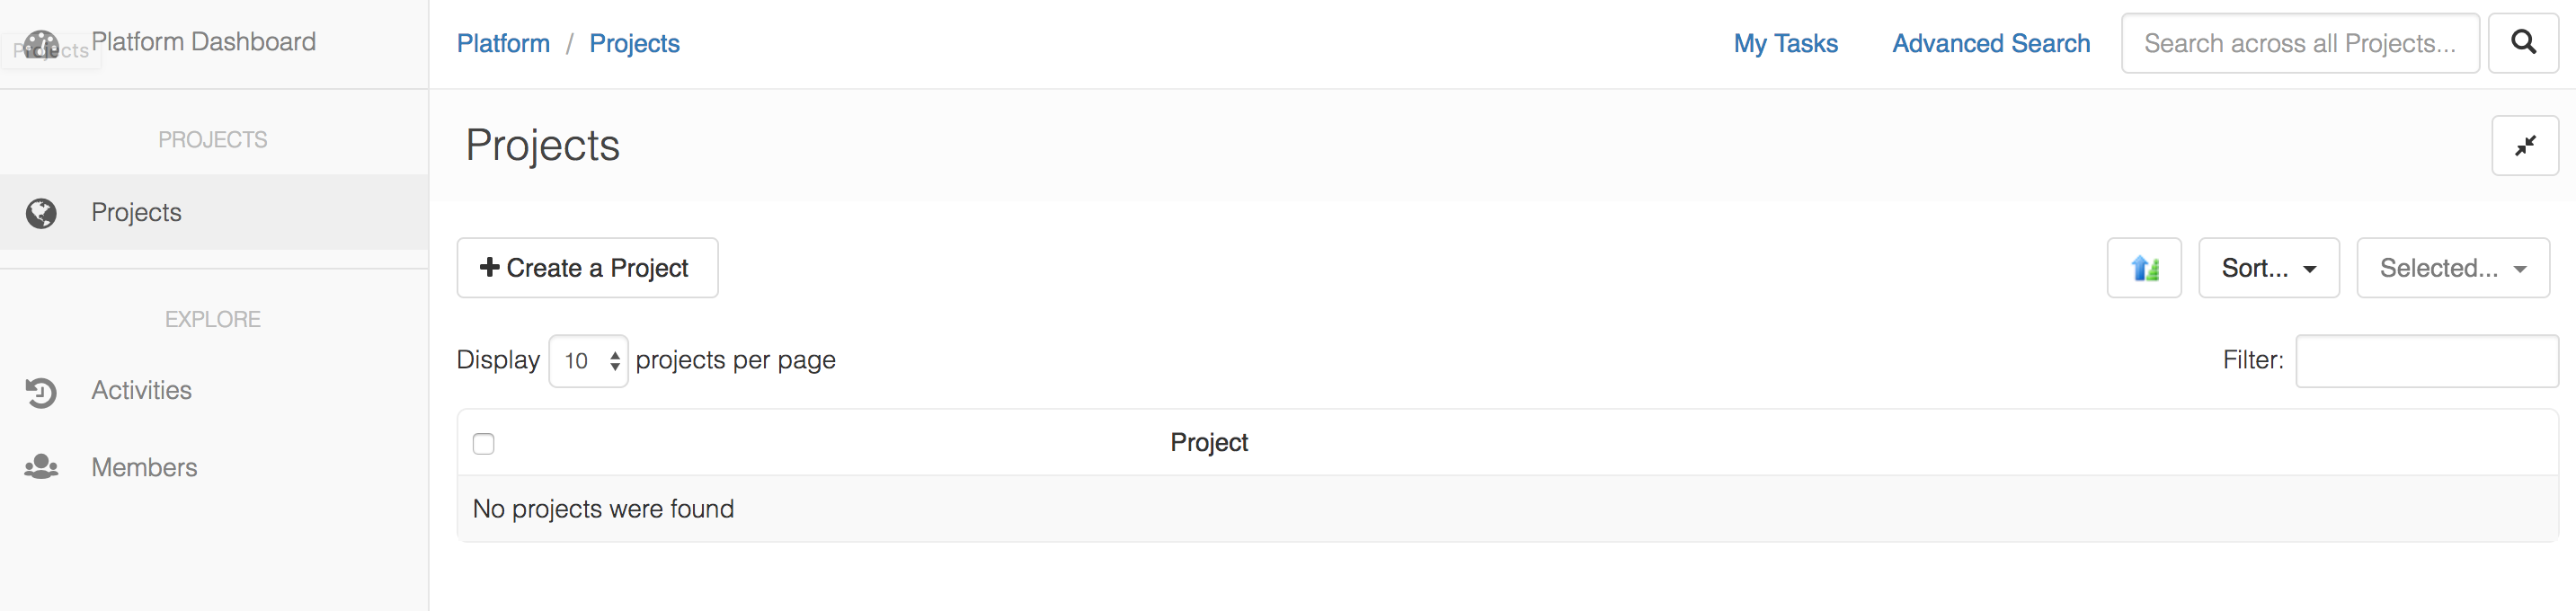
View your Projects
The Projects page is on the left-hand menu.
This will show you a list of the Projects that are available.
Click on the Projects menu option on the left-hand side
If you haven't created a Project before, this list will be empty.
-
Create a New Project
Let's create a new Project that we can work within.
Click on the Create a New Project button
The first screen will ask you to select the Type of Project you'd like to create.
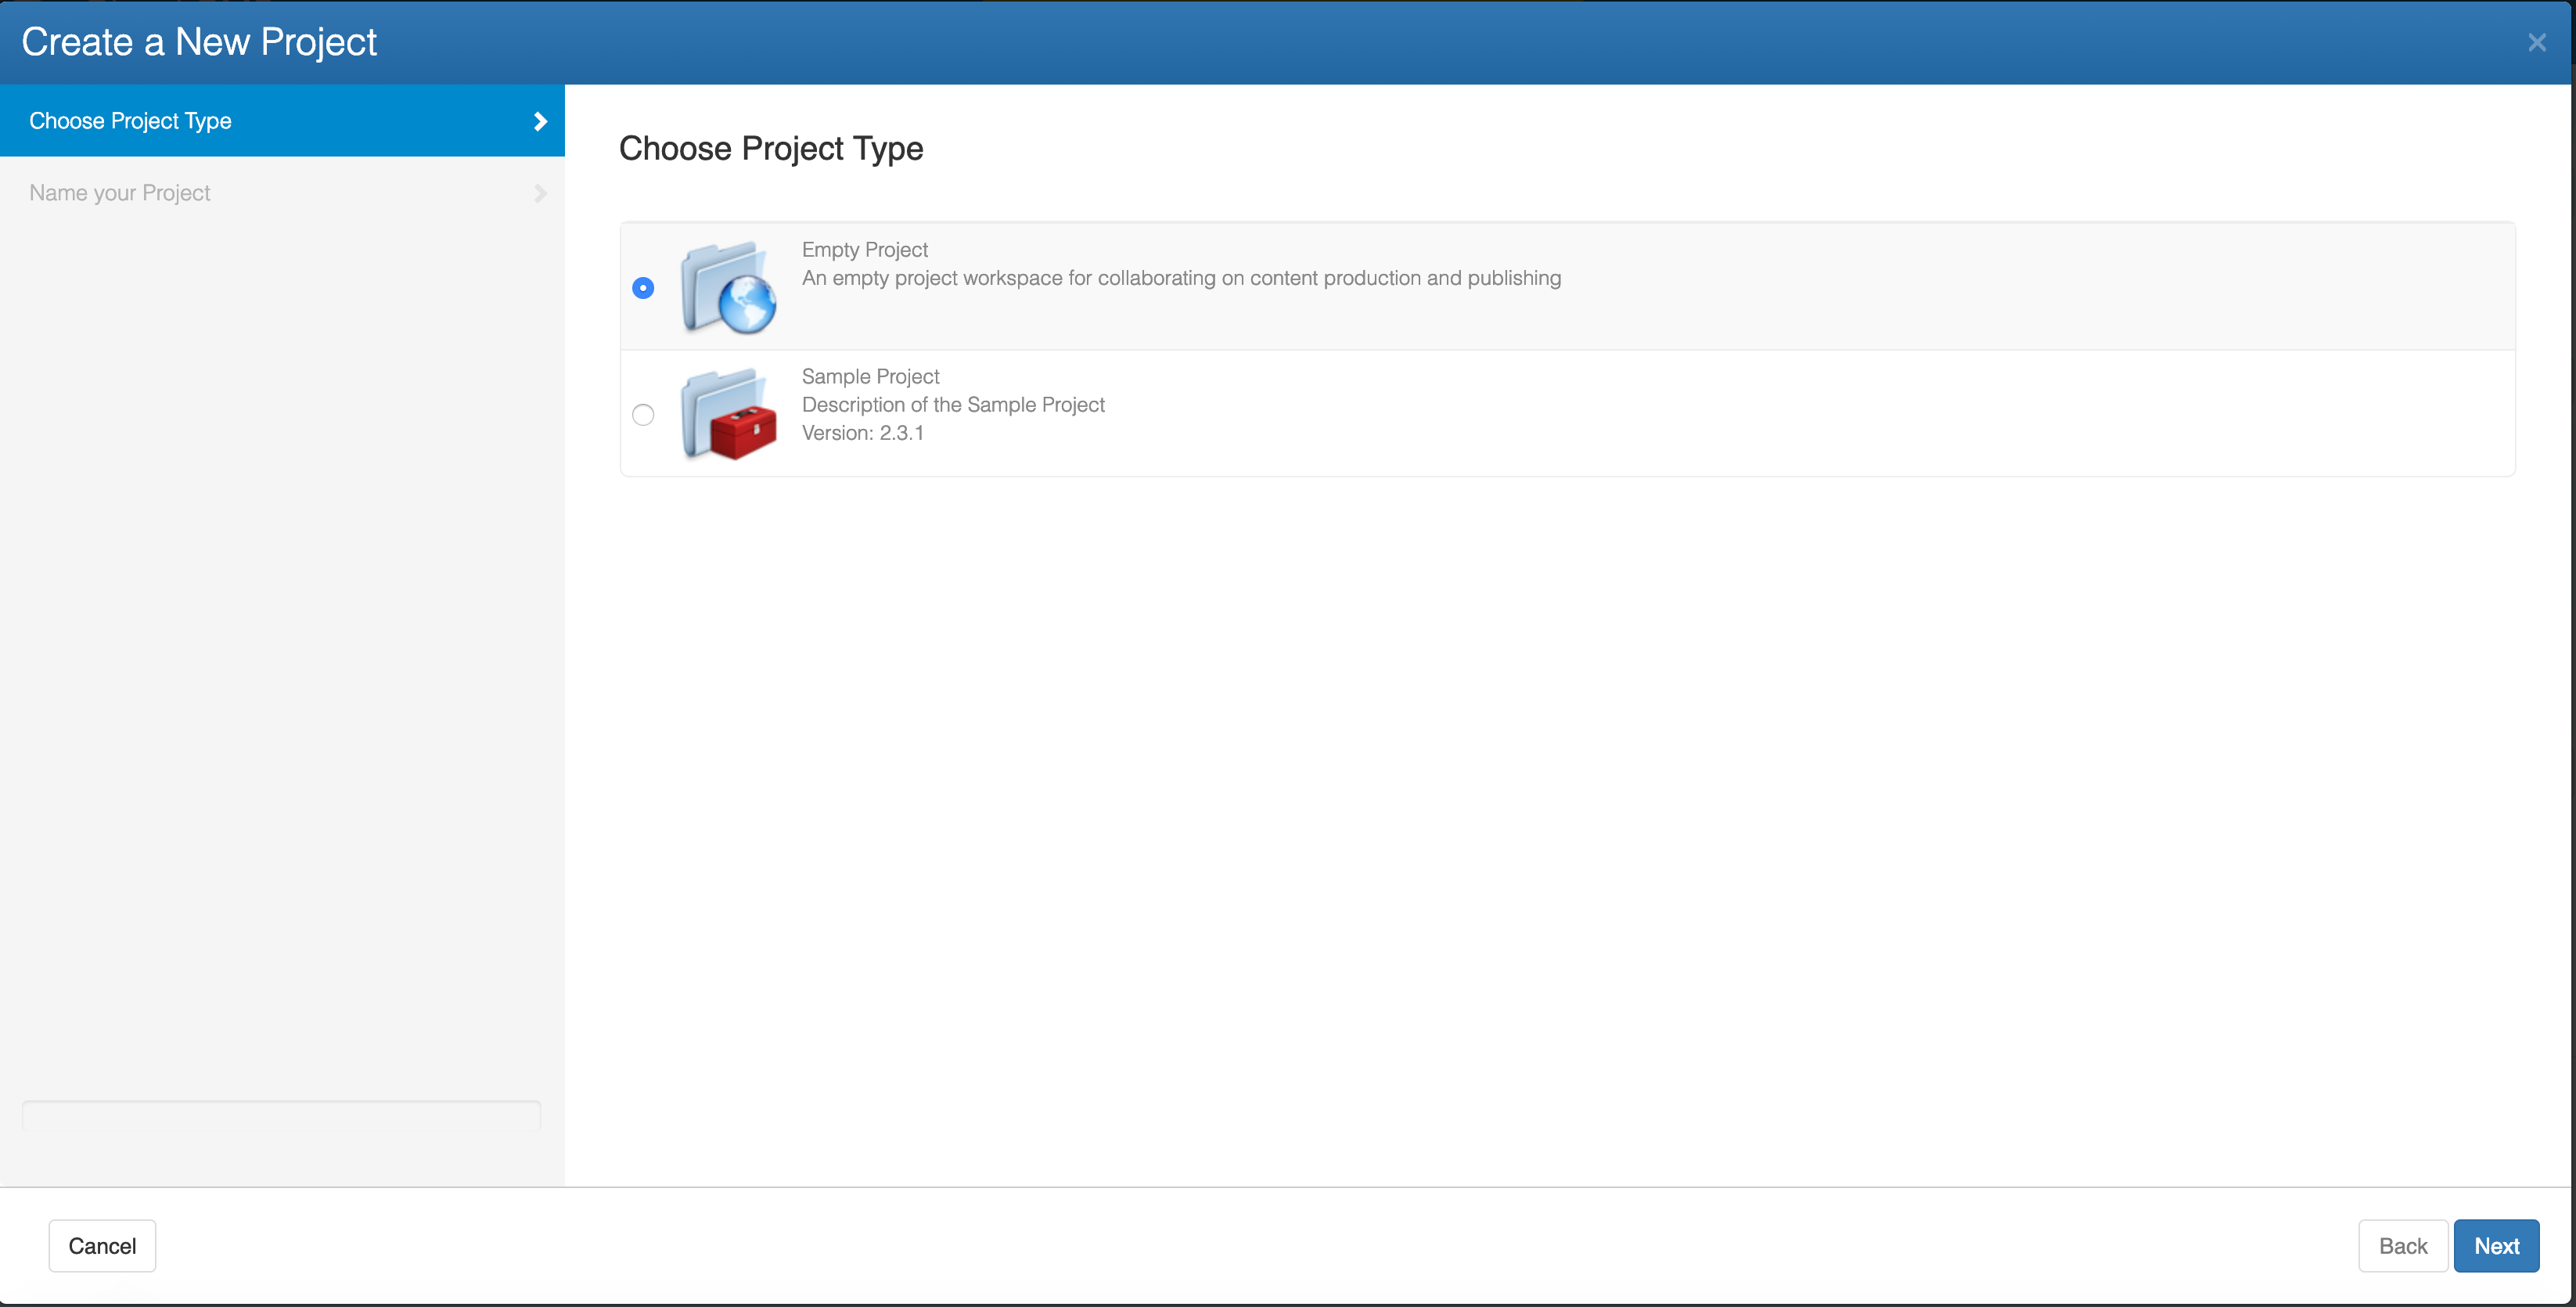
Select Empty Project and Click Next
We now need to give our Project a Name and, if you're so inclined, a Description.
Fill in the form like this:
- Name: Quick Start Project
- Description: Walkthrough of the Quick Start Project
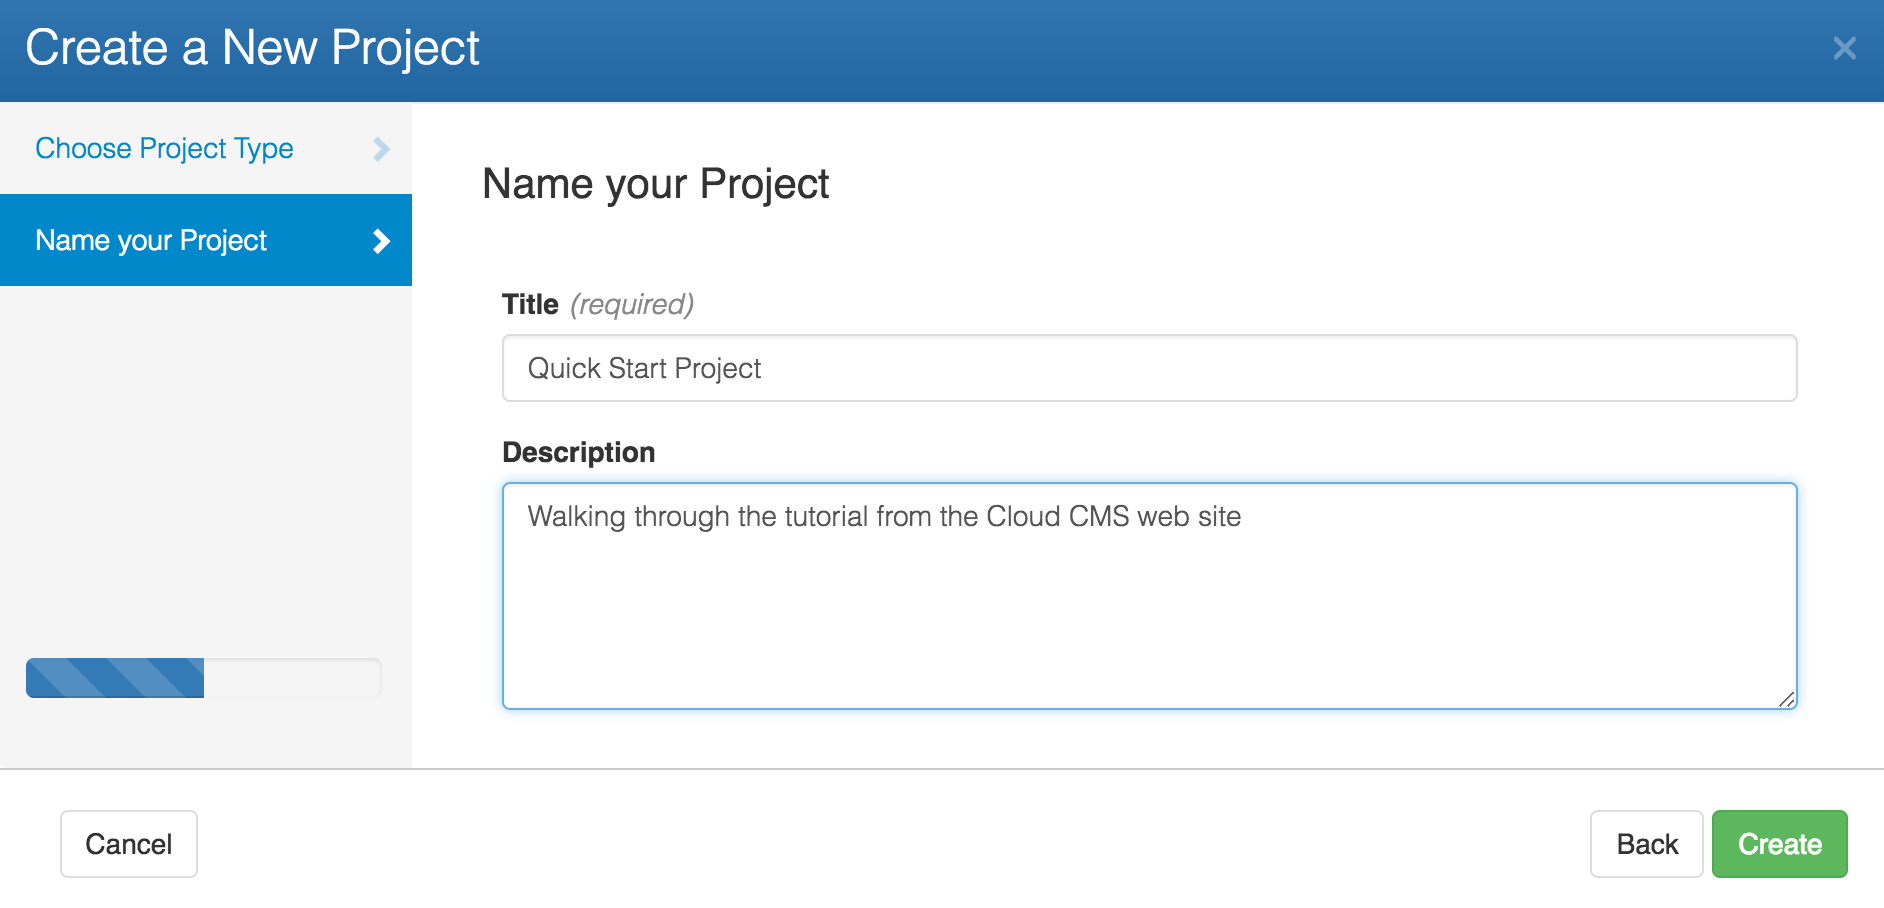
Click Create
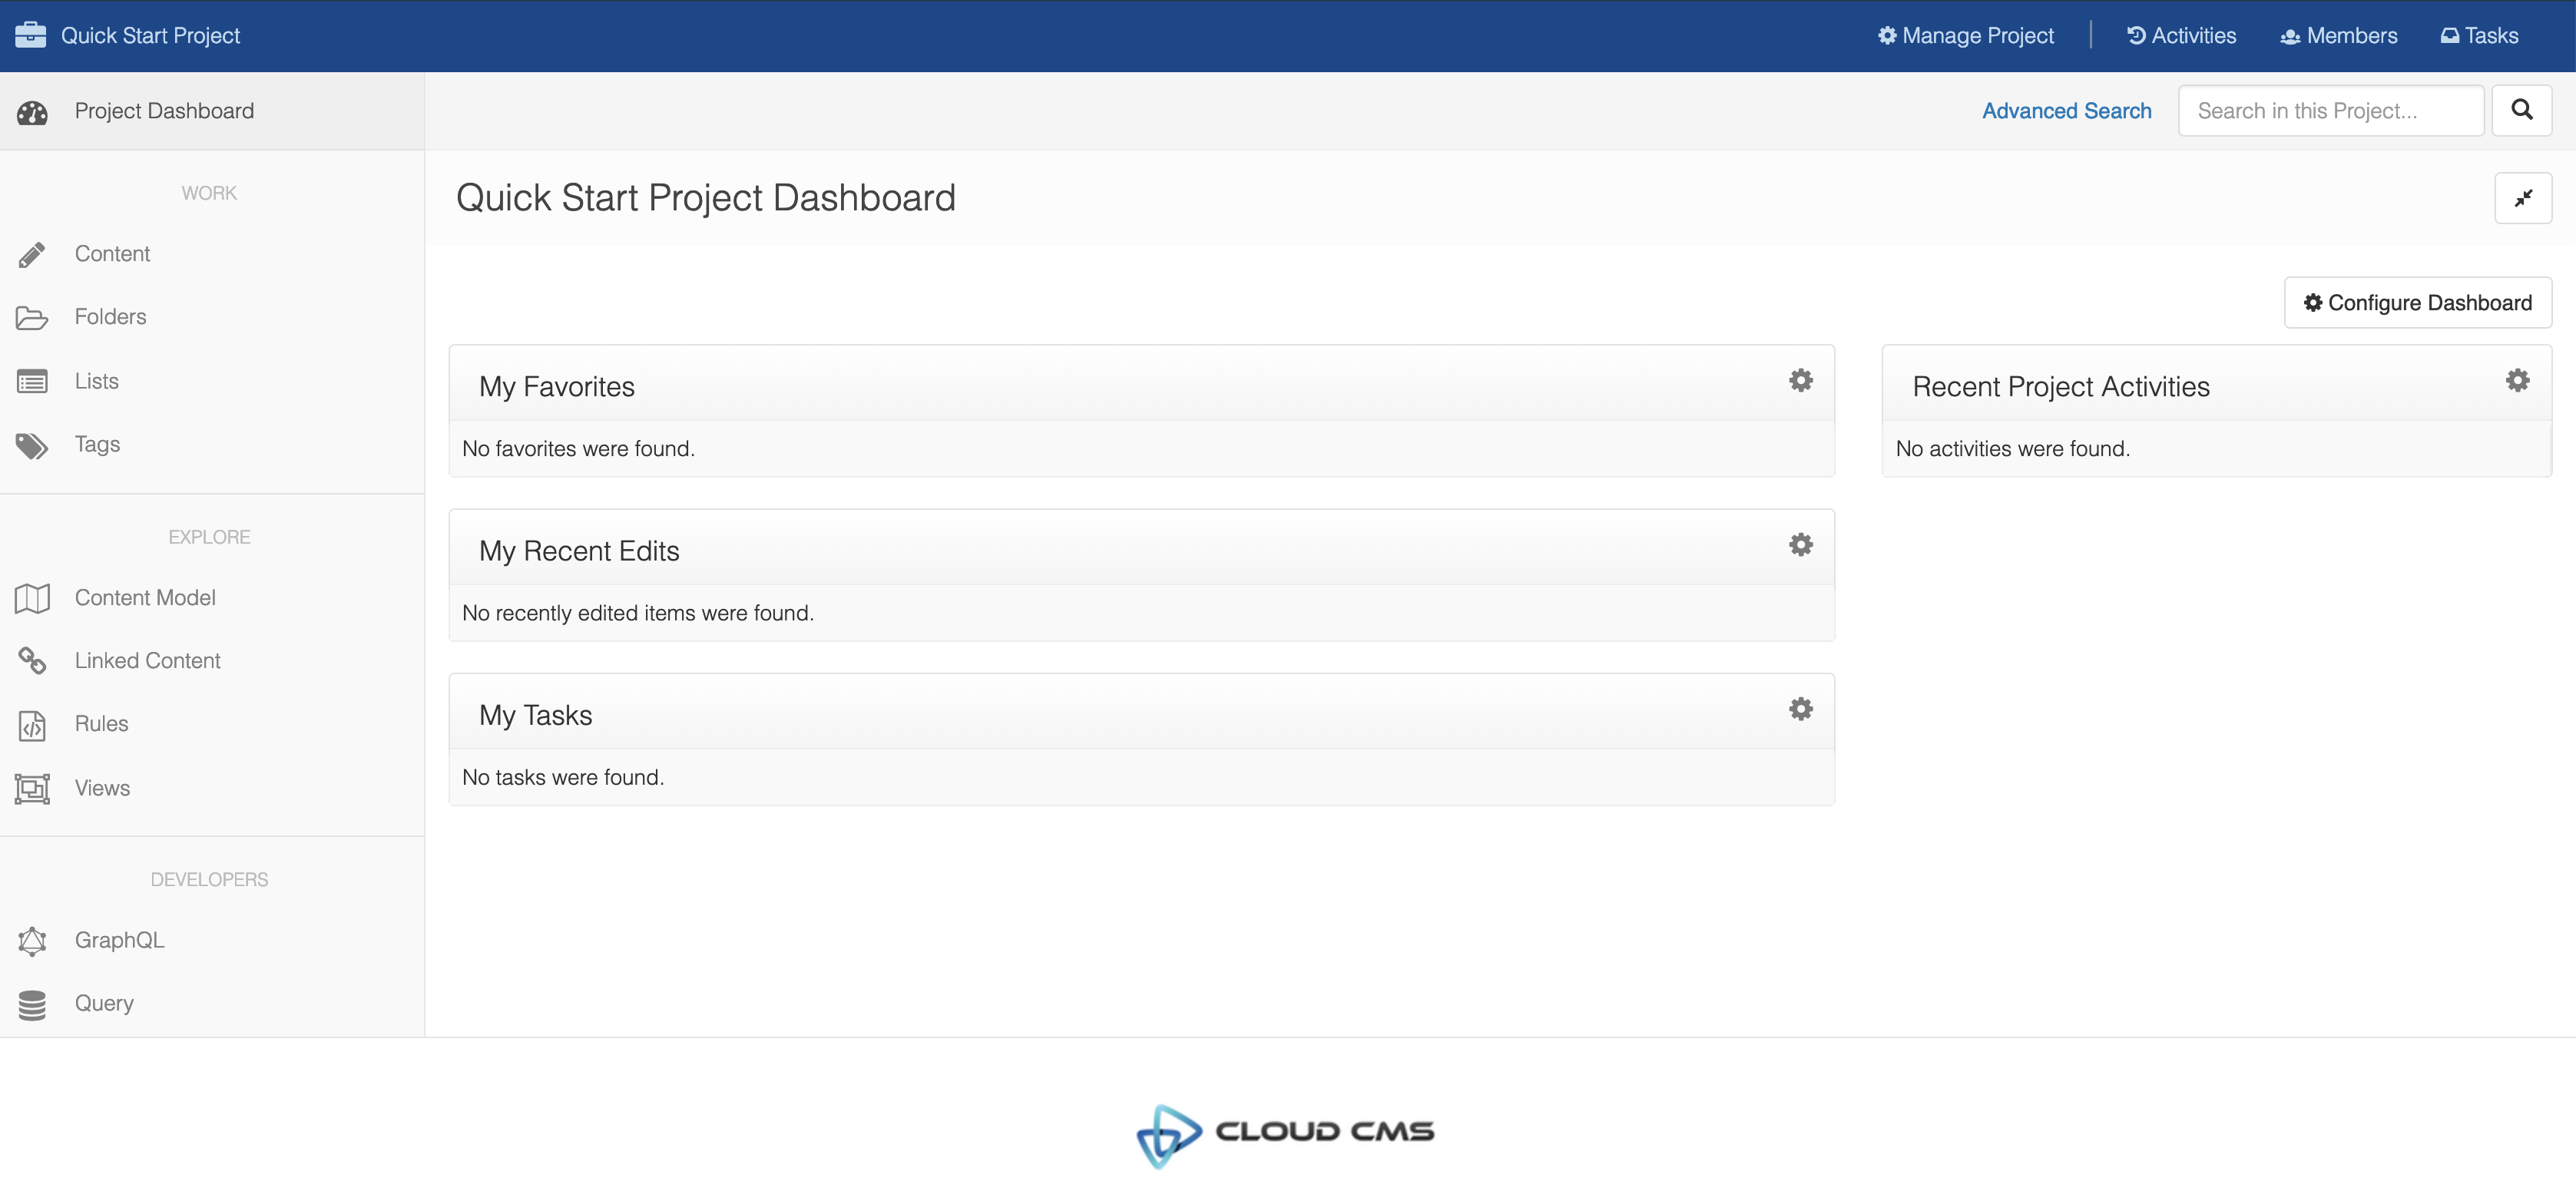
Your Project will be created. You will then be taken to the new Project's Dashboard.


Define a Content Type
Content Types are used to define the properties and relationships of your structured content. Read more about Content Modeling.
Content Types are optional. Gitana also works well with unstructured file content.
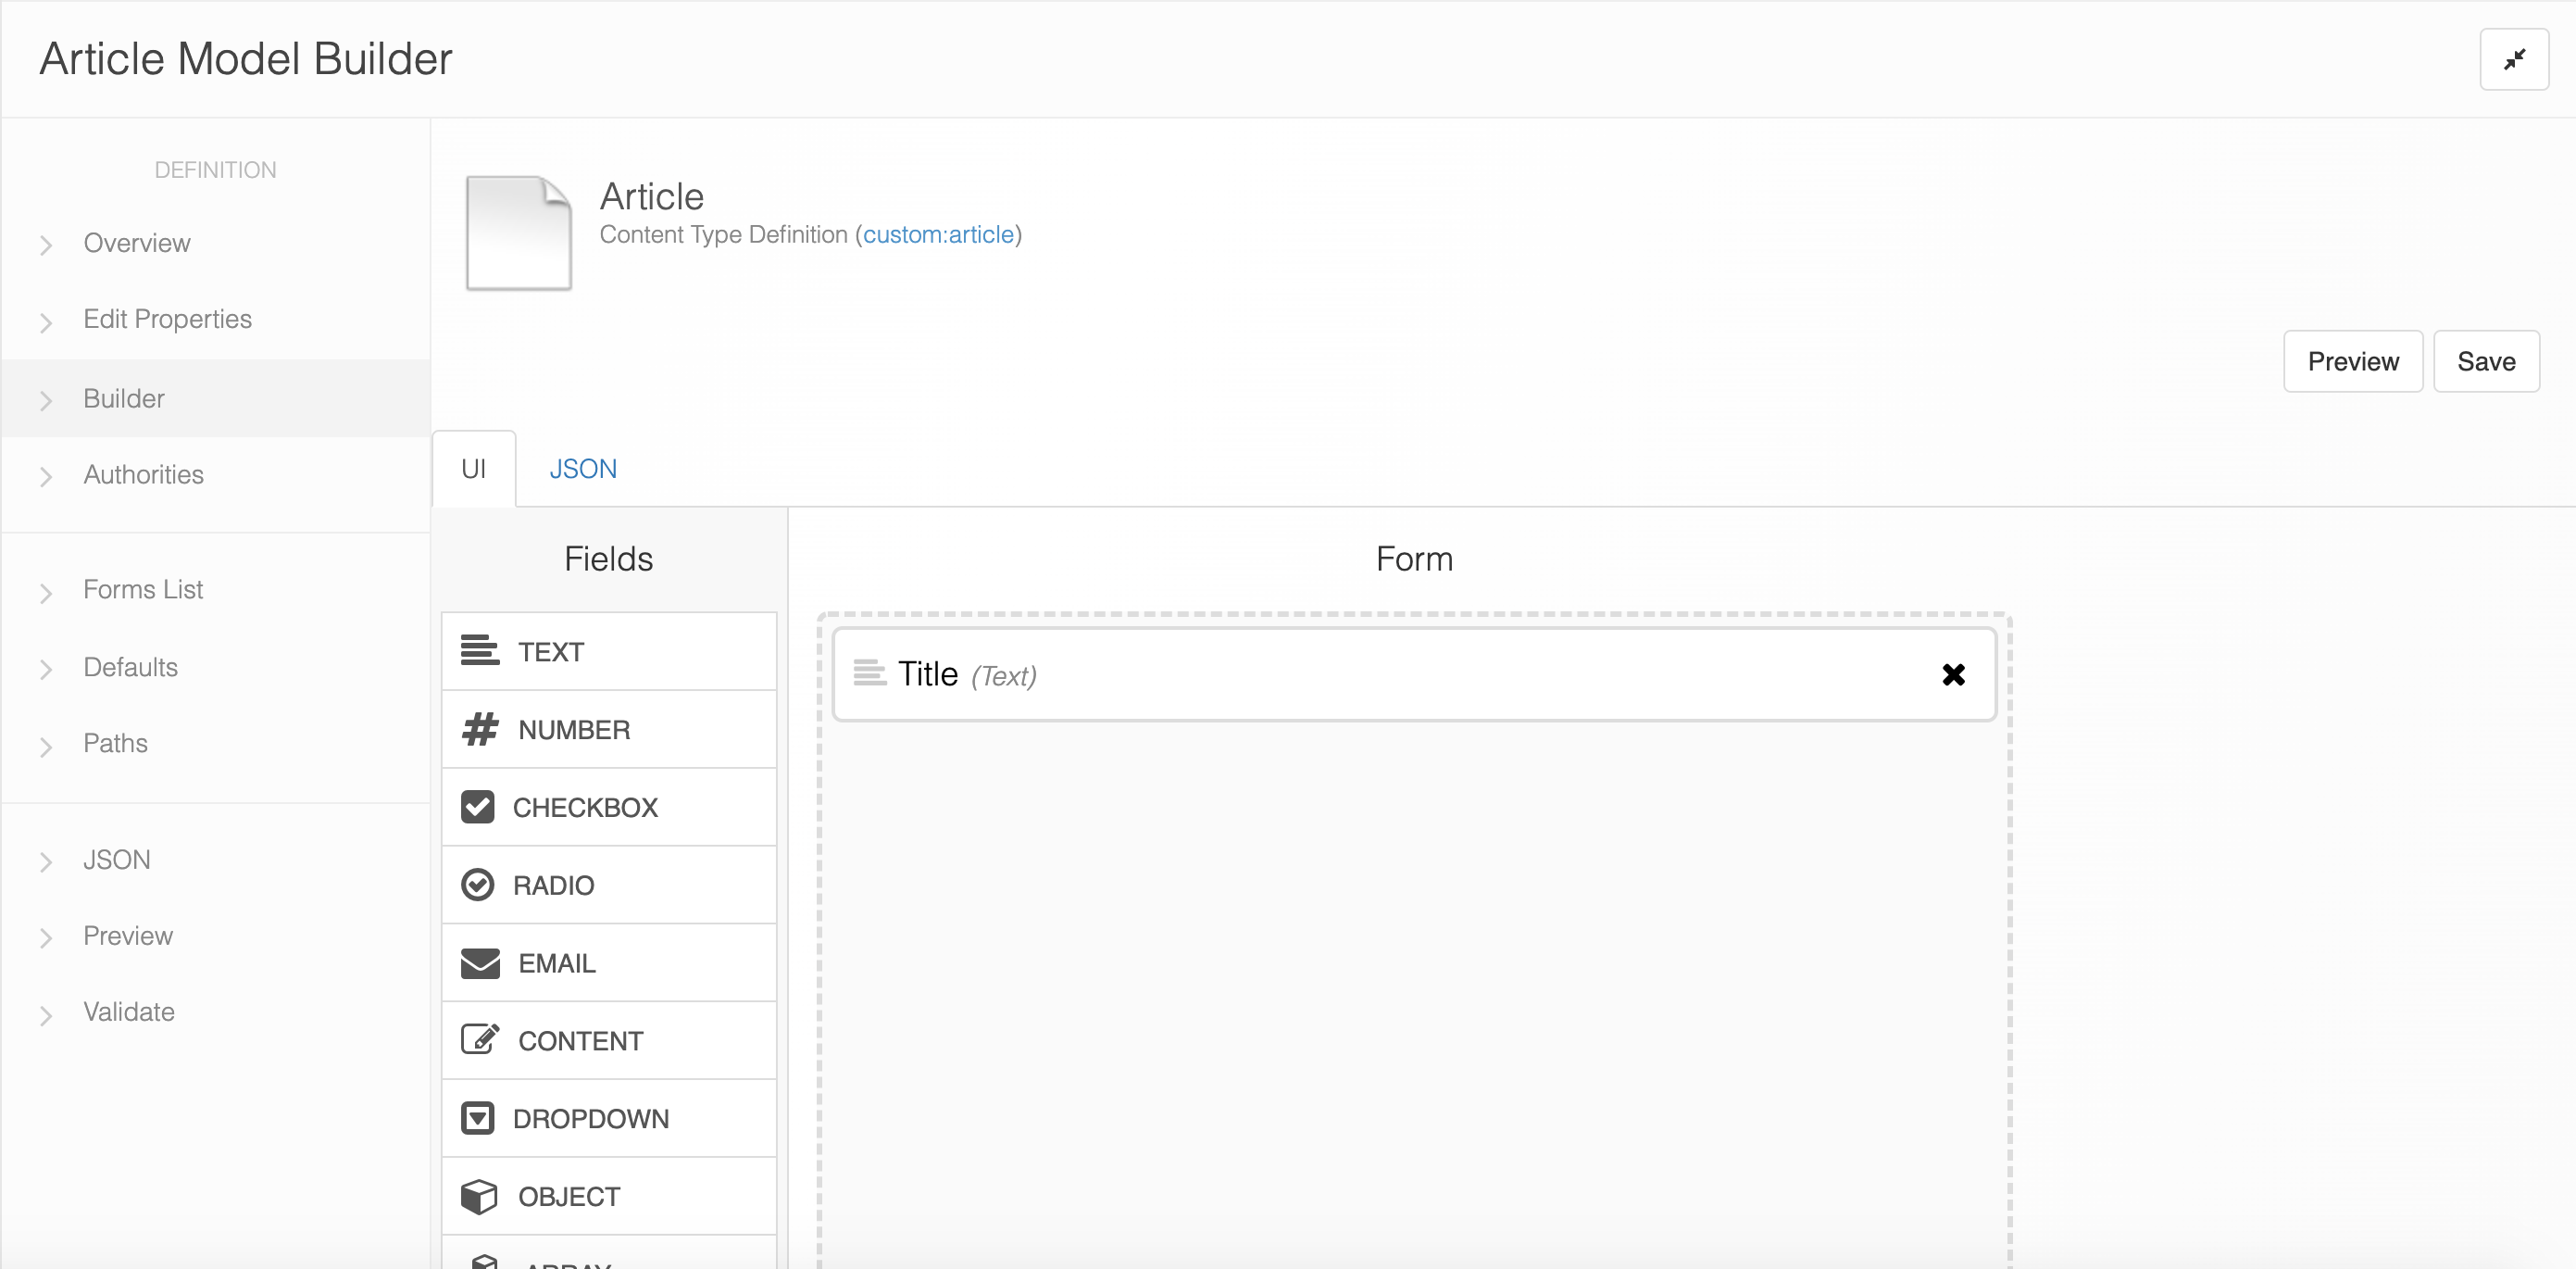
Let's define a new Content Type called Article using the Content Model Builder.
-
Use the Content Model Builder
The Content Model Builder makes the experience of creating the content models very user-friendly and quick. You can add and remove various fields just by dragging and dropping. It automatically generates the correct JSON for you to use.
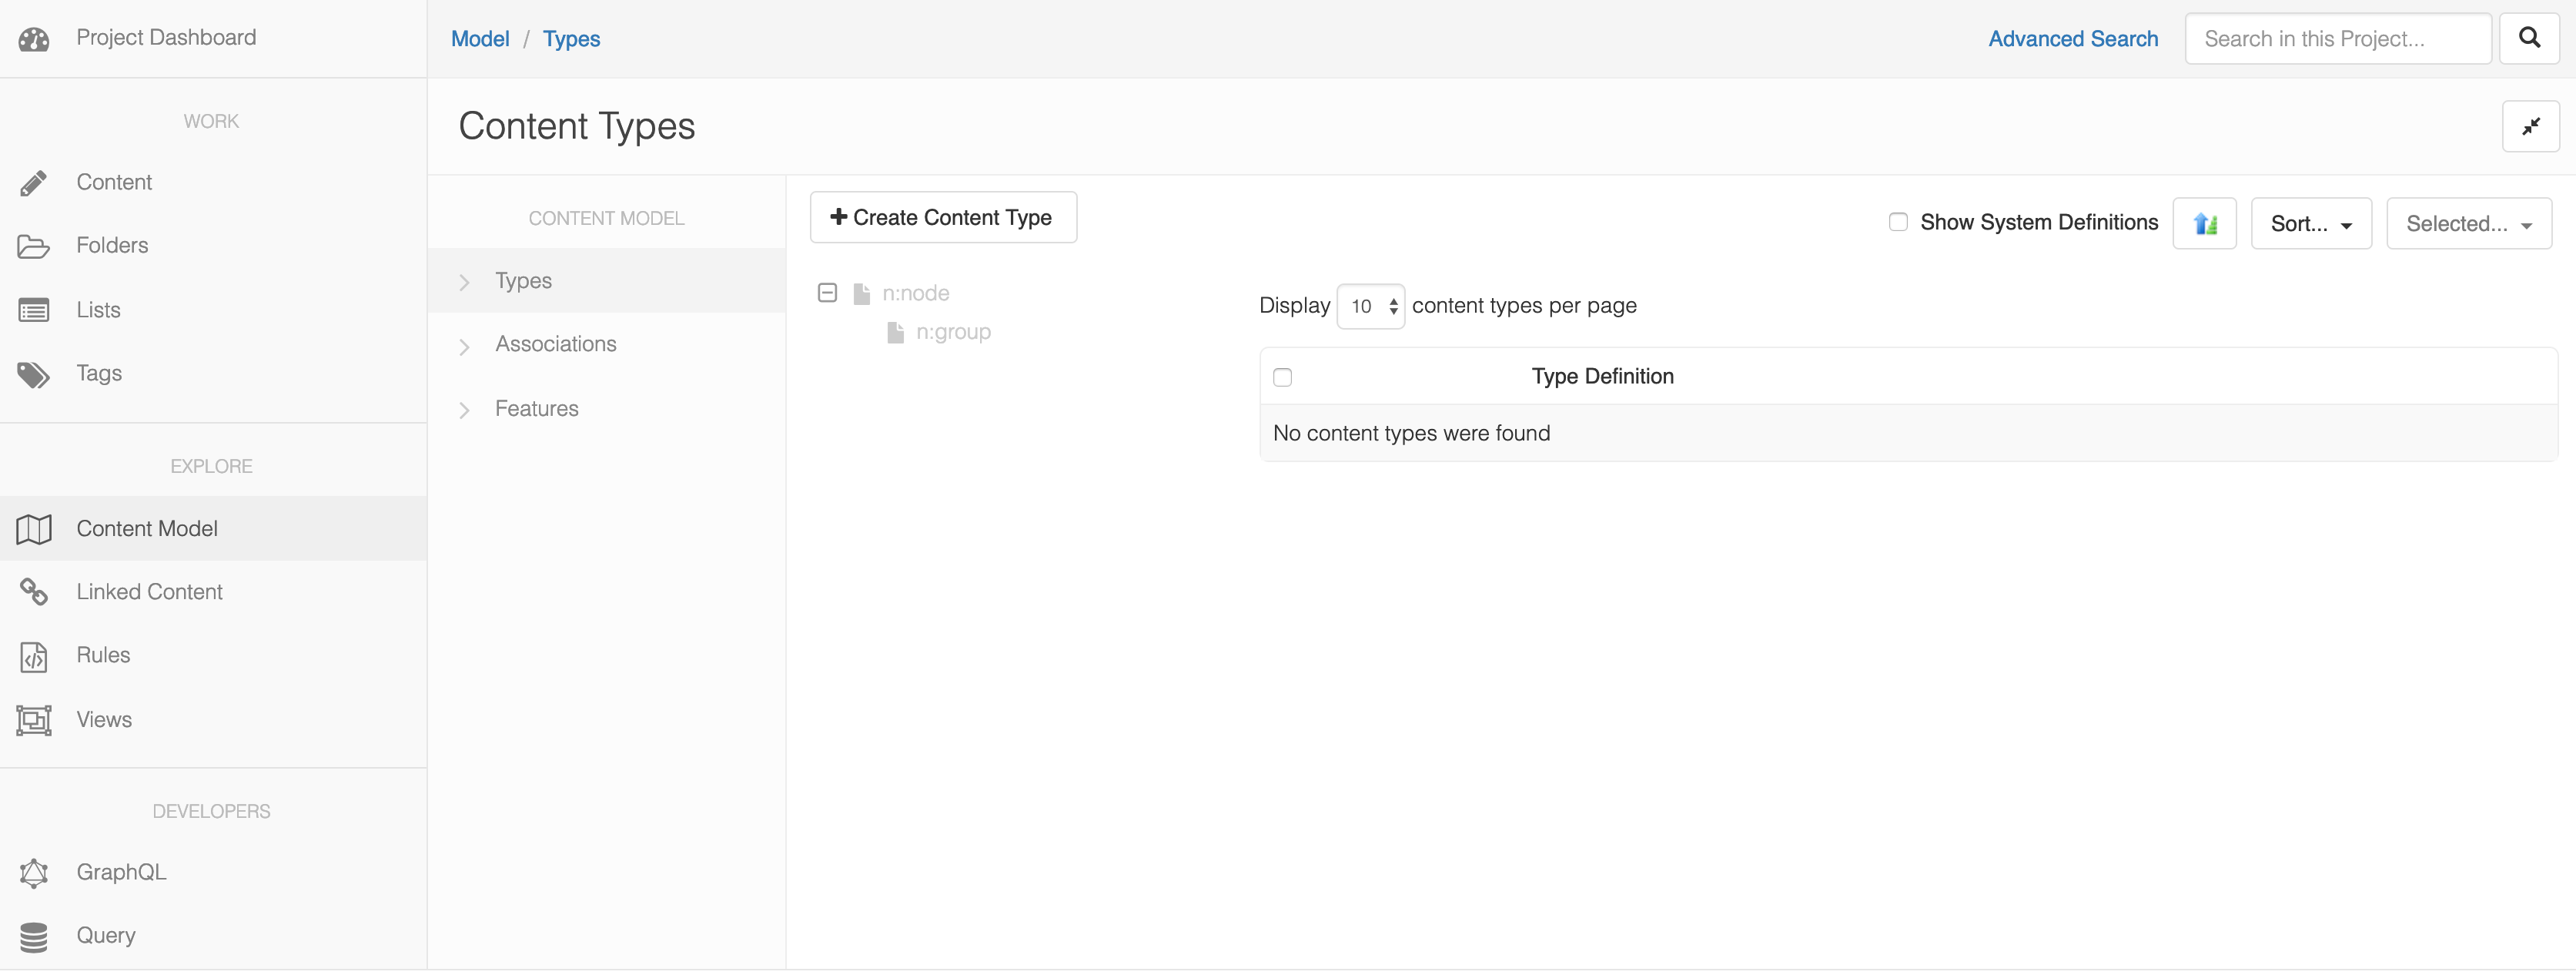
Click on Content Model on the left-hand menu
This will take you to a list of your Content Types.
-
Create a New Content Type
Let's create an Article Content Type with some interesting properties.
Click on the Create Content Type button
This will bring up a dialog where you can provide some details about your content type.
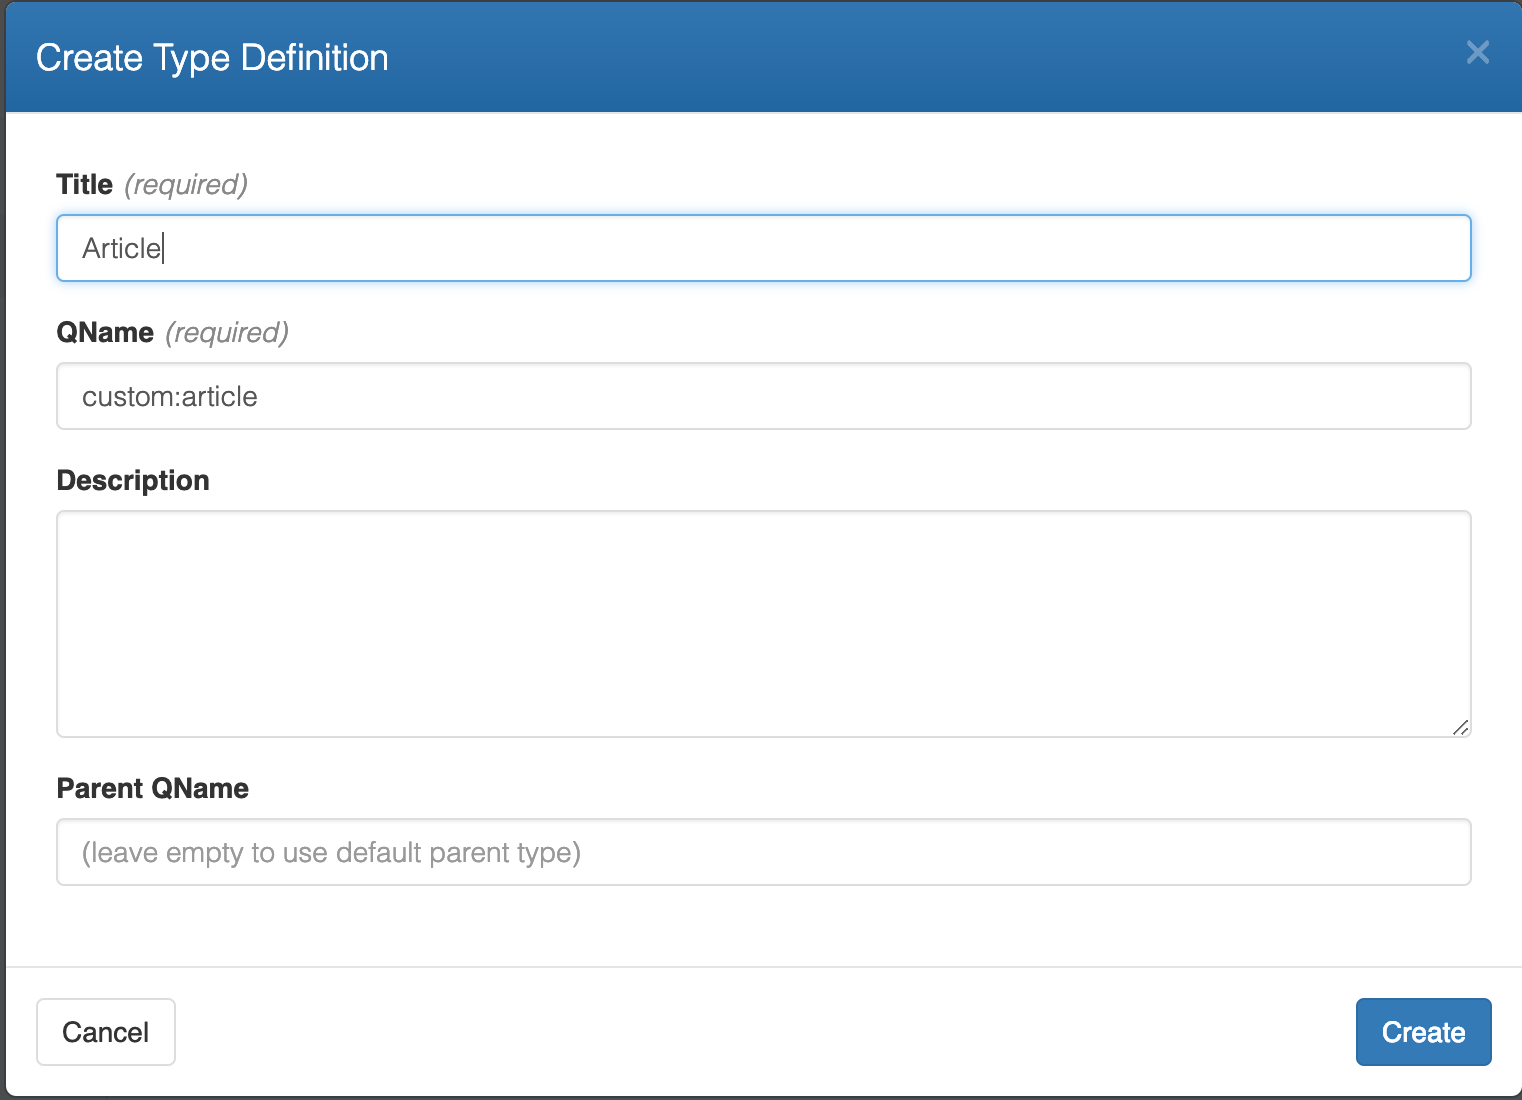
Fill in the form like this:
- Title: Article
- QName: custom:article
And then Click Create
Your Content Type will be created. You will then be taken to define its properties.
-
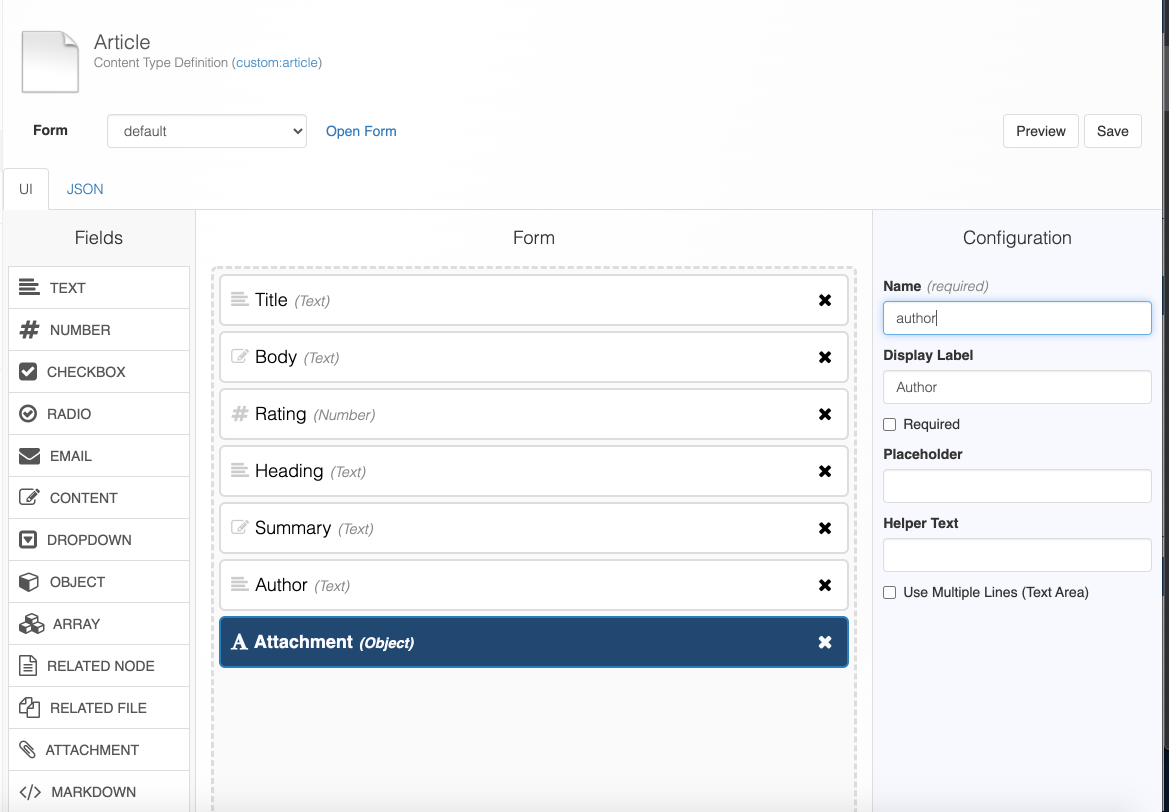
Add Properties to your Content Type
Drag properties from the left-hand side into the Article properties.
Drag Content into the Content Type
- Set the field name to
body - Set the label to
Body
Drag Number into the Content Type
- Set in the Configuration for the field
- Set the field name to
rating - Set the label to
Rating - Set
minimumto0 - Set
maximumto5
Drag Text into the Content Type
- Set the field name to
heading - Set the label to
Heading
Drag Content into the Content Type
- Set the field name to
summary - Set the label to
Summary
Drag Text into the Content Type
- Set the field name to
author - Set the label to
Author
Drag Attachment into the Content Type
- Set the field name to
attachment - Set the label to
Attachment
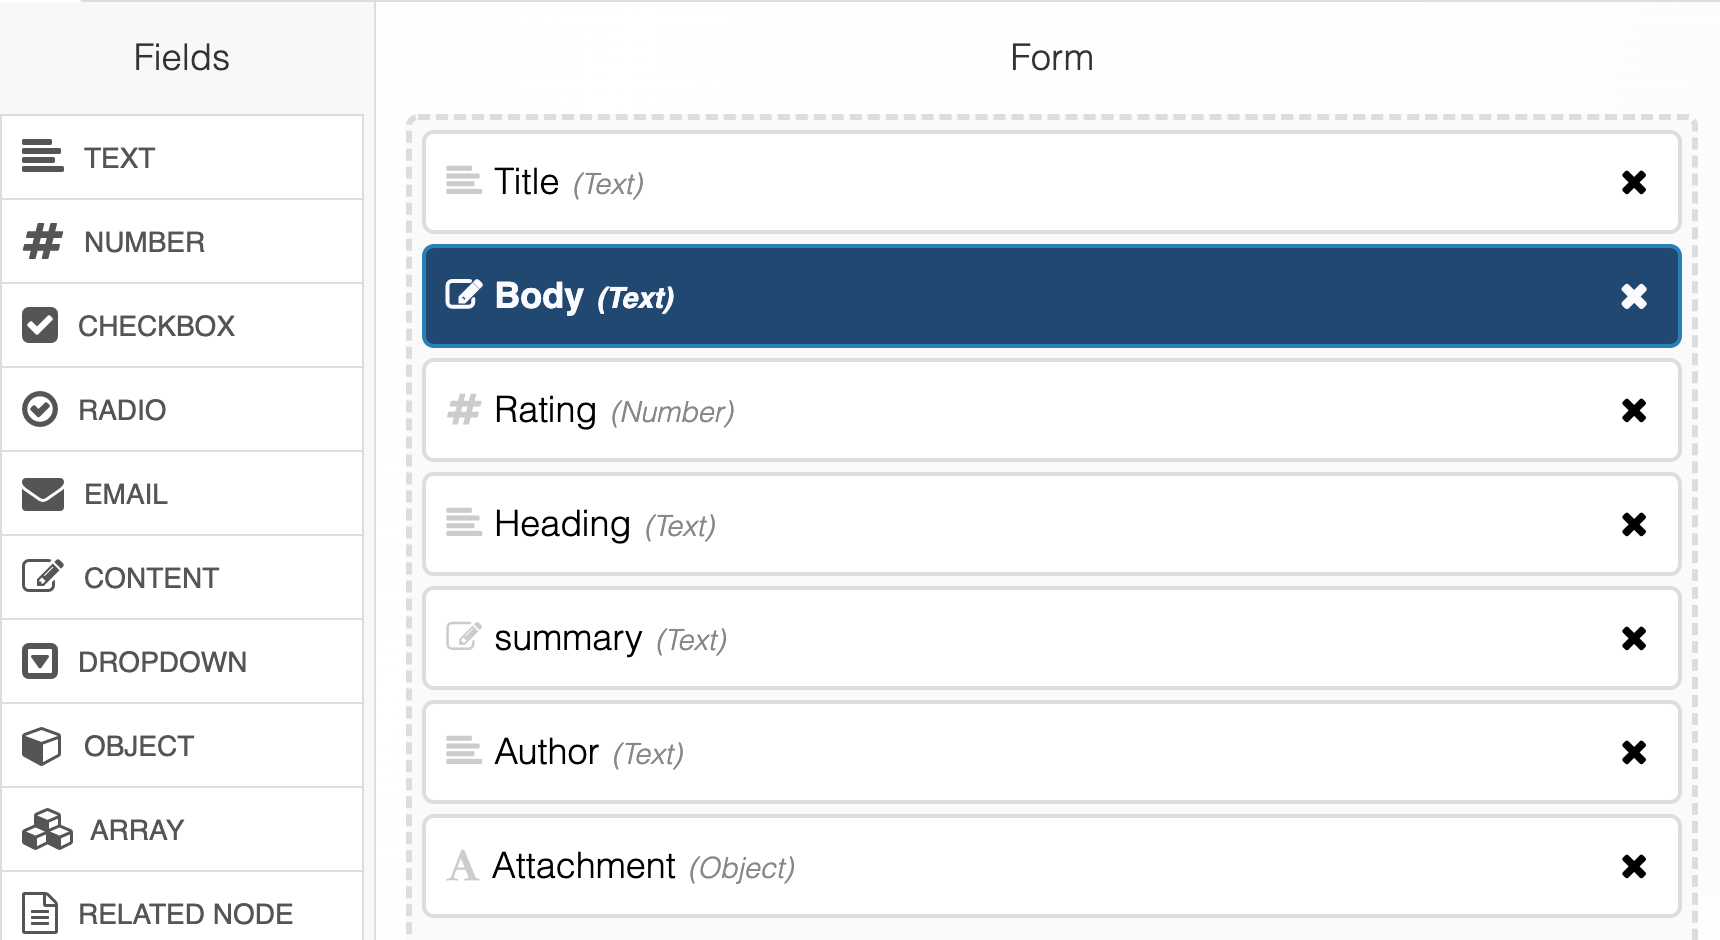
Once you've done all that, your Content Type should look something like this:
- Set the field name to
-
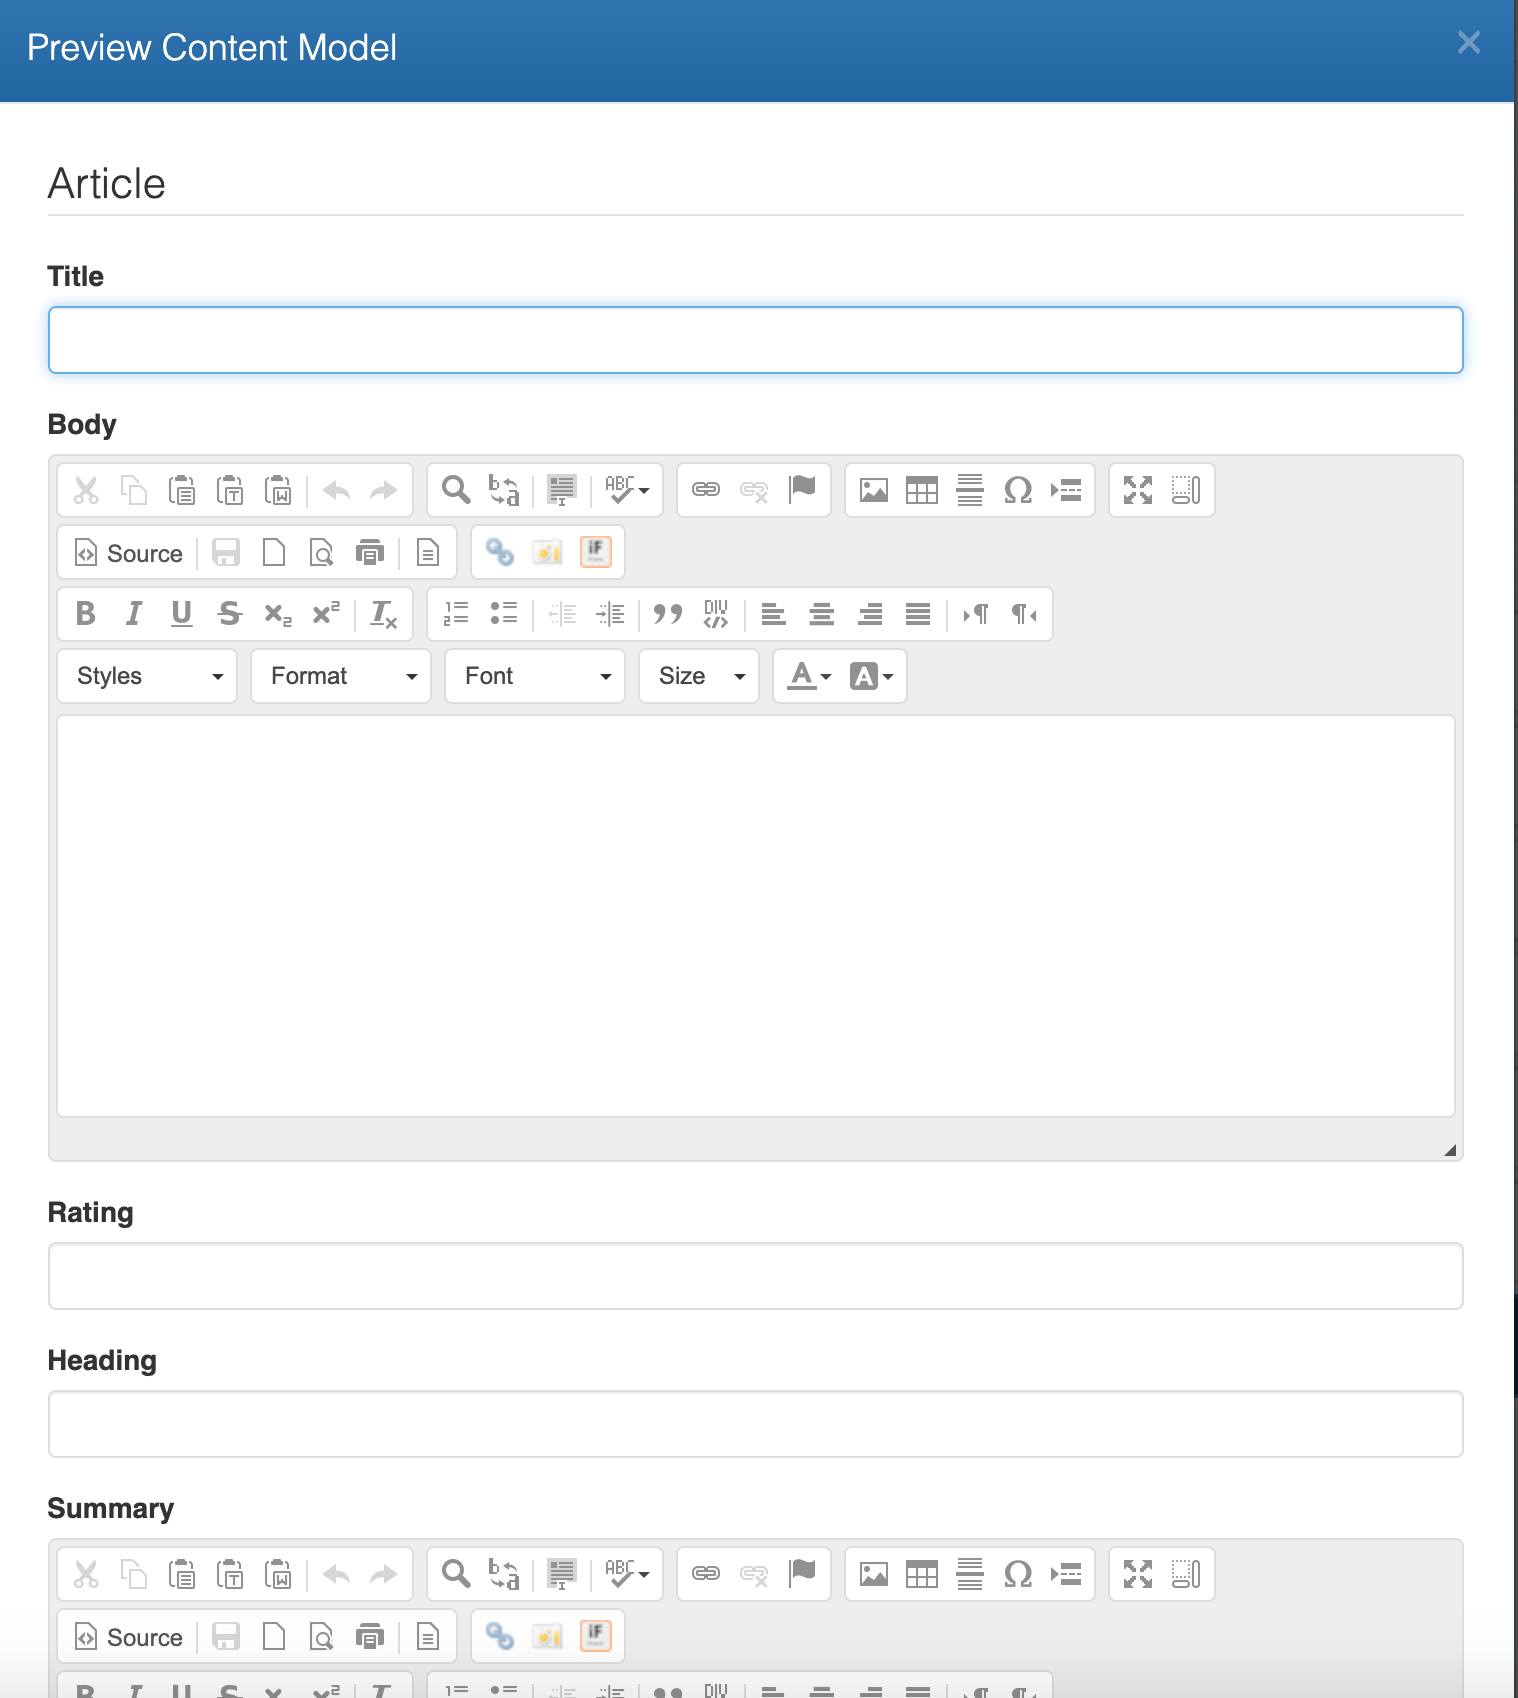
Preview your Editorial Form
Gitana automatically generates a content entry form for your editorial team based on your Content Type.
Click on Preview to view the Form
-
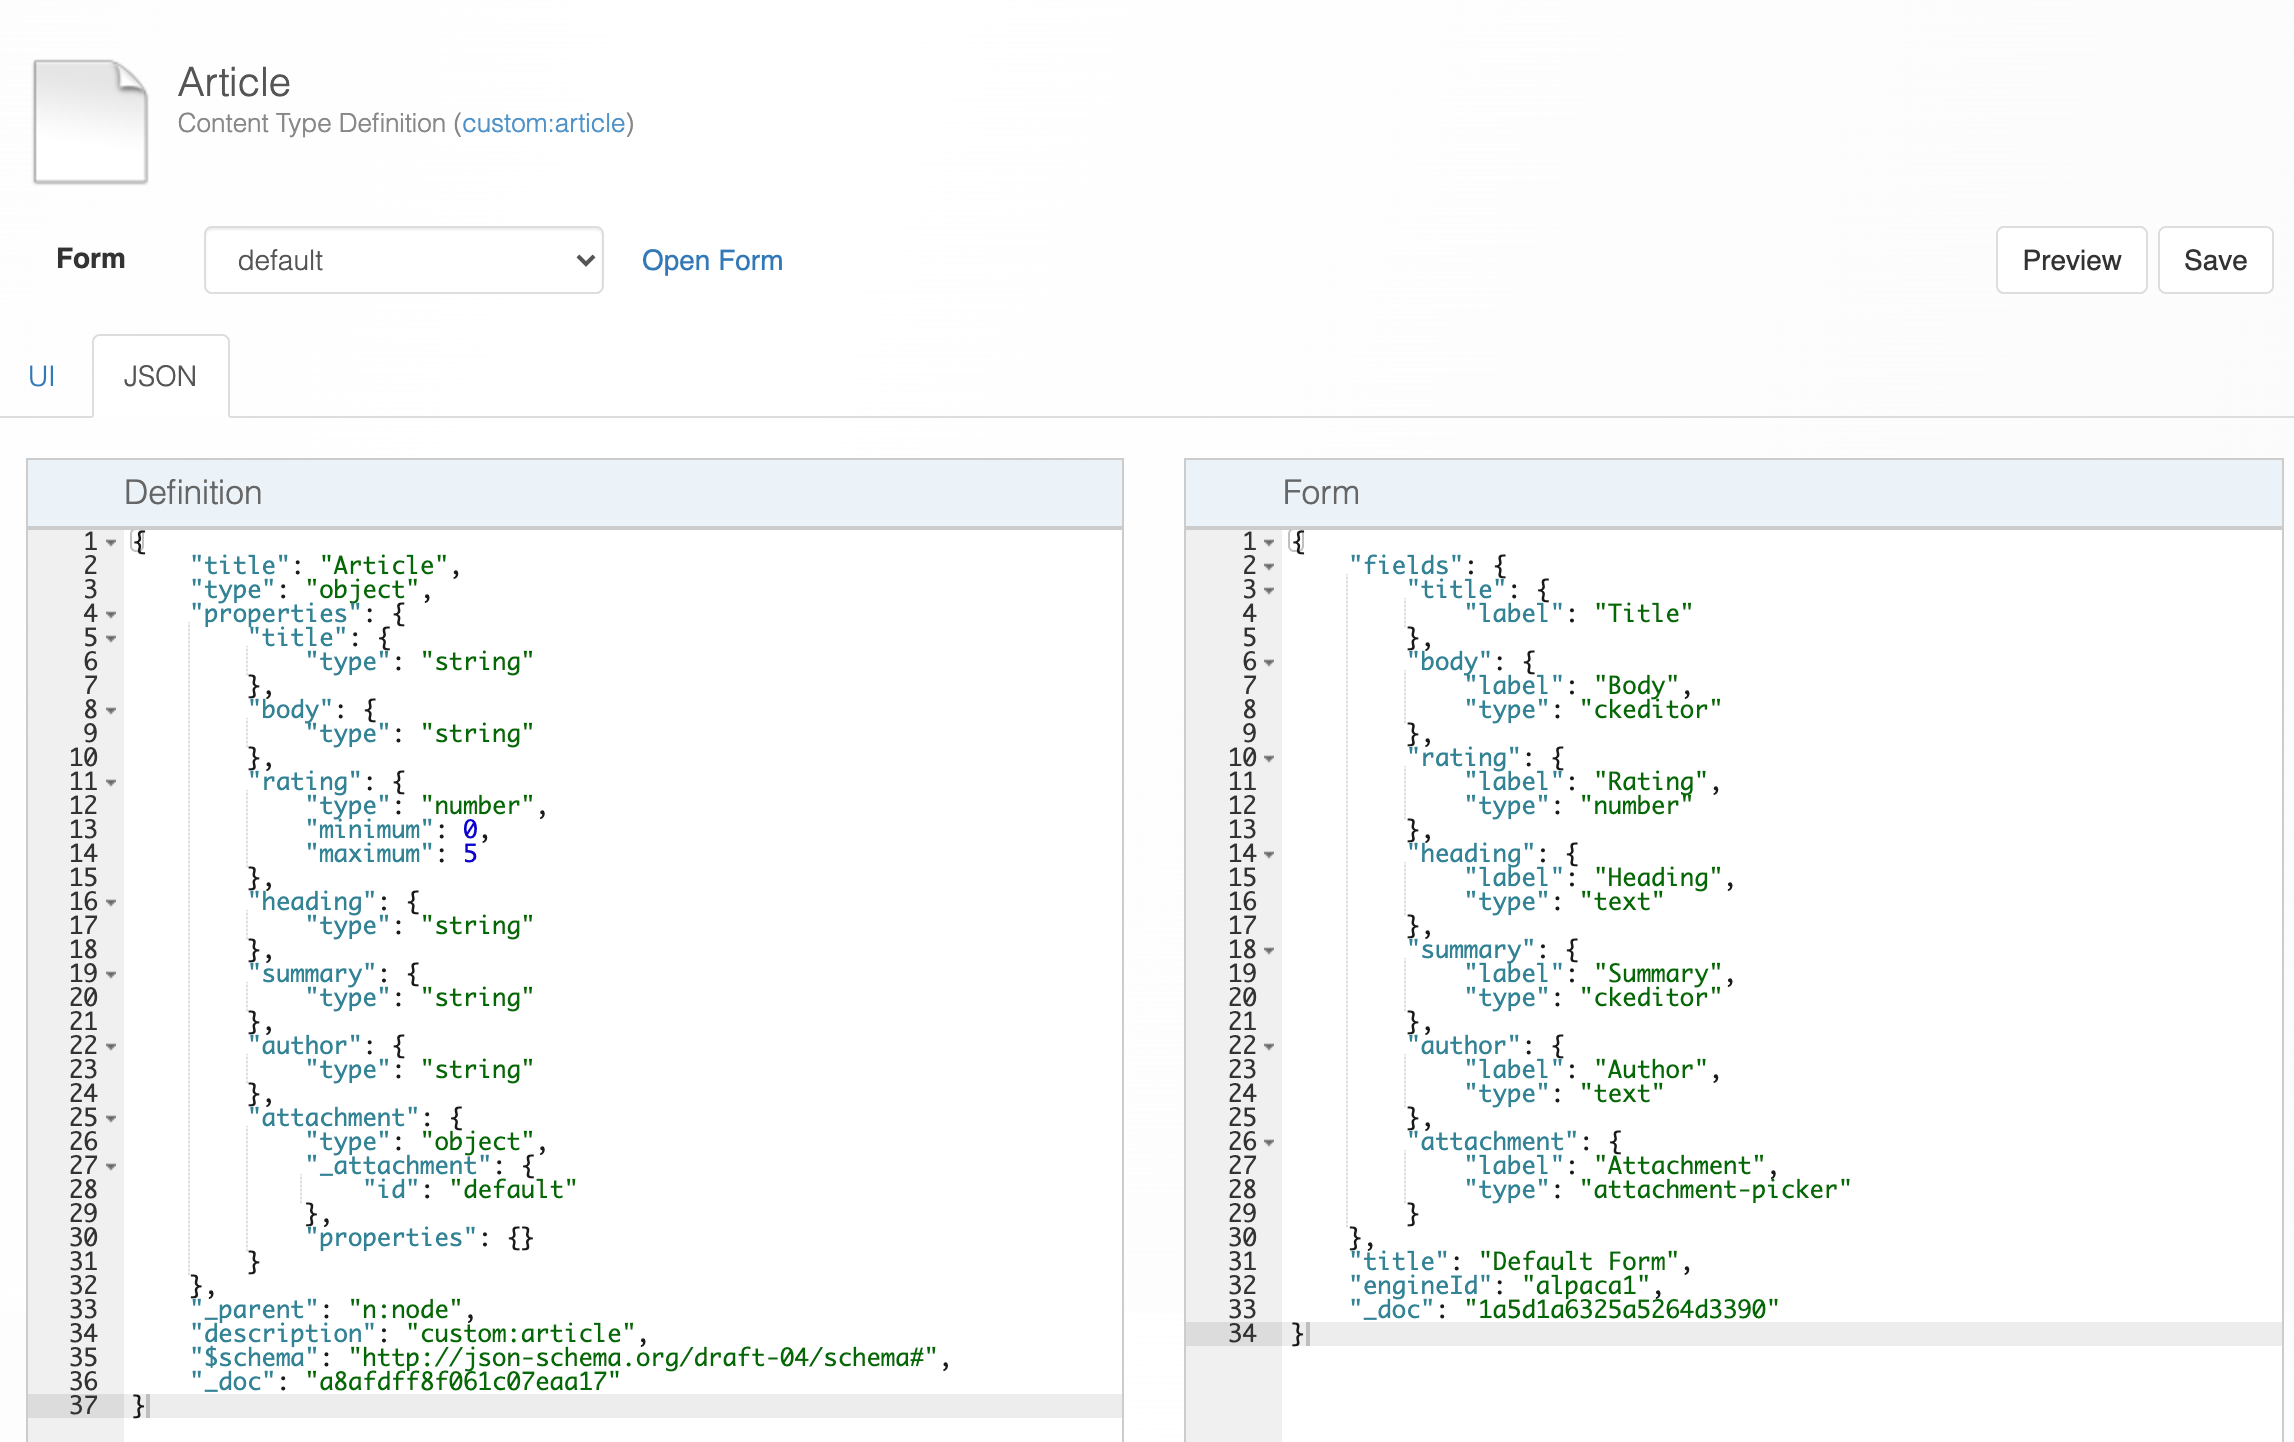
View the JSON
As you drag-and-drop and configure your Content Type visually, Gitana generates JSON Schema and an Editorial Form under the hood, which developers can further extend. You can see this JSON at any time.
Click on the JSON tab to see the inner workings
-
Save your Content Type
Click on Save

Way to go!
You have successfully defined your first Content Type in Gitana.
With this new Content Type, you are now ready to begin creating Content.


Create Content
In the previous section, you defined an Article content type.
Now let's create some Articles!
-
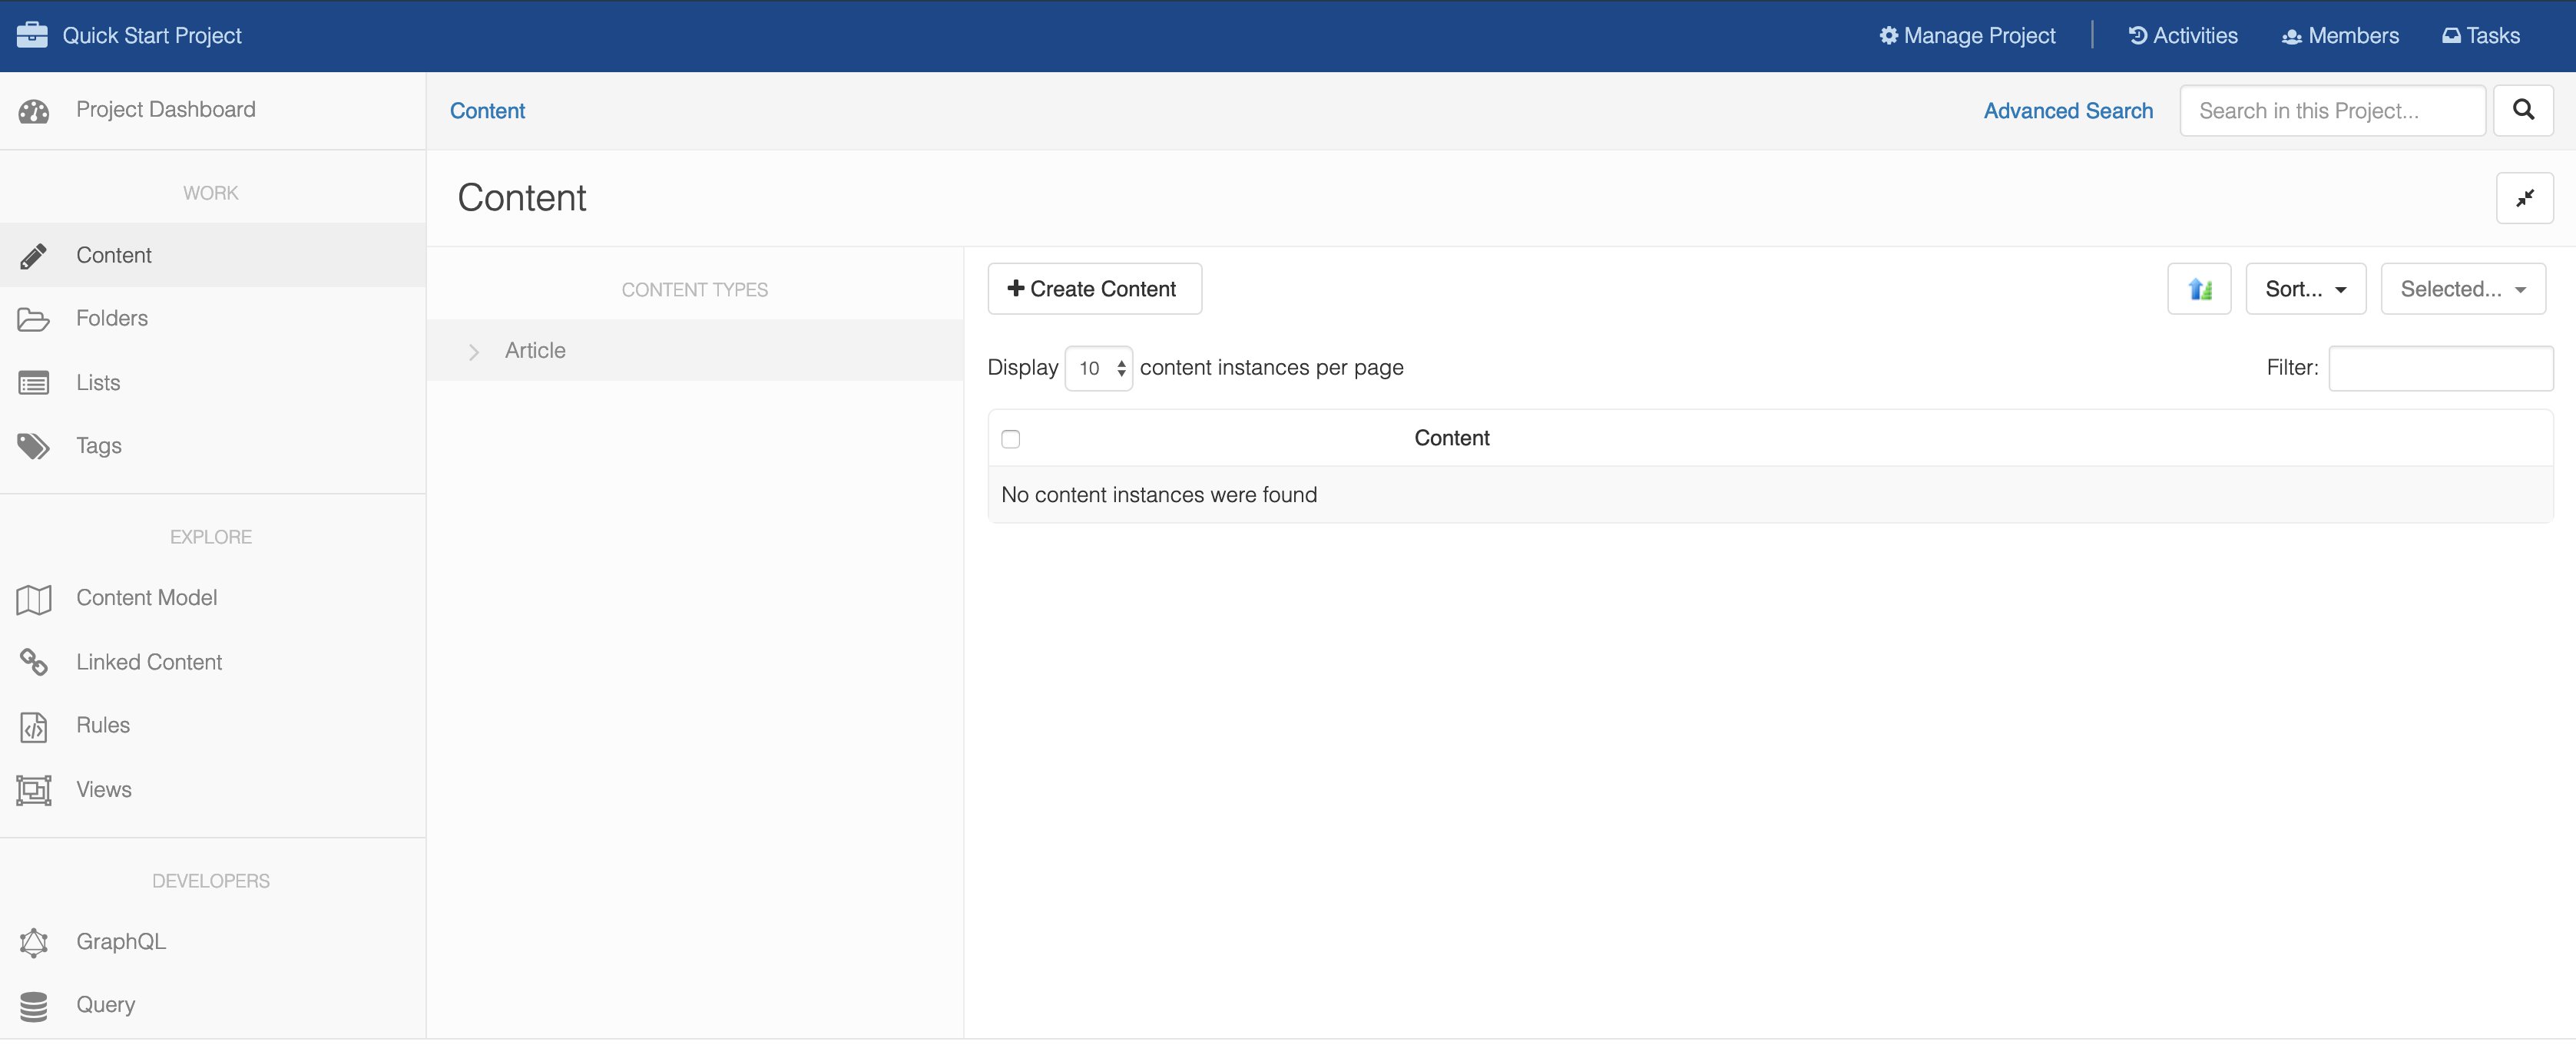
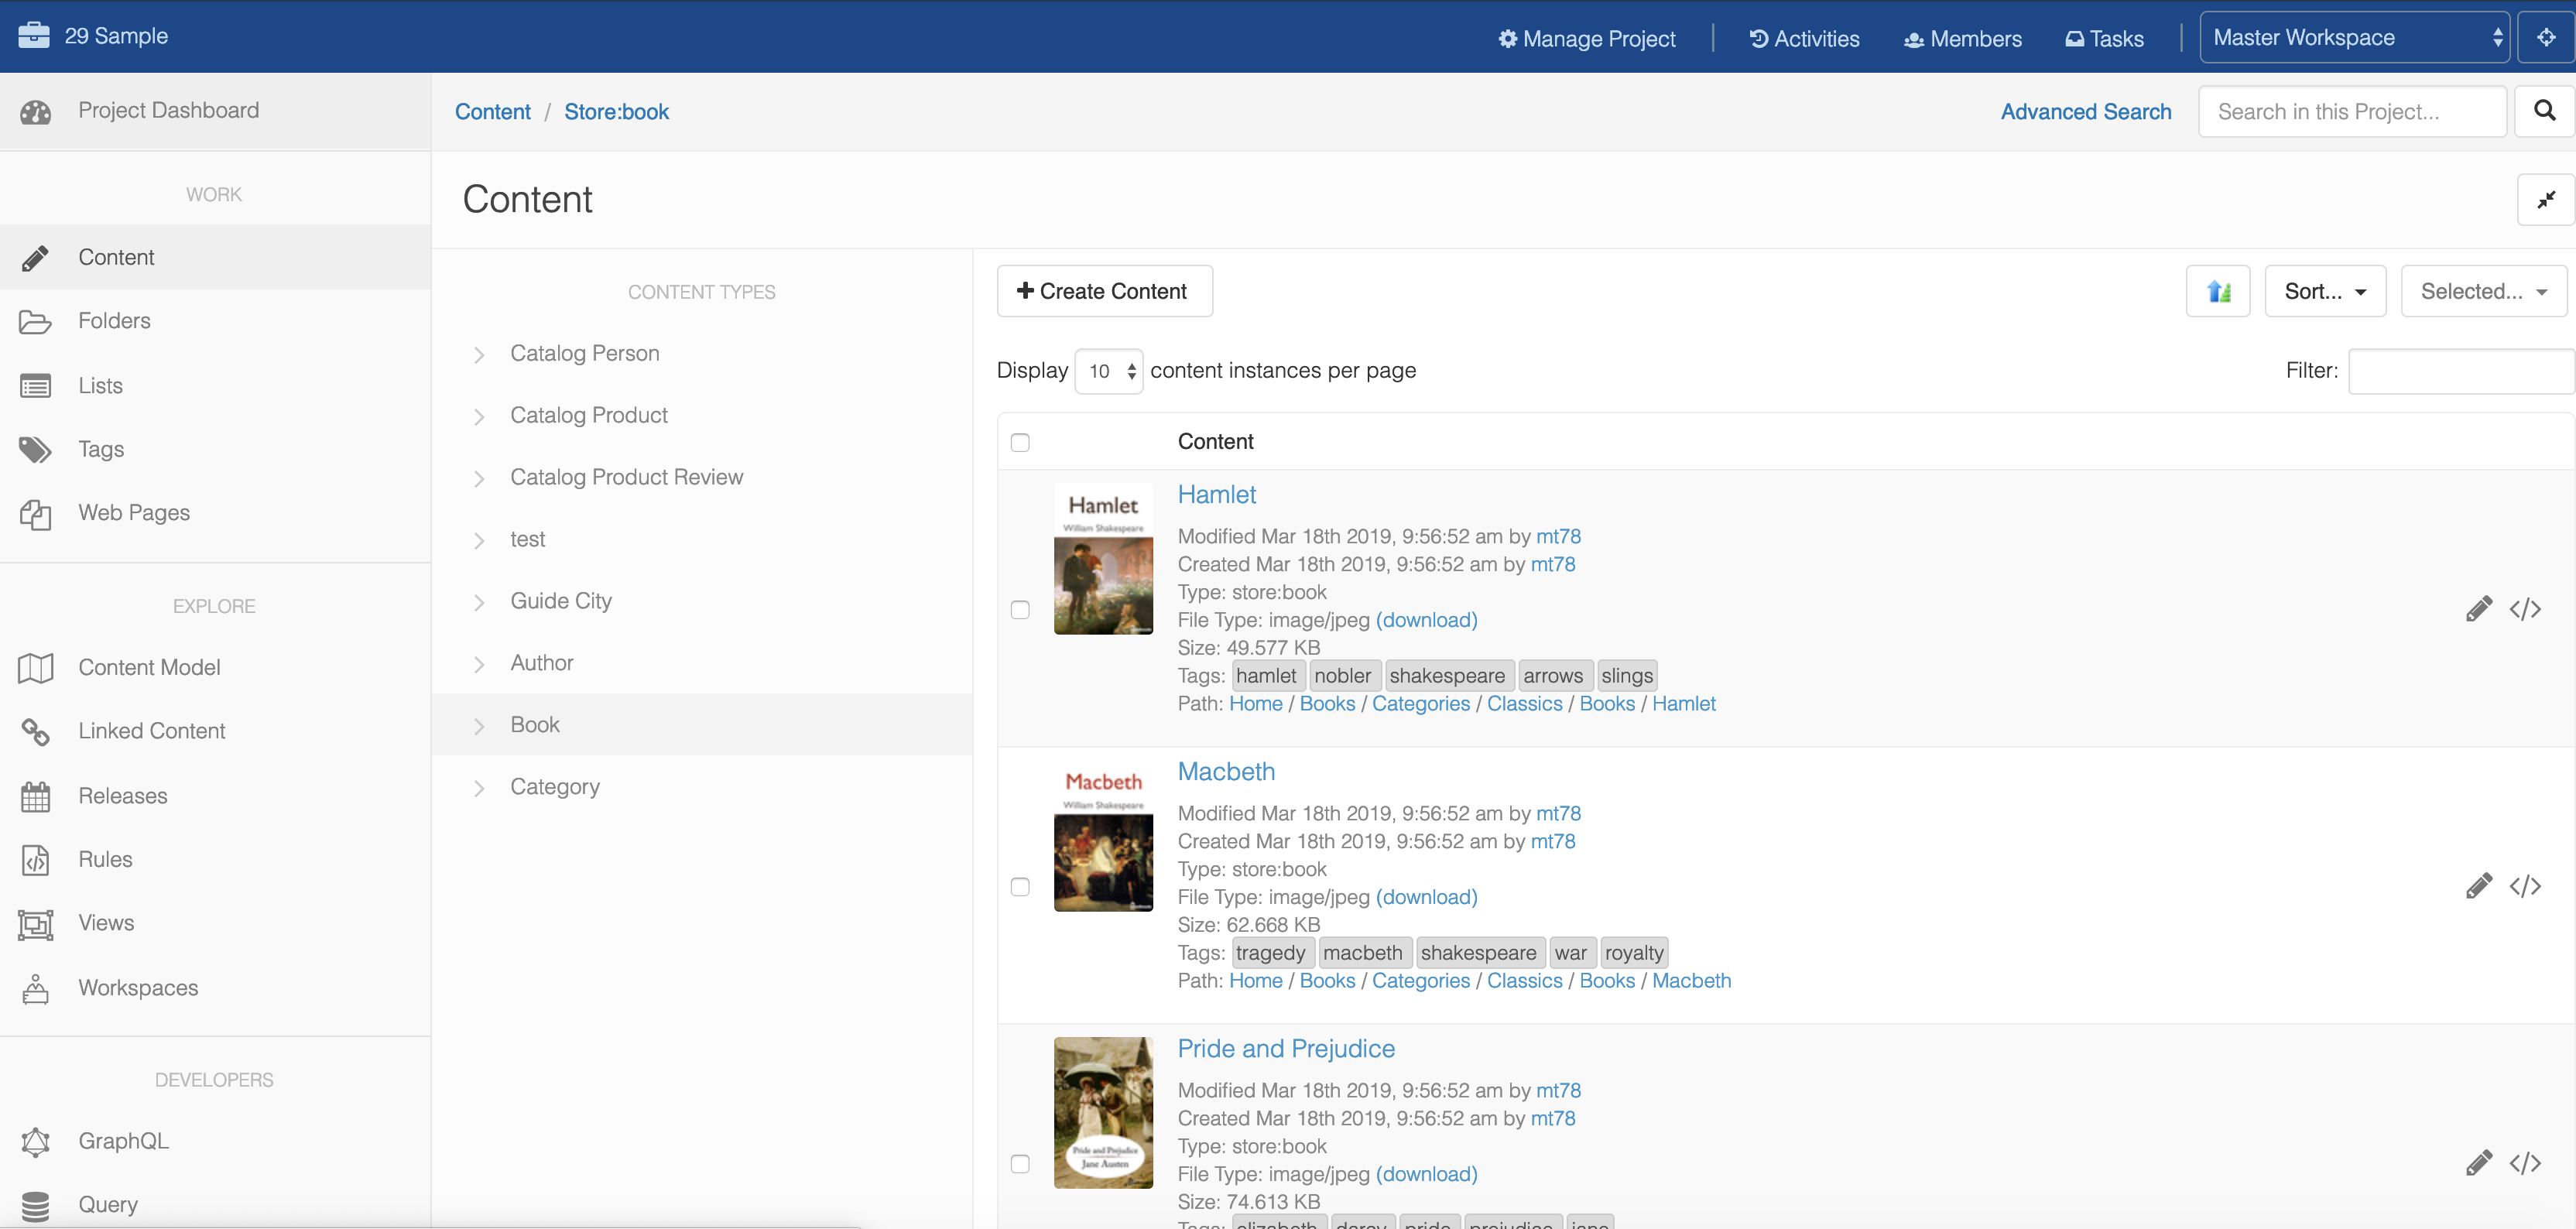
View your Content
The Content page is on the left-hand menu.
This will show your content types and all content instances you've created.
Click on the Content menu option on the left-hand side
This will bring you to the Content page.
-
Select Article
If you have multiple Content Types defined, they'll show up on the left-hand side.
In this case, we want to work with Articles.
Click on Article on the left-hand side
-
Create an Article
We will now create an article using the content-entry Form that was auto-generated when we defined our Content Type.
Click on the Create Content button
This will bring up the Create Content Wizard. The Wizard provides the Form for content entry.
-
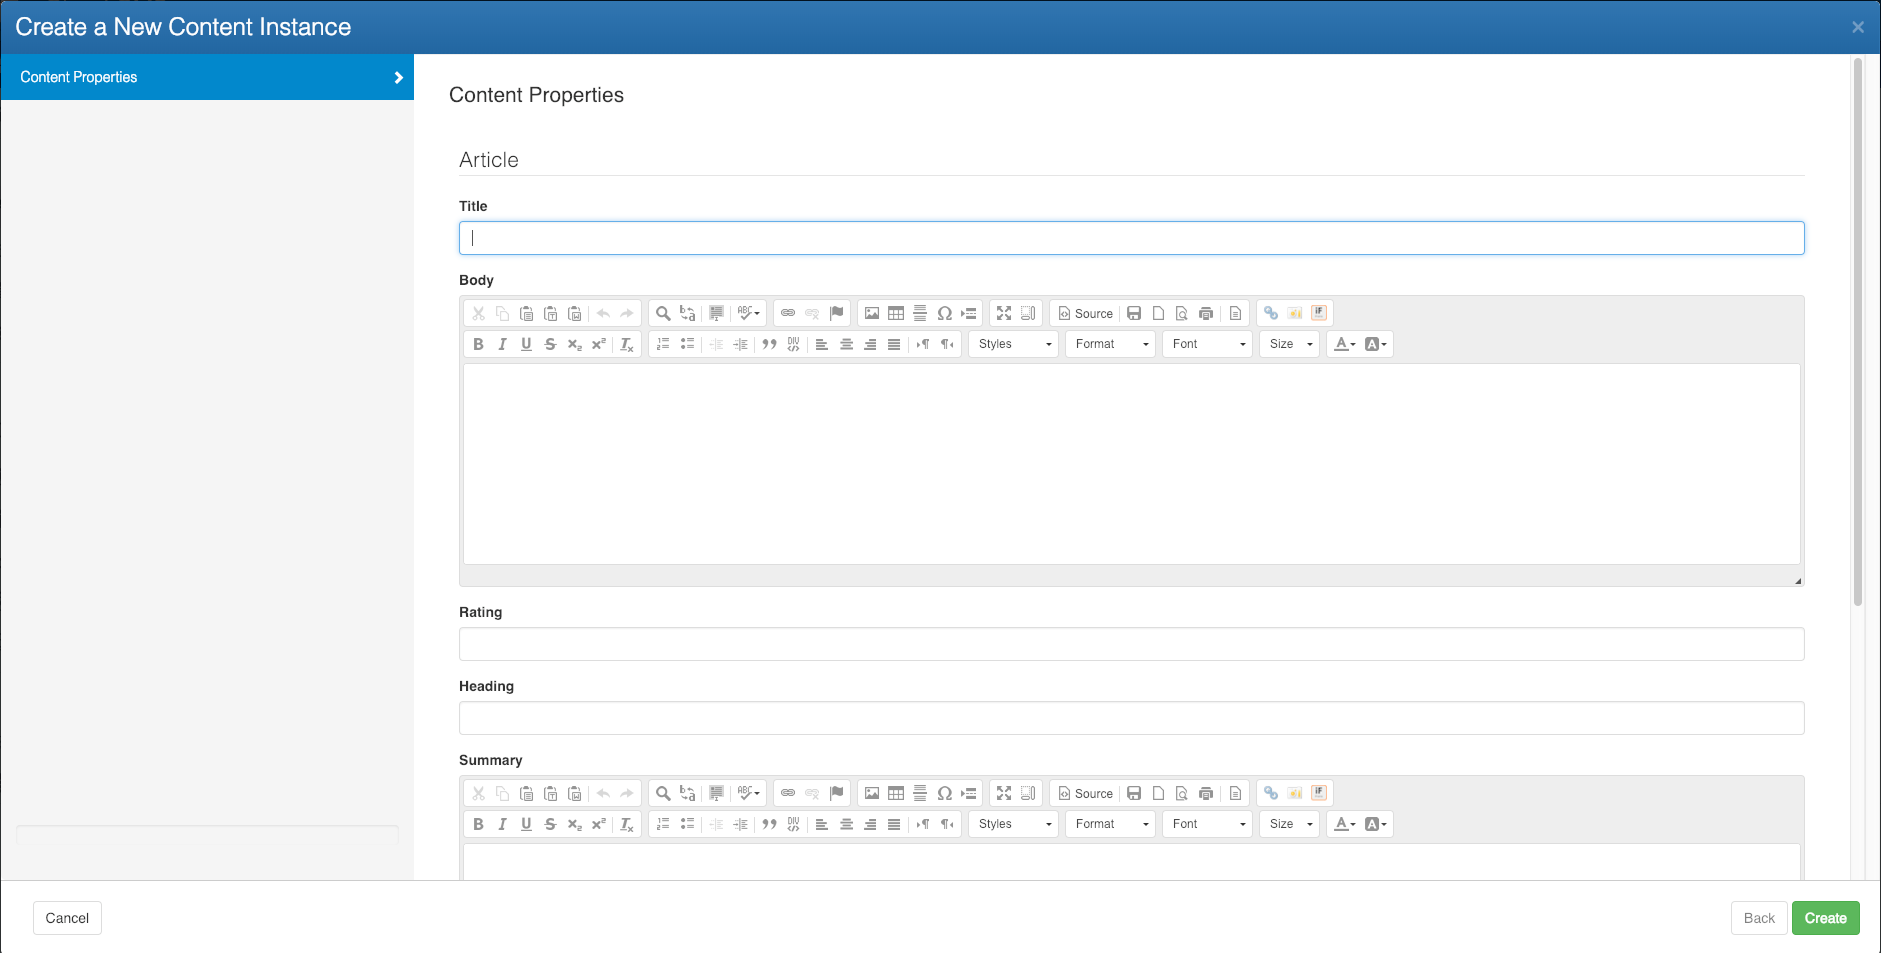
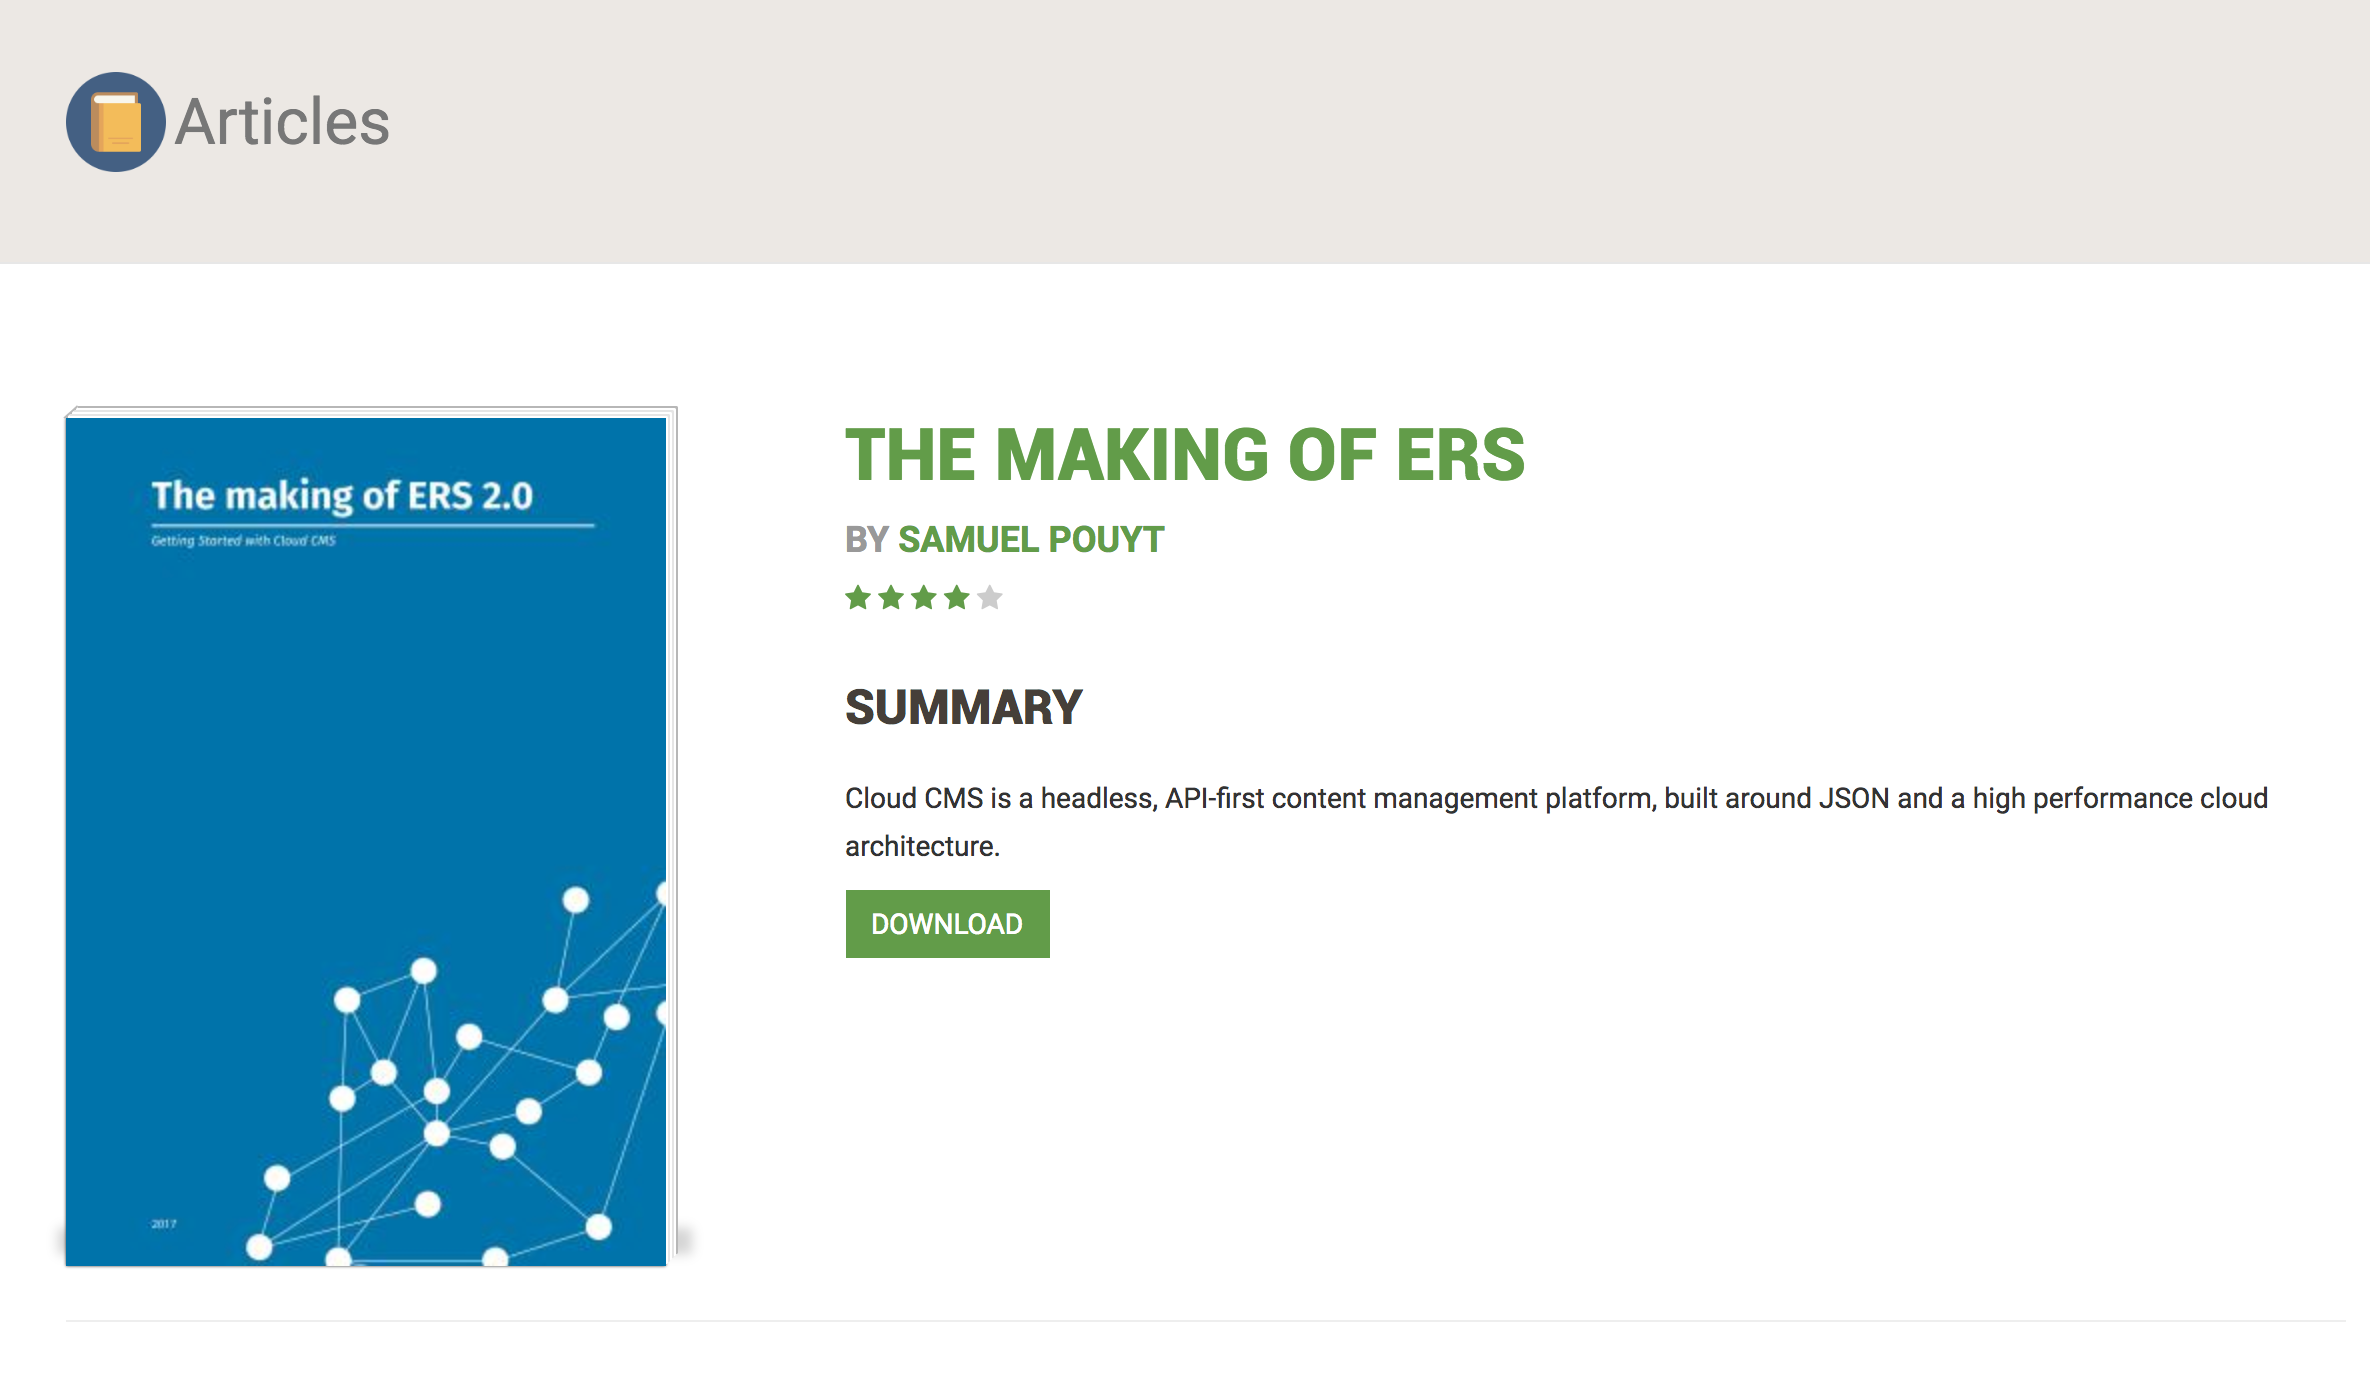
Fill out the Content Entry Form
You can fill in any values you like. It's your content after all!
Here are some suggested values:
Copy and Paste (or Type) the following
- Title: The Making of ERS
- Body: The main idea with the redesign of the ERS website was that we wanted to separate concerns: the de- sign would be distributed from a central point and would have nothing to do with the website imple- mentation, thus we would serve our CSS and JS so that any website could use it and we could update all websites at once.
- Rating: 4
- Heading: Getting Started with Gitana
- Summary: Gitana is a headless, API-first content management platform, built around JSON and a high performance cloud architecture.
- Author: Samuel Pouyt
- Attachment: The_Making_Of_ERS.pdf
When you've done that, your form might look like this:

Click Create
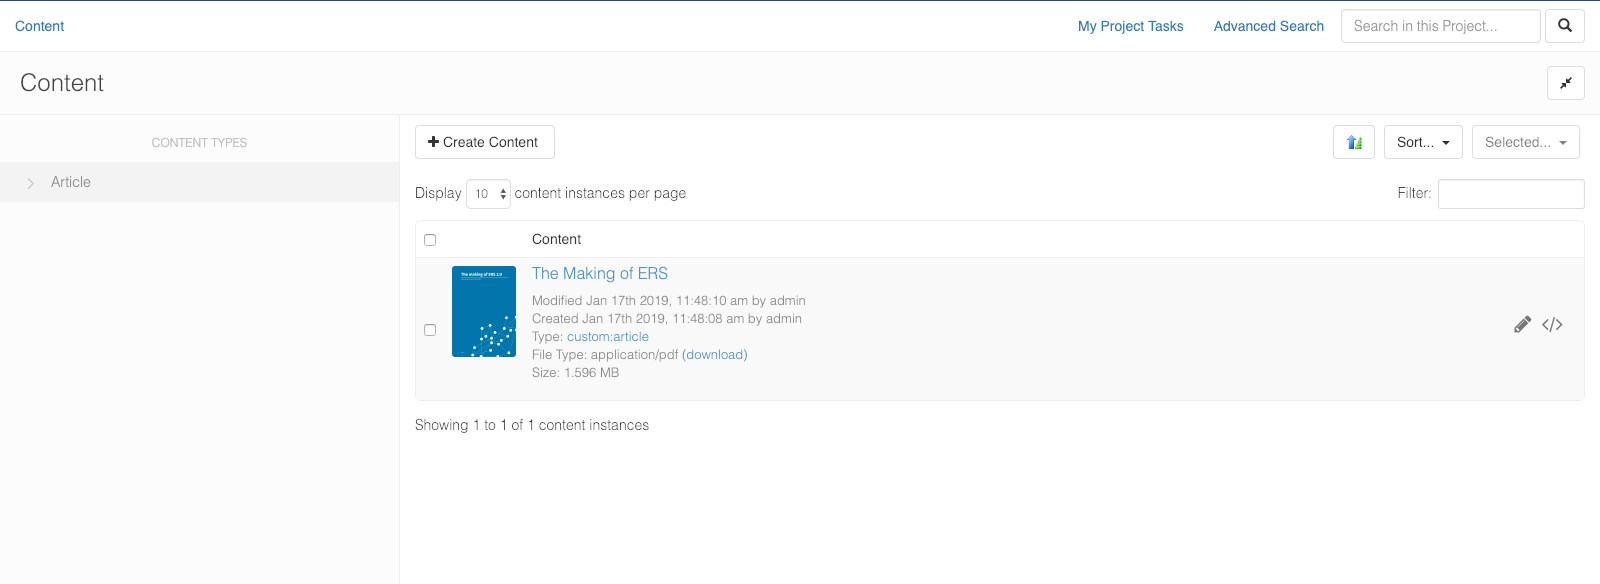
Your changes will be saved and you'll be taken back the Content page.
Your new Article will appear in the list.
-
Inspect your Content
Now that you've uploaded an attachment, lets explore the content a bit more.
Click on the Overview subpage.
This will show you an instant preview of your PDF content.
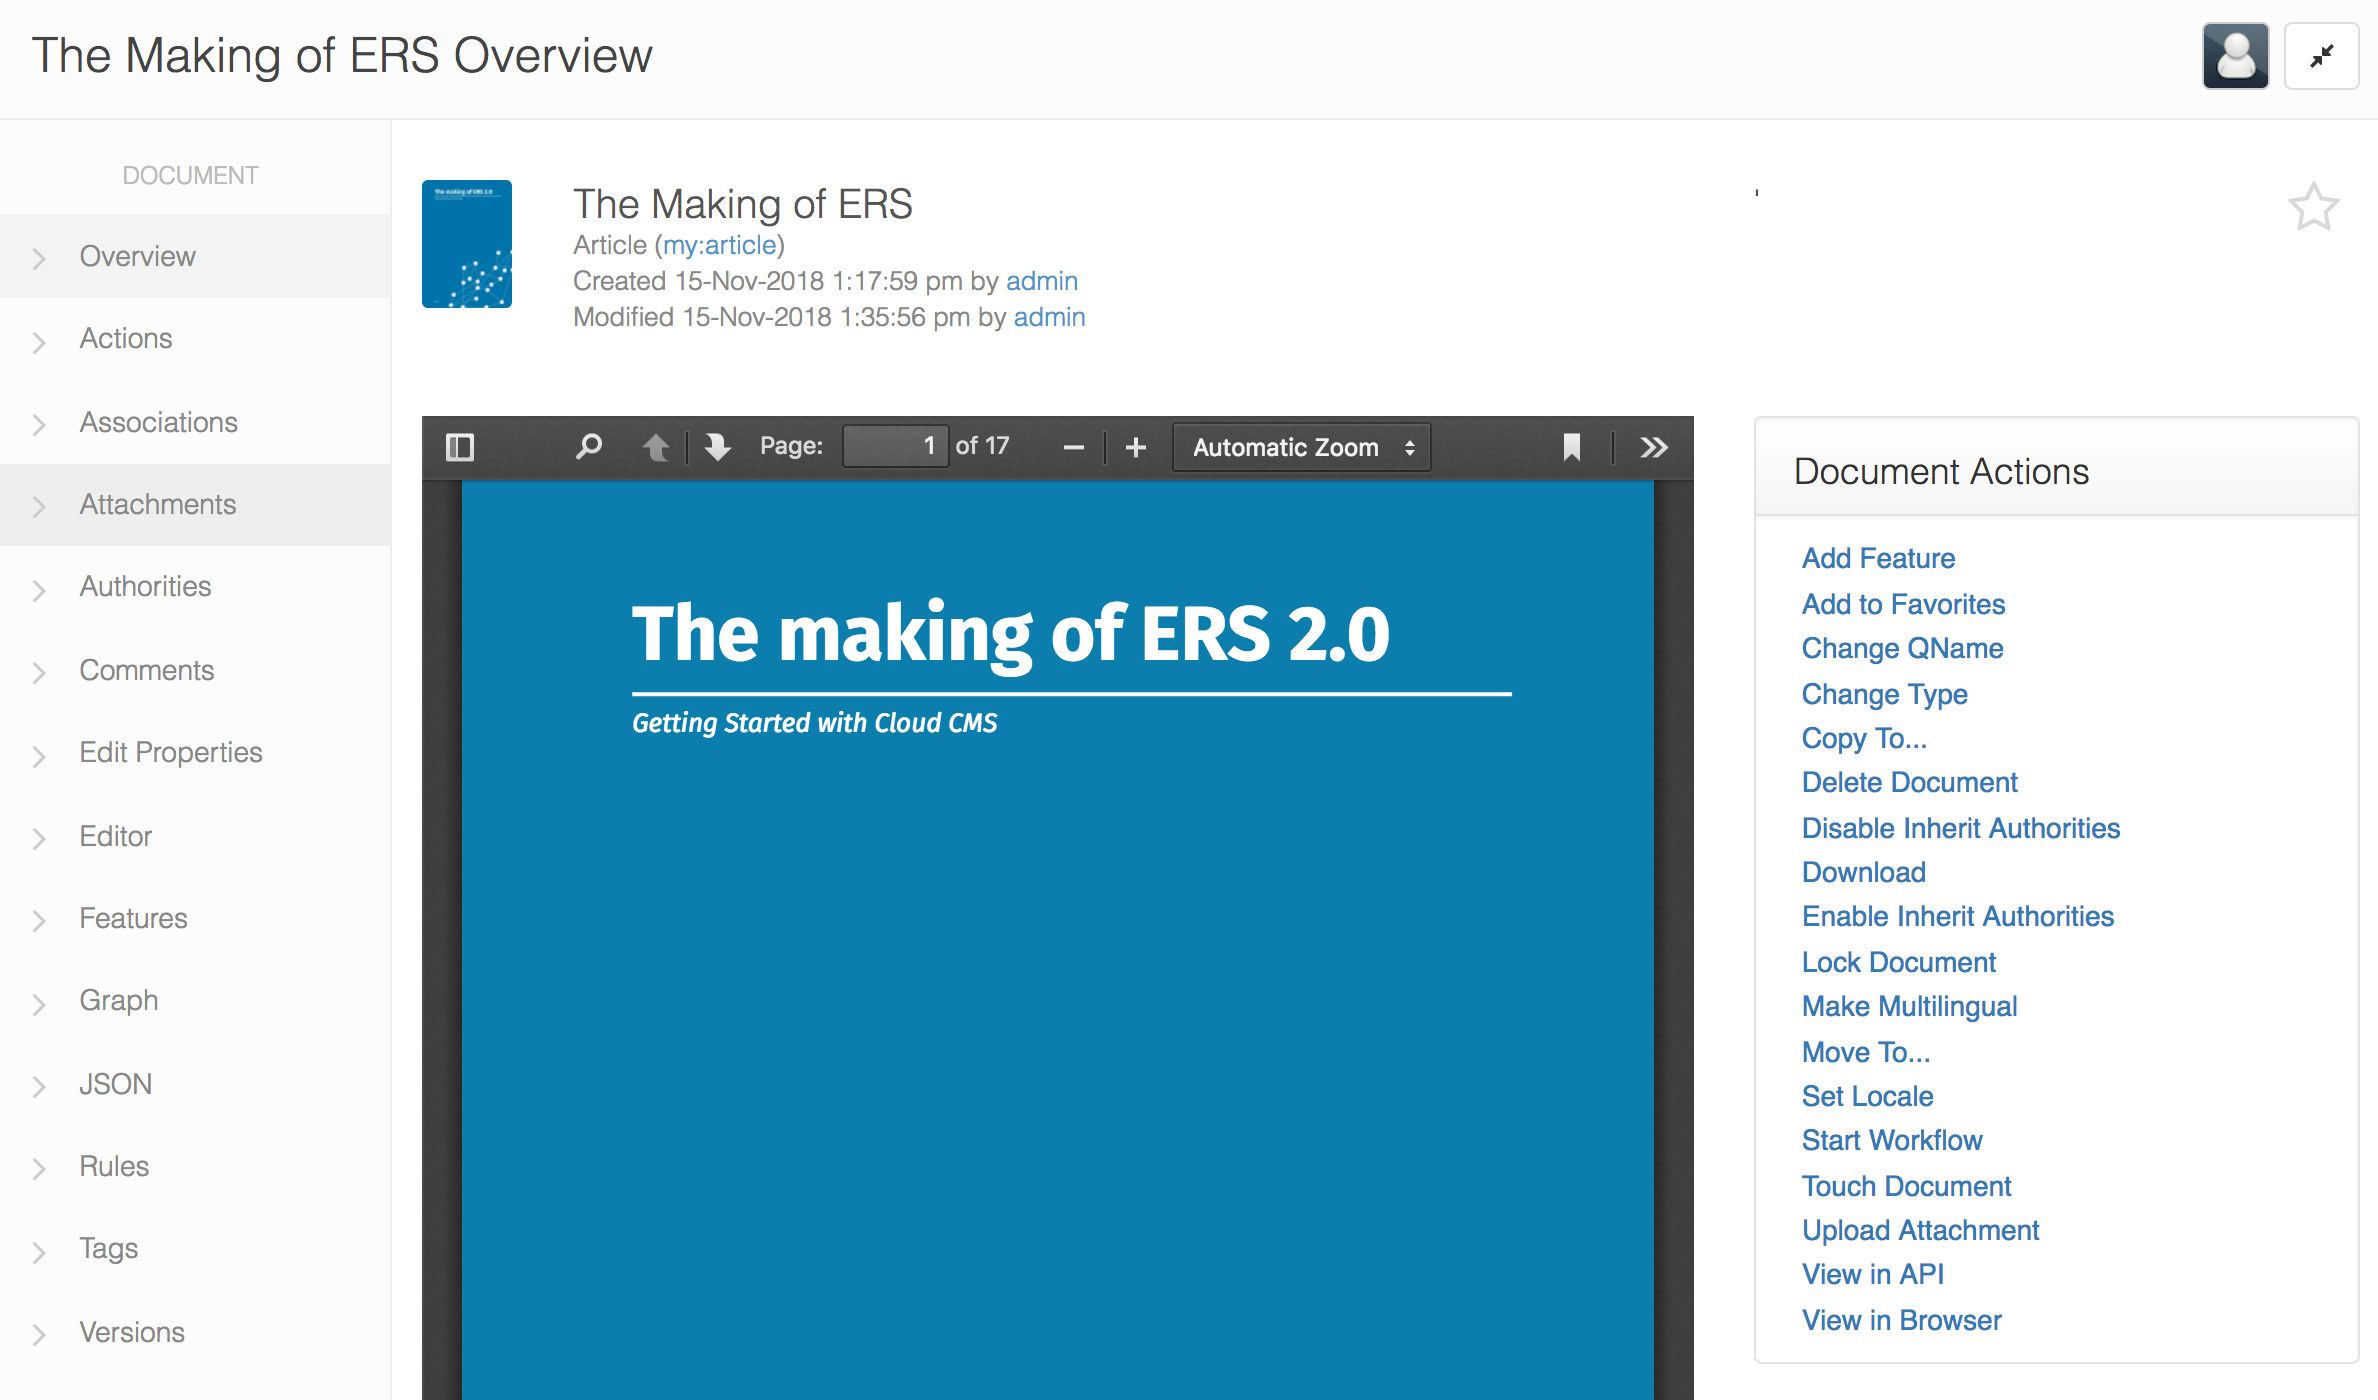
Gitana supports many common desktop and office file types, including PDF, Office and a wide variety of audio, video and image formats.
You rock!
You have successfully created your first Content Instance.
Now let's see it in a sample app.


Run your Sample App
Now that you have some content created, let see how to build an app that displays it.
-
View the Quick Start App
The Help menu provides a few options to help you view your Quick Start app.
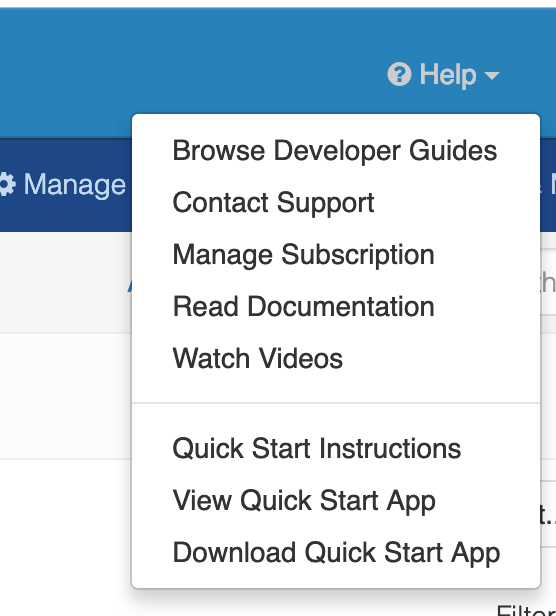
Click on View Quickstart App
This will bring up a new window that runs your sample app.
You should see your content show up and look more or less like this:
This application is a very simple HTML/JS application. You can view the source to see how it works.
This should give you a starter idea of how things work.
Looking to build something in Java, Node.js, C# or another language? Check out our SDK for examples.
-
Download Quickstart App
This will download a ZIP file containing your sample app so that you can run it locally.
To learn more about how it works, please take a look at the sample app's README file.


What to do Next
Explore the Sample Site
Each Trial comes with a Sample Site that includes sample content, forms, workflows and more.
Feel free to explore a bit and have some fun. There's a lot in there.
The Sample Project is often used as a starting point for extending for purposes of a Proof-of-Concept (POC) or as a way to get a general idea of what Gitana is all about.
-
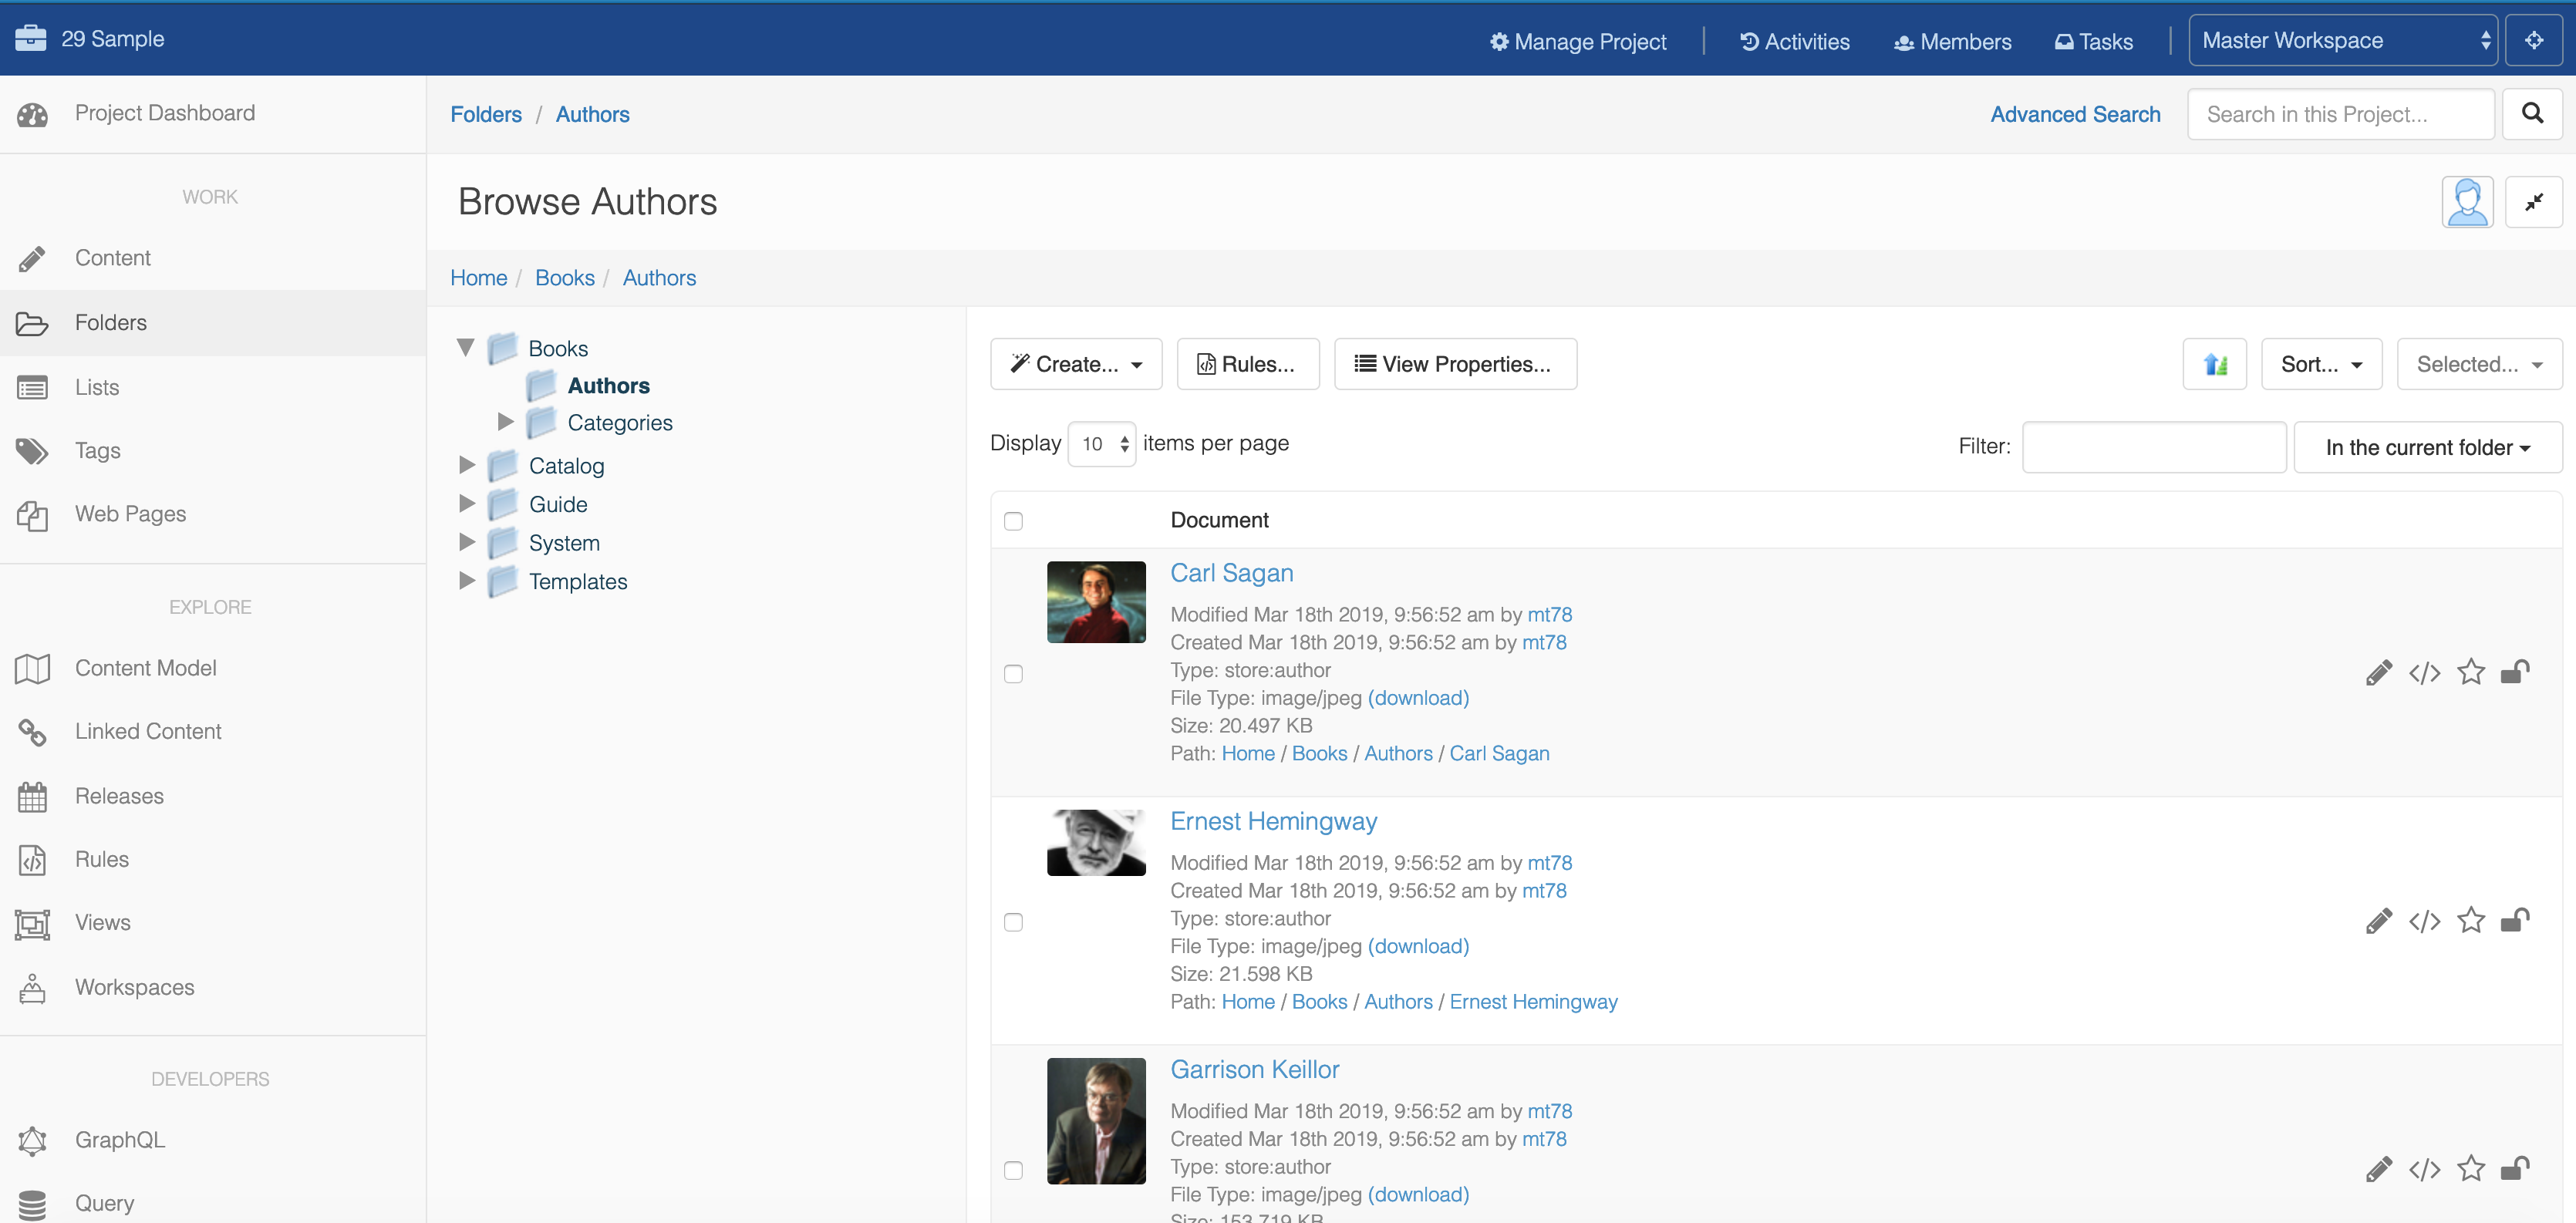
Explore Content by Type
The Sample Project comes pre-populated with a bunch of interesting content types for things like Books, Products, Authors and more.
Use the Content page to navigate your content by type.
-
Navigate using Files and Folders
Use the Folders page to view your content by a folder hierarchy.
You can upload files from your desktop and Gitana will automatically extract content from them, index them for full-text search and provide instant preview so that your editorial team can find things easily in the future.
-
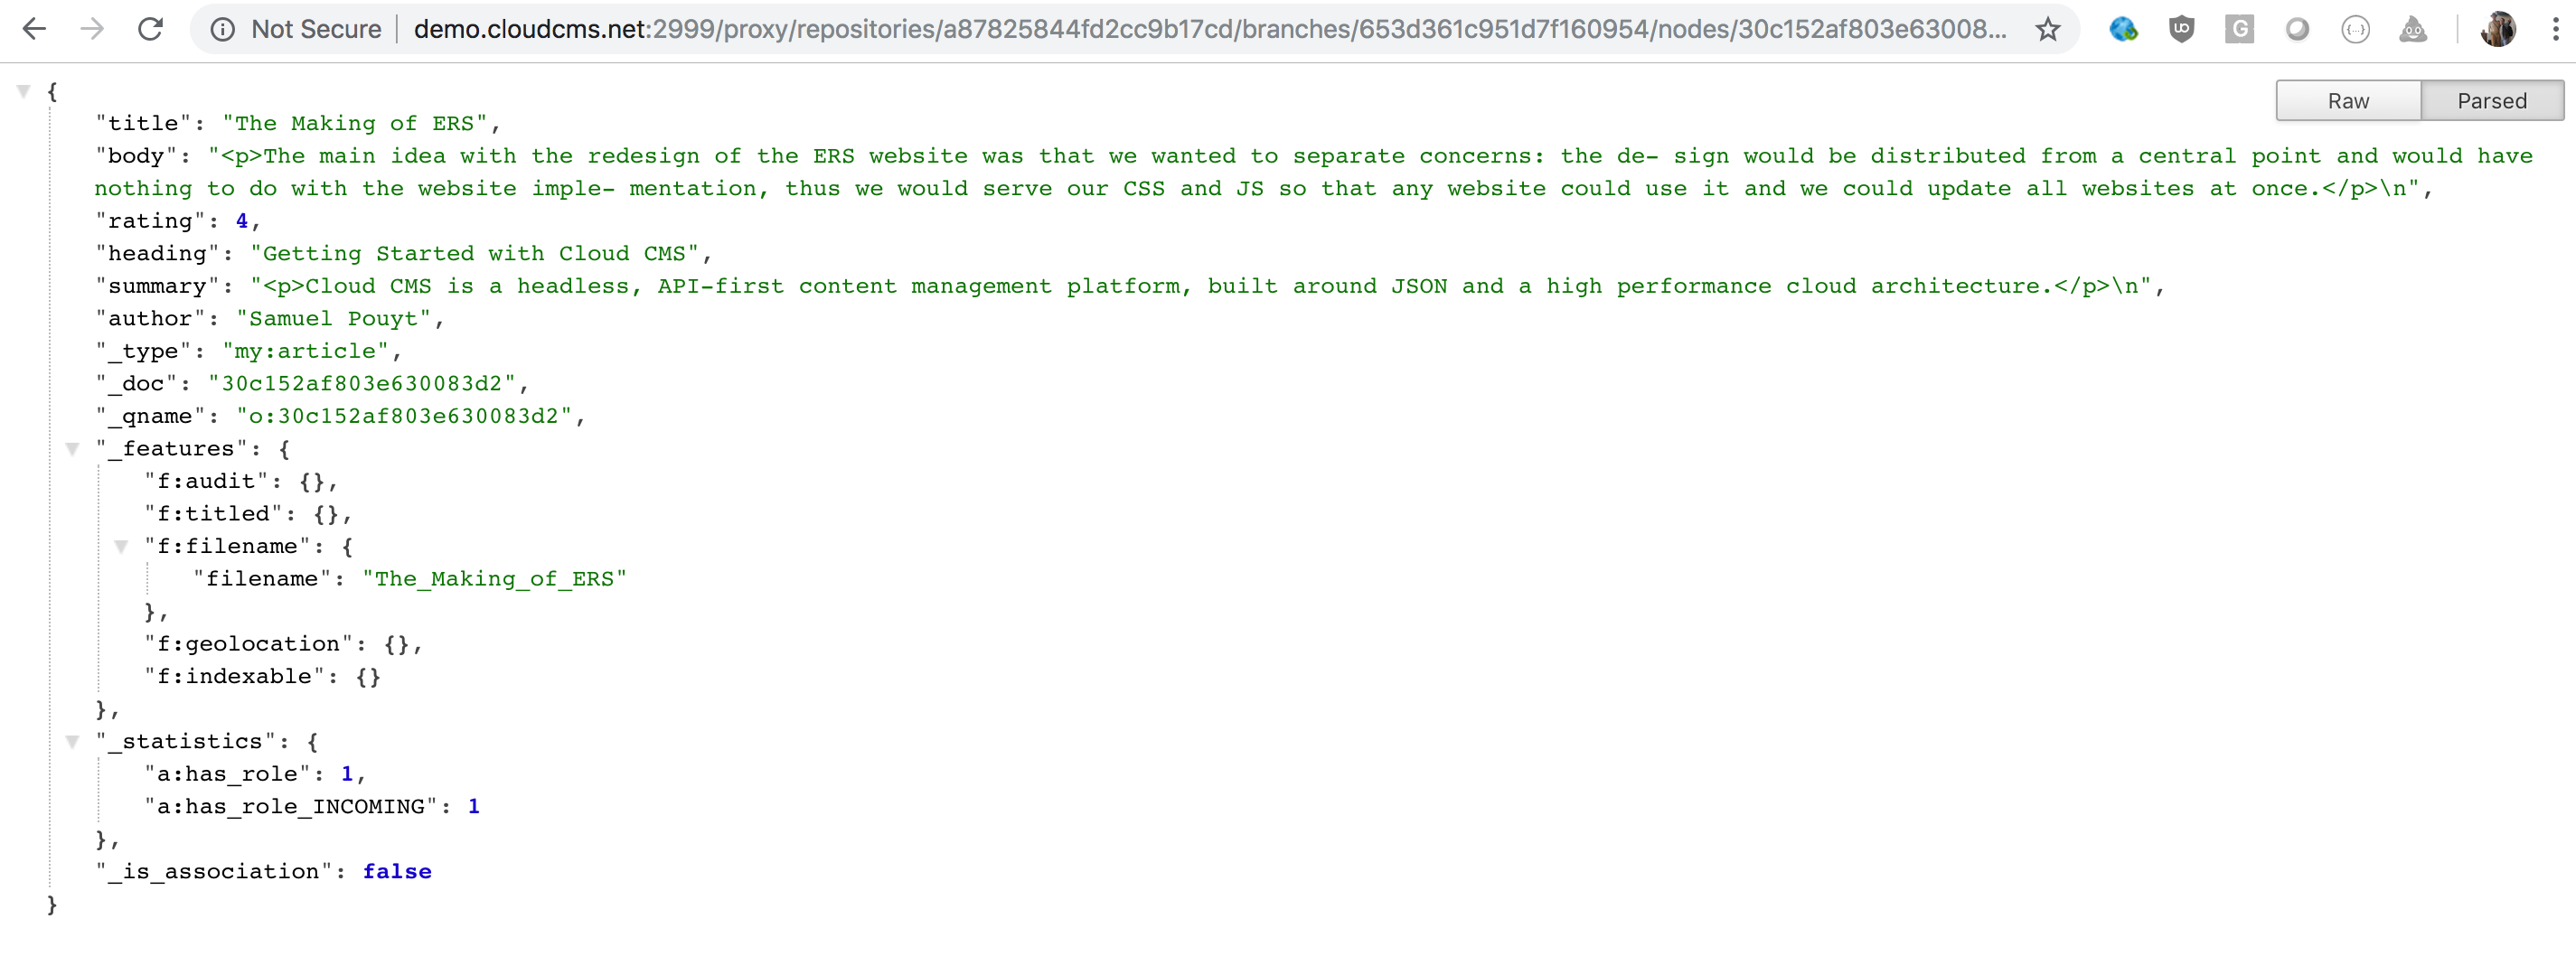
View things in the API
Click into a piece of Content to inspect it.
On the right-hand side, you'll see a link called "View in API". Click on that to retrieve the content via an HTTP GET.
Gitana offers a rich HTTPS API with REST/CRUD semantics, search and query, and also GraphQL.


Developers Page
Once you've gotten this far you are all set to go through our developers page. This is where you will find drivers and examples for a variety of popular frameworks.


Documentation, Videos and API Reference
Once you've gotten your fingers dirty, you may want to learn more about Gitana by reviewing our documentation or by taking a closer look at our REST API Documentation. There are also a number of Videos online to assist with a conceptual understanding of what Gitana is all about.
Check out the SDK
The Gitana SDK provides a GitHub repository stocked with a variety of sample code and getting started points for your projects. This code goes hand in hand with the tutorials and guides found within the Gitana developer documentation and includes sample web projects that you can run right away or deploy to the cloud.
Contact Us
We are available to help with any questions you may have. Contact us if we can help.
Ready to Get Started?
Unlock your data with smart content services and real-time deployment